Getting Started with Remote Support
How do I get started?
The first thing is to make sure that the Admin By Request client software is installed on all the endpoints to which you might want to connect in
If you are already using Endpoint Privilege Management (EPM), then the client is already installed on the endpoints showing in the portal Inventory. Skip the installation procedures and go to Enrolling devices.
If not (i.e. this is your first use of Admin By Request), then follow the installation procedures to install the client on one or more endpoints.
Installing a single endpoint
Installing multiple endpoints
Enrolling devices
The second thing is to make sure devices are enrolled. In order to access a device using Remote Support, the device needs to be enrolled with the Admin By Request Secure Remote Access product (see Product Enrollment).
After the device is enrolled, the settings scope needs to allow Remote Support sessions.
To allow Remote Support sessions:
-
Navigate to the Admin By Request portal
-
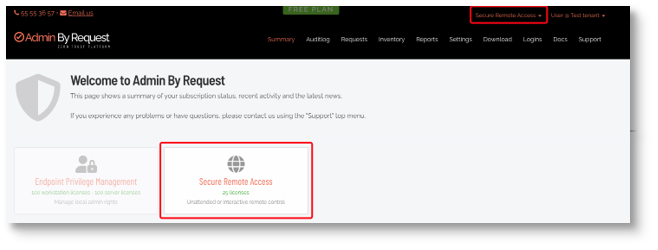
Ensure that the Secure Remote Access view is selected either on the Summary page or via the product selector in the menu:
-
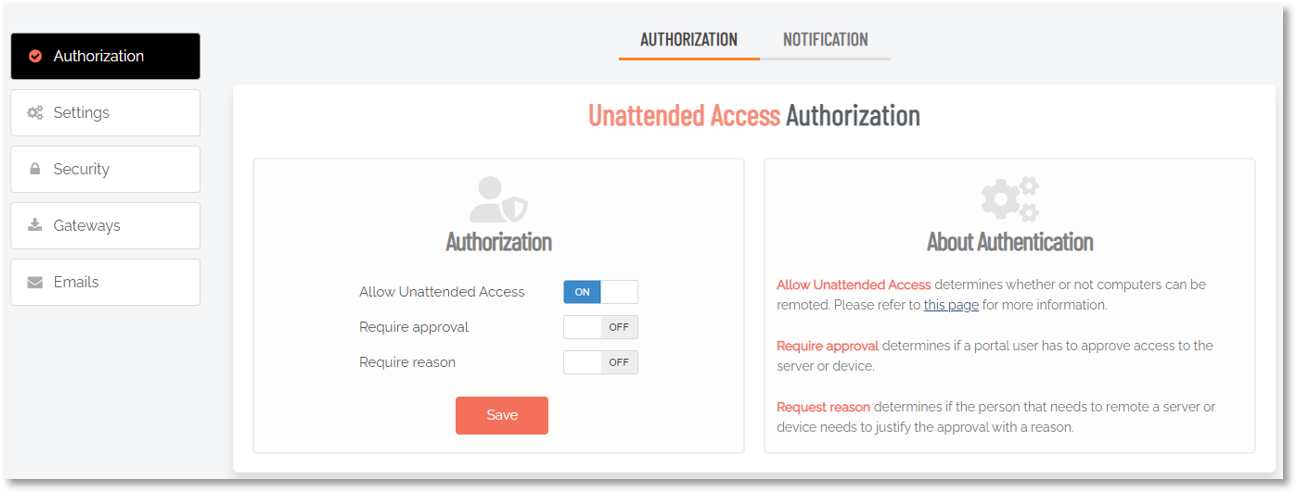
From the Settings menu, select Remote Support Settings.
-
Under the AUTHORIZATION tab, ensure that "Allow Remote Support” is set to On:
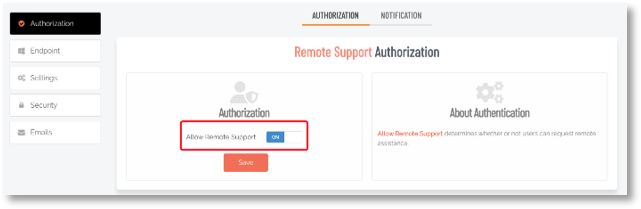
This ensures that devices falling within this settings scope have the ability to request a Remote Support session (or have one requested by a portal user).
Mac enrollment and permissions
-
If a Mac endpoint is not enrolled in Secure Remote Access, SRA-specific prompts are not shown.
-
After enrollment, restart the endpoint so the client can fetch SRA components and apply the relevant permission flow.
-
With MDM, some permissions can be configured centrally. However, macOS user consent is still required for privacy permissions such as screen recording and audio/microphone capture.
-
For these privacy prompts, approval by the signed-in user is sufficient; elevation is not always required.
On first connection, the signed-in user can be asked to log out before the remote control session starts.
Requesting Remote Support (end user initiated)
 Windows
To request a Remote Support session as an end user, the end user does the following:
-
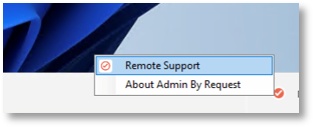
From the endpoint with the Admin By Request client installed, navigate to the Admin By Request tray icon (or use the desktop icon if this has been enabled - see Set desktop icon).
-
Right-click the icon and select the Remote Support item:
-
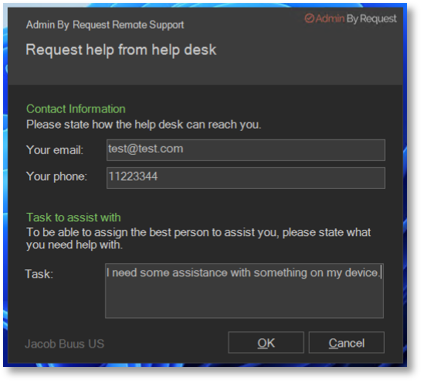
This prompts the user for contact information as well as a reason for the Remote Support request:
-
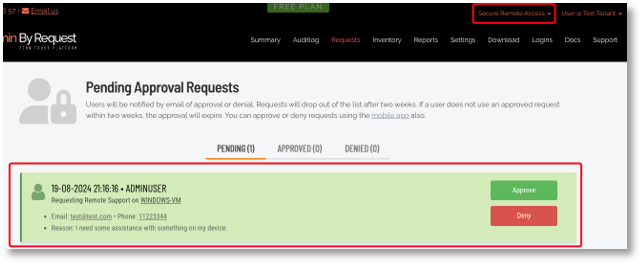
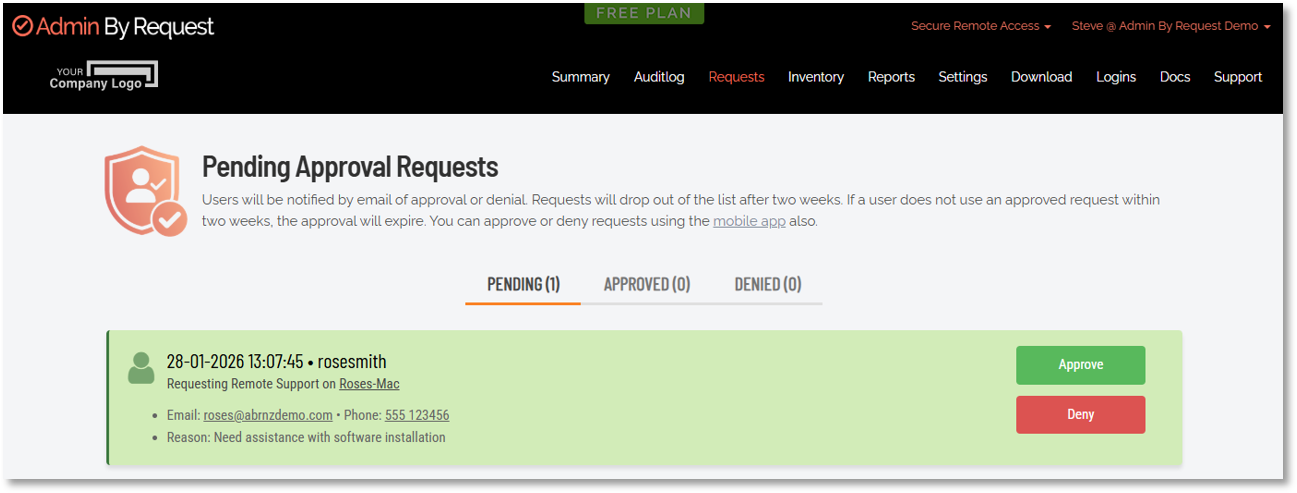
All Remote Support requests awaiting approval can be found by the portal admin in the Admin By Request portal under “Requests” with the “Secure Remote Access” view selected in the product selector:
-
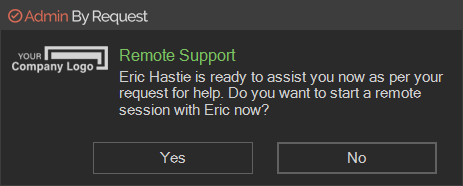
The portal admin can now approve or deny the request. If the request is approved, the end user is prompted to allow the connection:
-
By clicking Yes, the secure tunnel and just-in-time server session is initialized, and the portal user is connected to a Remote Support session – sharing the screen and input directly in the browser (if enabled - see Specify View Only for portal admin).
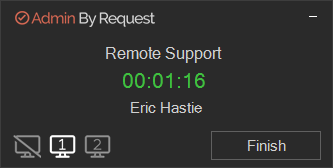
Once the session starts, a timer appears in the lower, right corner of the screen, showing the amount of time used so far during the session:
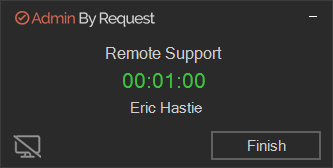
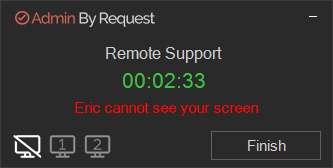
Click the Hide icon at any time to hide the screen from the remote person.
Mac
To request a Remote Support session as an end user, the end user does the following:
-
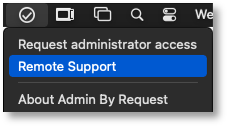
From the endpoint with the Admin By Request client installed, navigate to the Admin By Request menu bar.
-
Select Remote Support:
-
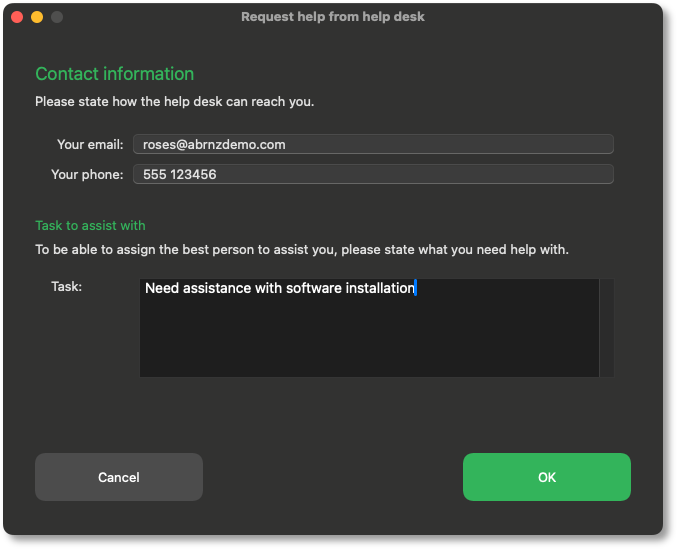
This prompts the user for contact information as well as a reason for the Remote Support request:
-
Click OK to submit the request and OK again to acknowledge the notification.
-
All Remote Support requests awaiting approval can be found by the portal admin in the Admin By Request portal under “Requests” with the “Secure Remote Access” view selected in the product selector:
-
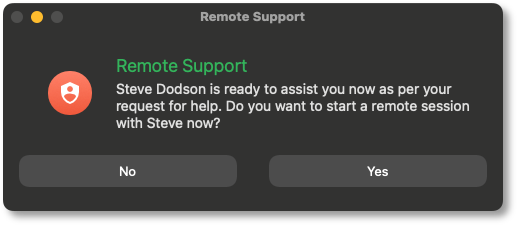
The portal admin can now approve or deny the request. If the request is approved, the end user is prompted to allow the connection:
-
By clicking Yes, the secure tunnel and just-in-time server session is initialized, and the portal user is connected to a Remote Support session – sharing the screen and input directly in the browser (if enabled - see Specify View Only for portal admin).
Once the session starts, a timer appears in the lower, right corner of the screen, showing the amount of time used so far during the session:
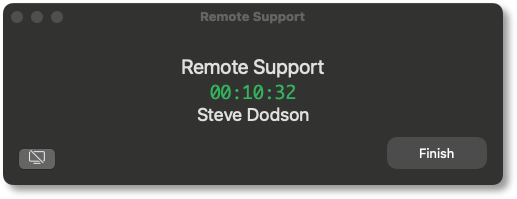
Click the Hide icon at any time to hide the screen from the remote person.
Starting Remote Support (IT admin initiated)
Windows
To start a Remote Support session as a portal administrator, the following sequence occurs:
-
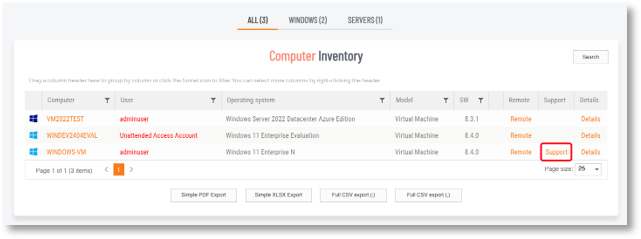
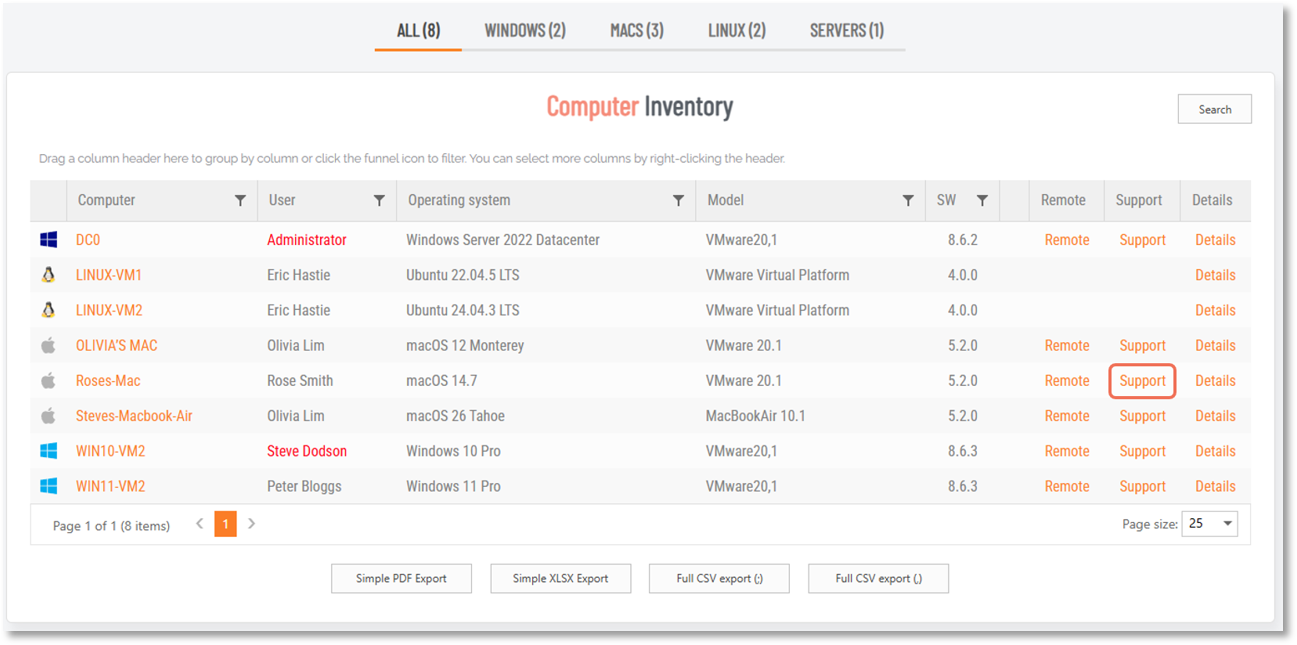
The portal admin identifies the target device in the Inventory and then either:
-
clicks Support from the Inventory list:
-
or, clicks the Screenshare button in the Remote Support panel (after drilling down into inventory details for the endpoint):
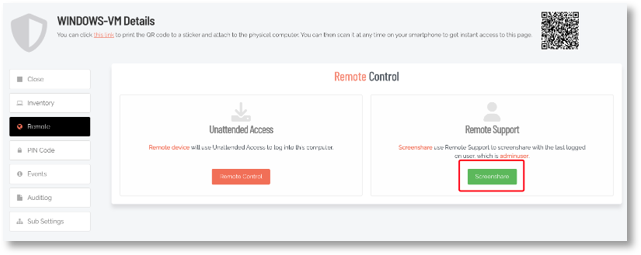
-
-
After either is clicked, the end-user receives a pop-up asking to accept the incoming connection:
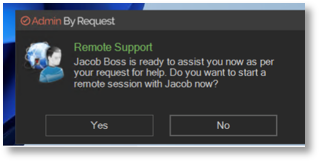
-
If the end user clicks Yes, the secure tunnel and just-in-time server session is initialized, and the portal admin is now connected to a Remote Support session – sharing the screen and input (if enabled - see Specify View Only for portal admin) directly in the browser.
-
If the end user clicks No, the portal admin request to start a Remote Support session is denied. In any case, all request details are logged in the Auditlog.
Once the session starts, a timer appears in the lower, right corner of the screen, showing the amount of time used so far during the session:
Click the Hide icon at any time to hide the screen from the remote person.
Mac
To start a Remote Support session as a portal administrator, the following sequence occurs:
-
The portal admin identifies the target device in the Inventory and then either:
-
clicks Support from the Inventory list:
-
or, clicks the Screenshare button in the Remote Support panel (after drilling down into inventory details for the endpoint):
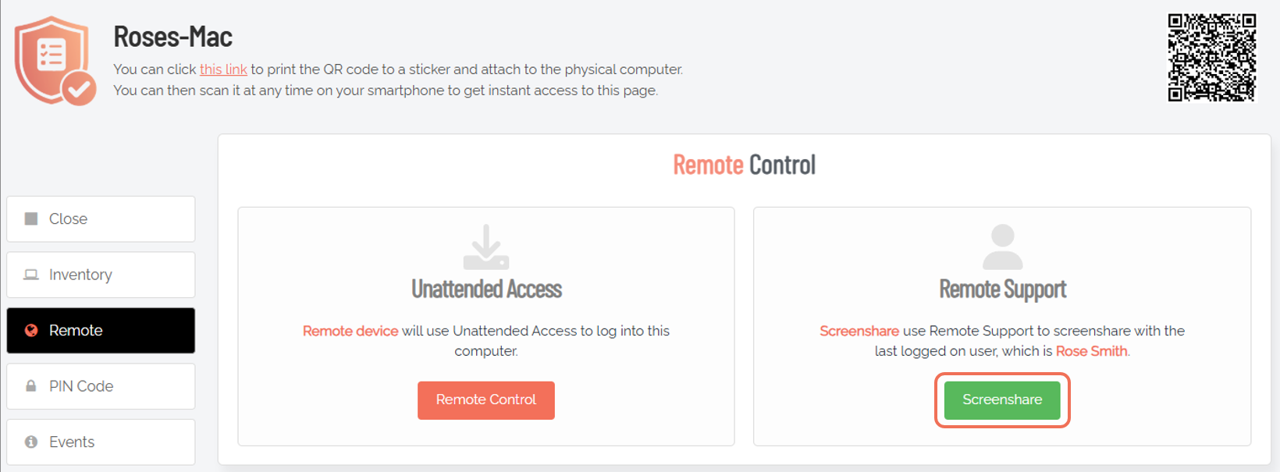
-
-
A connection is initiated and the permissions at the endpoint are checked:
-
If Admin By Request already has permission to do Screen & System Audio Recording, a connection is established and the remote support session begins.
-
If Admin By Request does not have permission, a Remote Support Permissions Required prompt appears at the endpoint. The endpoint user must click Open Settings and grant permission before the remote support session can continue.
-
-
The end-user receives a pop-up asking to accept the incoming connection:
-
If the end user clicks Yes, the secure tunnel and just-in-time server session is initialized, and the portal admin is now connected to a Remote Support session – sharing the screen and input (if enabled - see Specify View Only for portal admin) directly in the browser.
-
If the end user clicks No, the portal admin request to start a Remote Support session is denied. In any case, all request details are logged in the Auditlog.
Once the session starts, a timer appears in the lower, right corner of the screen, showing the amount of time used so far during the session:
Click the Hide icon at any time to hide the screen from the remote person.
Unattended behavior for Remote Support
Under Remote Support Settings > Security > Unattended, behavior changes as follows:
-
On: the remote support session can start without an endpoint approval popup.
-
Off: the endpoint user is asked to approve the remote support session.
This is commonly used for kiosk or shared devices where local interaction is not practical.
-
This feature requires Mac 5.2 or newer and is not yet supported on Windows.
-
There is a warning in the portal about the potential data protection exposure created when this setting is ON:

During a session
Using the remote desktop via the browser is the same as if you were working with it directly, except that there will be a difference in performance, depending on the speed of your connection between the browser and the remote endpoint.
While a remote session is running, an action bar is available for performing some basic tasks:
![]()
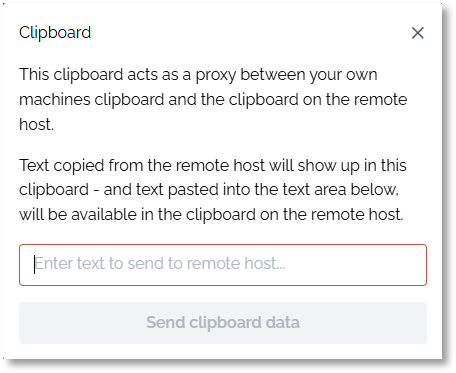
Uploading files is not available at the time of writing.
Ending the session
A Remote Support session can end in a number of ways:
-
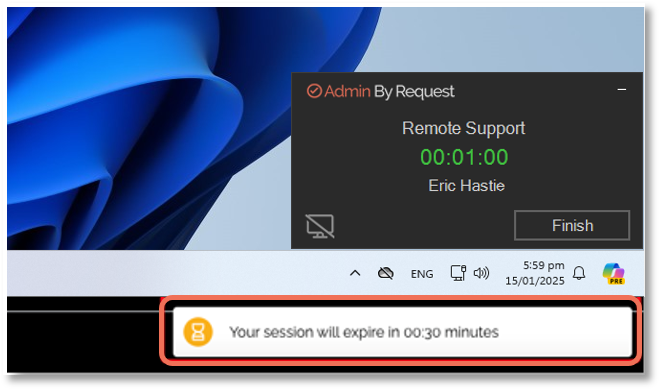
If session expiration is enabled (see Set session expiry), the session will be terminated after the set amount of time. When the remaining time gets below 2 minutes, a countdown alert appears:
-
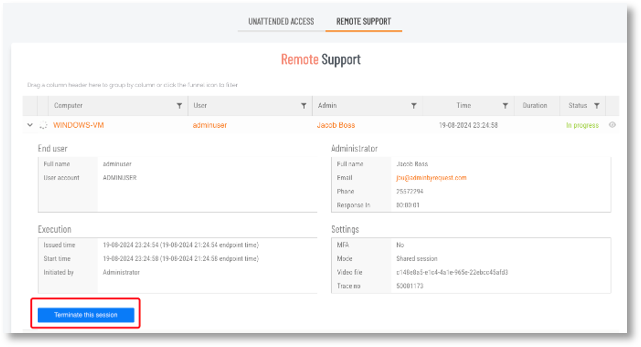
By pressing the Terminate this session from the auditlog details of an ongoing Remote Support session:
What next?
Check out Basic Settings for Remote Support for details on how to setup the following:
-
A desktop icon
-
Session recordings
-
MFA for extra security
-
View-only for the portal admin
-
Session expiry