Getting Started with Unattended Access
How do I get started?
The first thing is to make sure that the Admin By Request client software is installed on all the endpoints to which you might want to connect in
If you are already using Endpoint Privilege Management (EPM), then the client is already installed on the endpoints showing in the portal Inventory. Skip the installation procedures and go to Enabling Unattended Access.
If not (i.e. this is your first use of Admin By Request), then follow the installation procedures to install the client on one or more endpoints.
Installing a single endpoint
Installing multiple endpoints
Enabling Unattended Access
The second thing is to make sure Unattended Access is turned on:
-
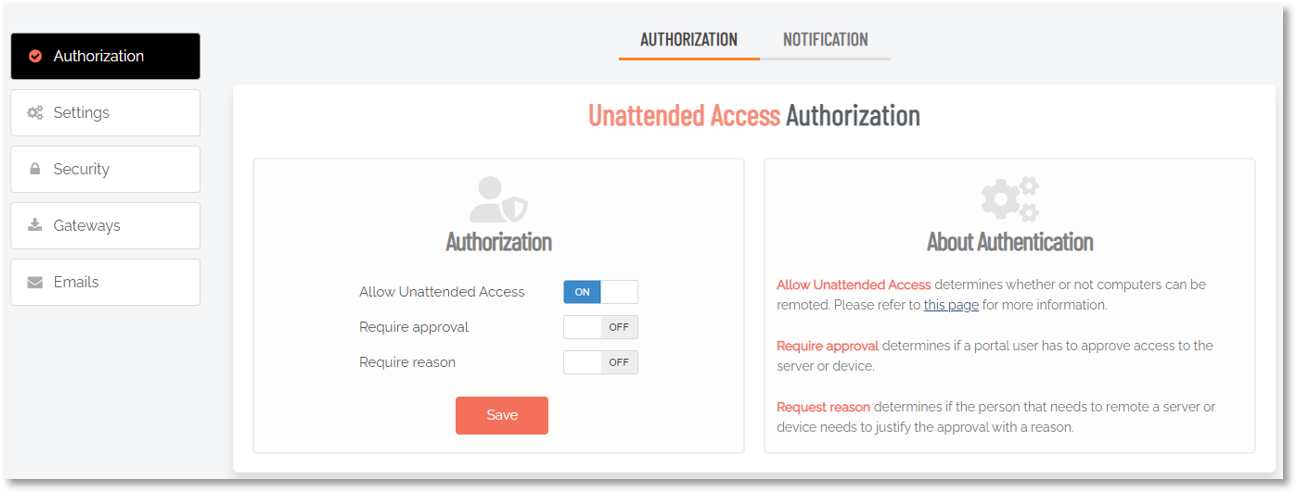
To enable Unattended Access, log in to the Admin By Request portal and head over to Secure Remote Access > Settings > Unattended Access Settings.
-
Select Authorization in the left menu and, from the AUTHORIZATION tab, ensure that Allow Unattended Access is turned On:
Mac prerequisites/setup notes
-
Make sure endpoints are enrolled in Secure Remote Access (see Product Enrollment).
-
On macOS, SRA permission prompts are shown only after the endpoint is enrolled and restarted.
-
MDM can preconfigure part of the required permissions, but user consent is still required for certain privacy permissions such as screen recording and audio/microphone capture. For a step-by-step example, refer to Connecting to a Mac.
Auto-login must be disabled for Unattended Access to work. On Macs with FileVault enabled (either manually or via MDM), auto-login is disabled by default.
How do I setup a Managed Service?
A managed service is a way of operating Unattended Access so that your infrastructure allows an outbound connection to establish a secure tunnel from your respective endpoints and that these have the Admin By Request endpoint client installed.
Using Admin By Request's Managed Service for Unattended Access is the default. If you decide on this option when first enabling Unattended Access, no configuration is required; all you need to do is:
-
Ensure your endpoints have the Admin By Request endpoint client installed.
-
Connect to an endpoint (see
If this is not the first time enabling Unattended Access and you have previously configured an on-premise gateway, the following tasks are needed to setup a managed service using a Cloudflare tunnel:
-
 Check cloud hosting
-
Ensure that your endpoints have the Admin By Request endpoint client installed
-
In the portal, go to Secure Remote Access > Settings > Unattended Access Settings.
-
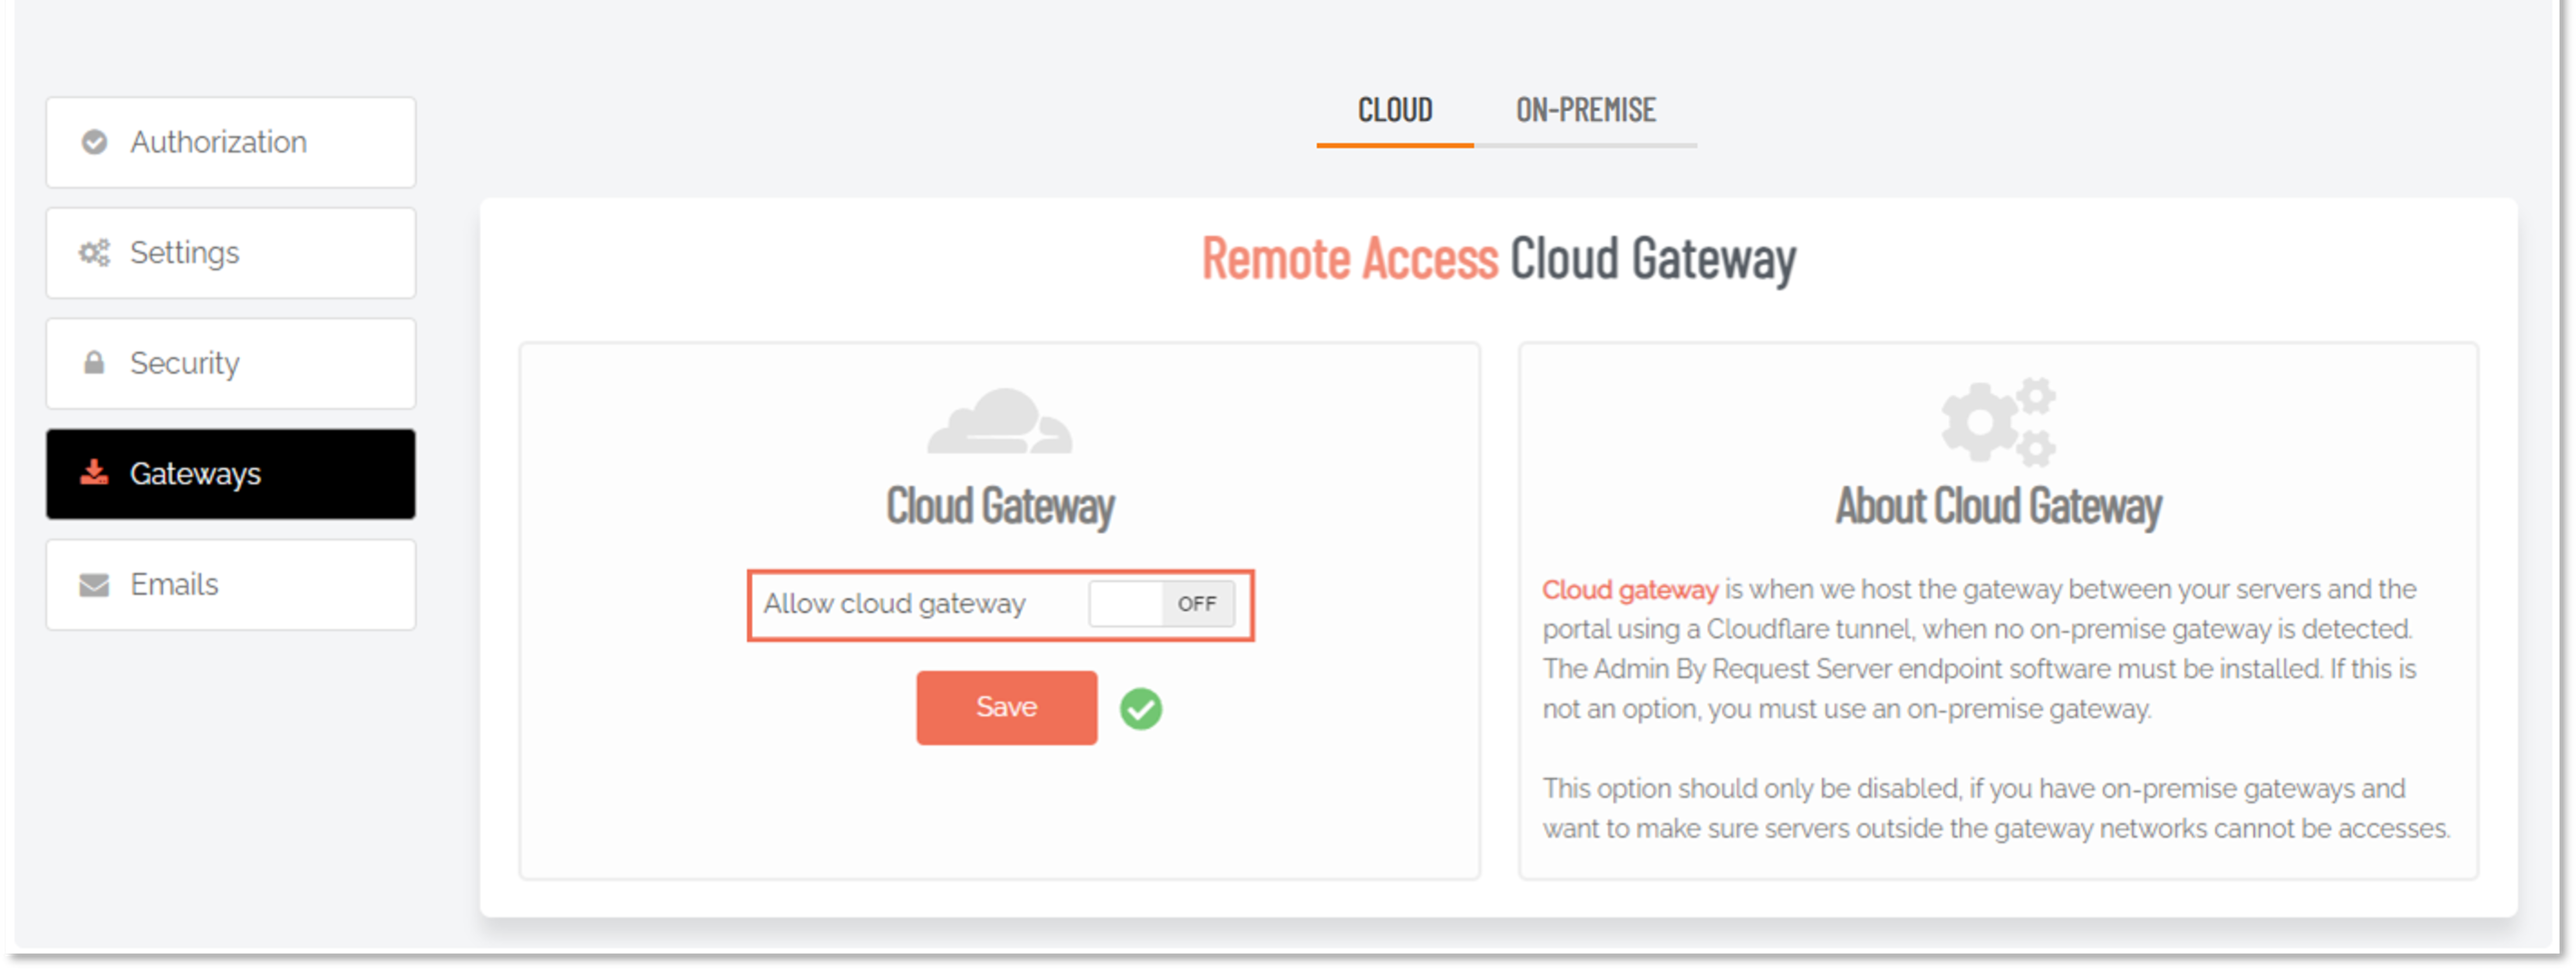
Select the Gateways menu and check if a CLOUD tab exists:
- If not (the default), there is nothing to configure - the cloud gateway is already enabled.
- If so, click the CLOUD tab and ensure that Allow cloud gateway is On:

The CLOUD tab becomes visible only when an on-premise gateway is created. If no on-premise gateway has been created, the CLOUD tab is not available and Unattended Access uses the managed service option, which is enabled by default and requires no configuration.
Creating an on-premise gateway means the cloud gateway must be disabled (see How do I setup a Self-hosted Implementation?), which is why the CLOUD tab becomes visible when a gateway is created.
That’s it. The Admin By Request agent will now attempt to establish a secure tunnel via an outbound call - allowing connections directly via the managed gateway.
-
-
Connect to an endpoint
In order to allow Admin By Request to connect to your endpoints, they need to allow traffic on the following ports:
-
RDP - 3389 (Windows only)
-
SSH - 22
-
VNC - 5900 and 5901
Connecting to a server
-
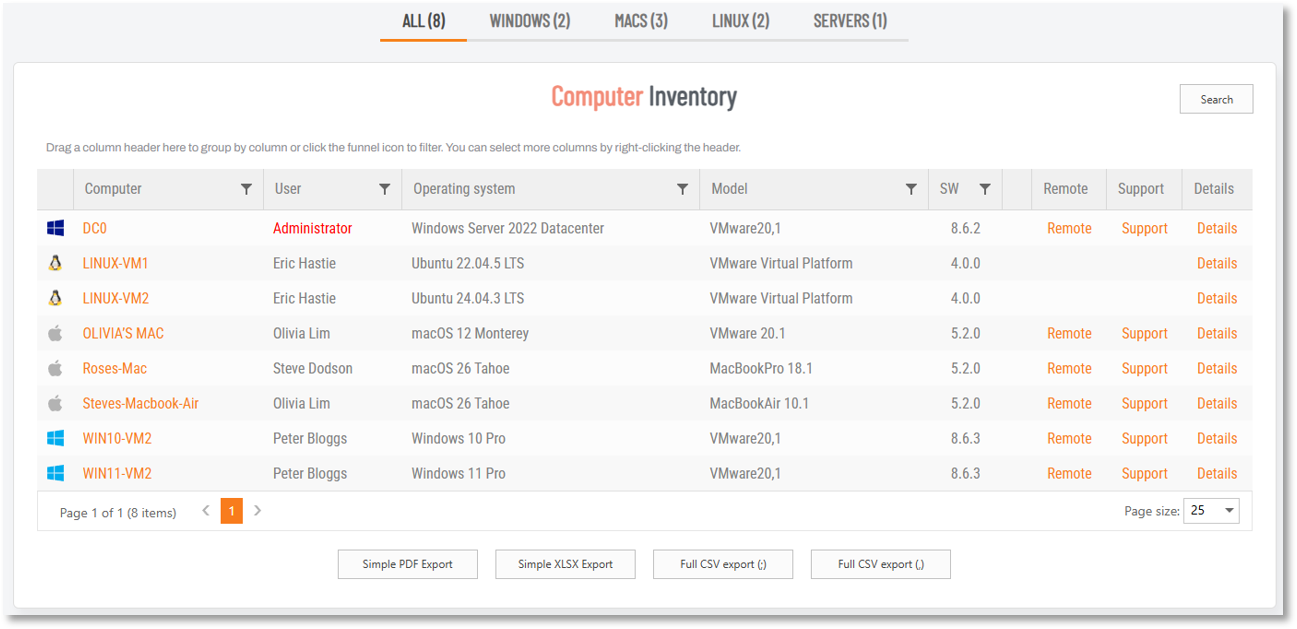
From the portal, head over to your Inventory and make sure you're in the Secure Remote Access view. Select an endpoint which is enrolled for Secure Remote Access:
-
Click the Remote link for this endpoint, enter User name and Password and click Connect:
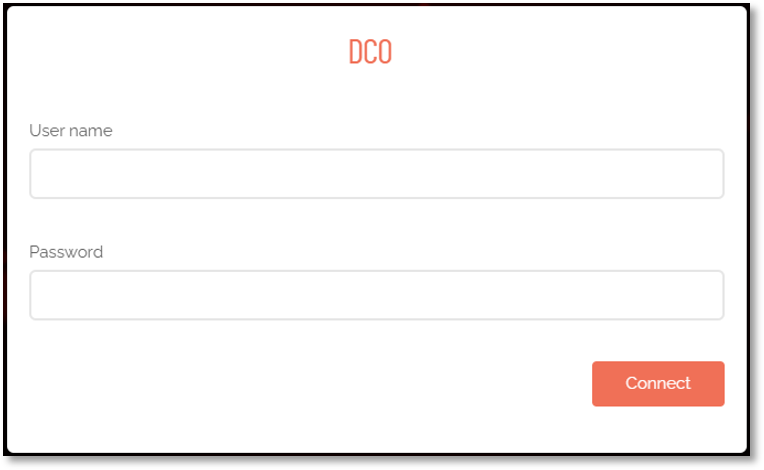
After a few seconds, the connection appears directly in your browser.
Connecting to a Mac
-
After clicking Remote in the Inventory list, a connection is initiated and the current login status at the endpoint is checked:
-
If there is no user is logged-in at the endpoint, a connection is established and the unattended access session begins.
-
If a user is logged-in, a Secure Remote Access prompt appears at the endpoint advising that a supporter is requesting unattended access. The endpoint user must click Log out or wait to be logged-out automatically.
-
-
At this point, the login screen is shown in the remote user's browser, along with a prompt that asks if it's OK to directly access screen and audio:
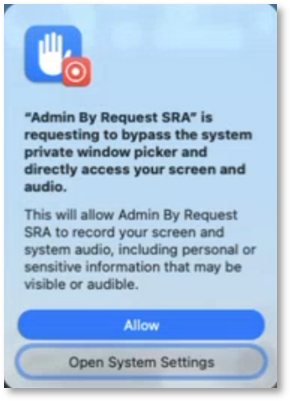
This prompt appears once only - the first time a remote connection is established. If this is not the first time connecting remotely to this endpoint, the prompt will not appear.
-
Click Allow to allow access.
The Mac remote access session is now up and running.
-
How do I setup a Self-hosted Implementation?
A self-hosted implementation means that you run Unattended Access on-premise inside your own infrastructure, including the ability to run Docker containers. To establish a secure tunnel, your infrastructure must also allow outbound connections to Cloudflare.
The following tasks are needed to setup a self-hosted implementation:
-
Disable cloud hosting
-
Ensure that your endpoints have the Admin By Request endpoint client installed.
-
In the portal, go to Secure Remote Access > Settings > Unattended Access Settings.
-
Select the Gateways menu and, from the CLOUD tab, ensure that Allow cloud gateway is Off:
-
Click Save if making changes.
-
-
Create a gateway
-
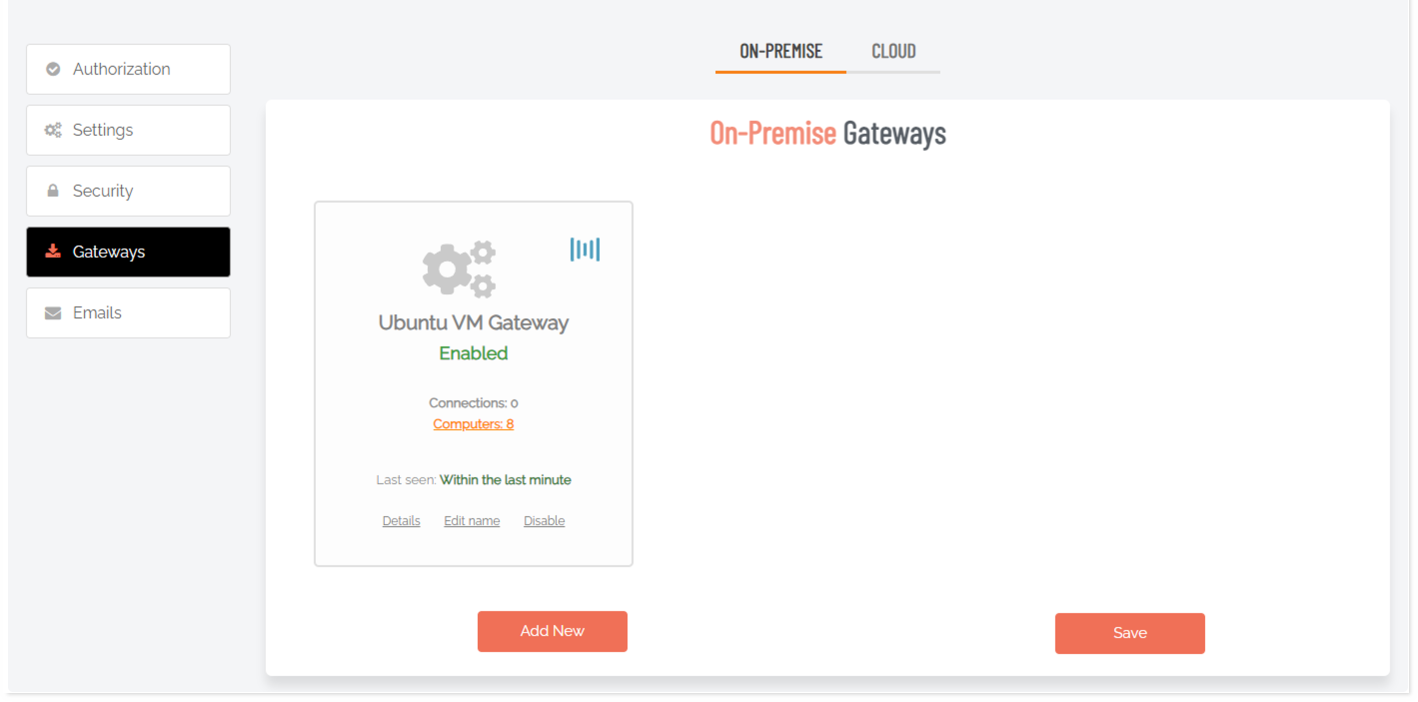
In the portal, from the Gateways menu, select the ON-PREMISE tab. This shows the current gateways for your tenant:
-
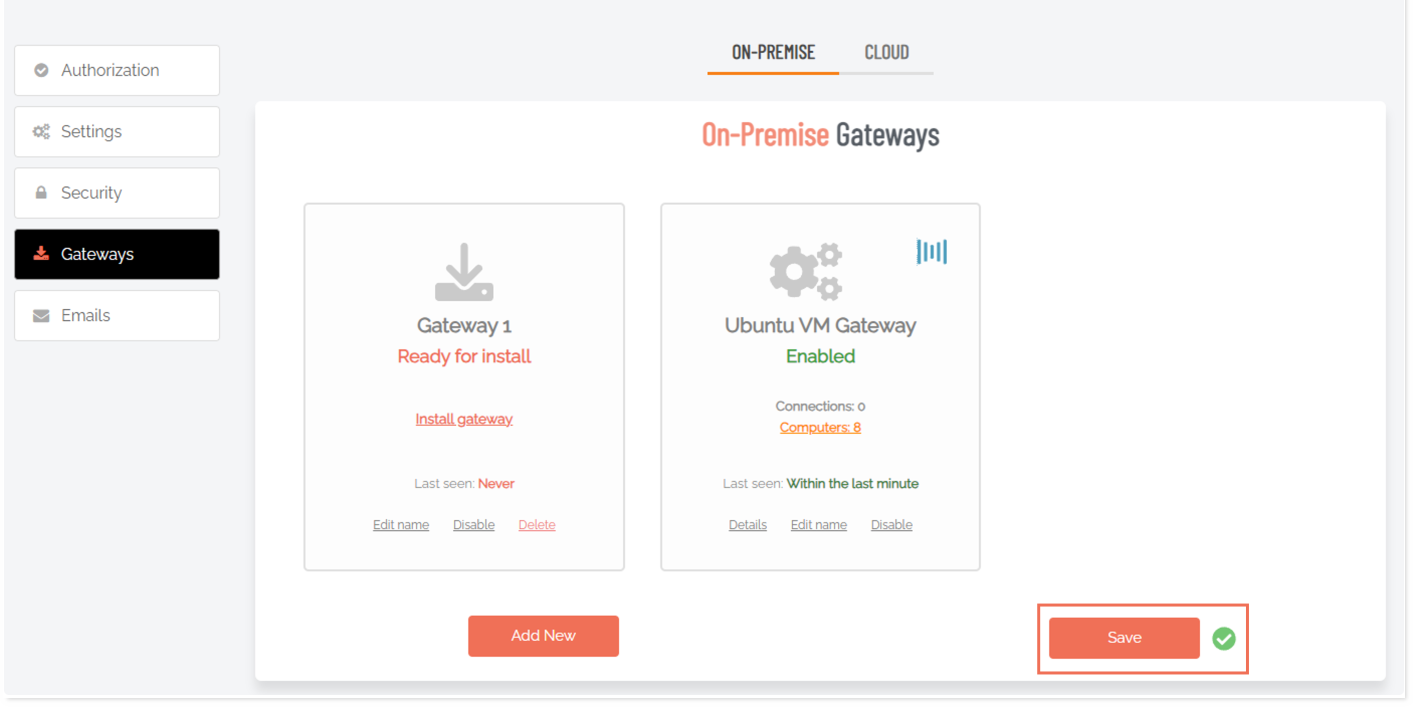
Click Add New, followed by Save. This will create a new Gateway with the default name Gateway 1:
-
Click the words Install gateway. This displays a view that allows access to the Docker compose file used for the installation:
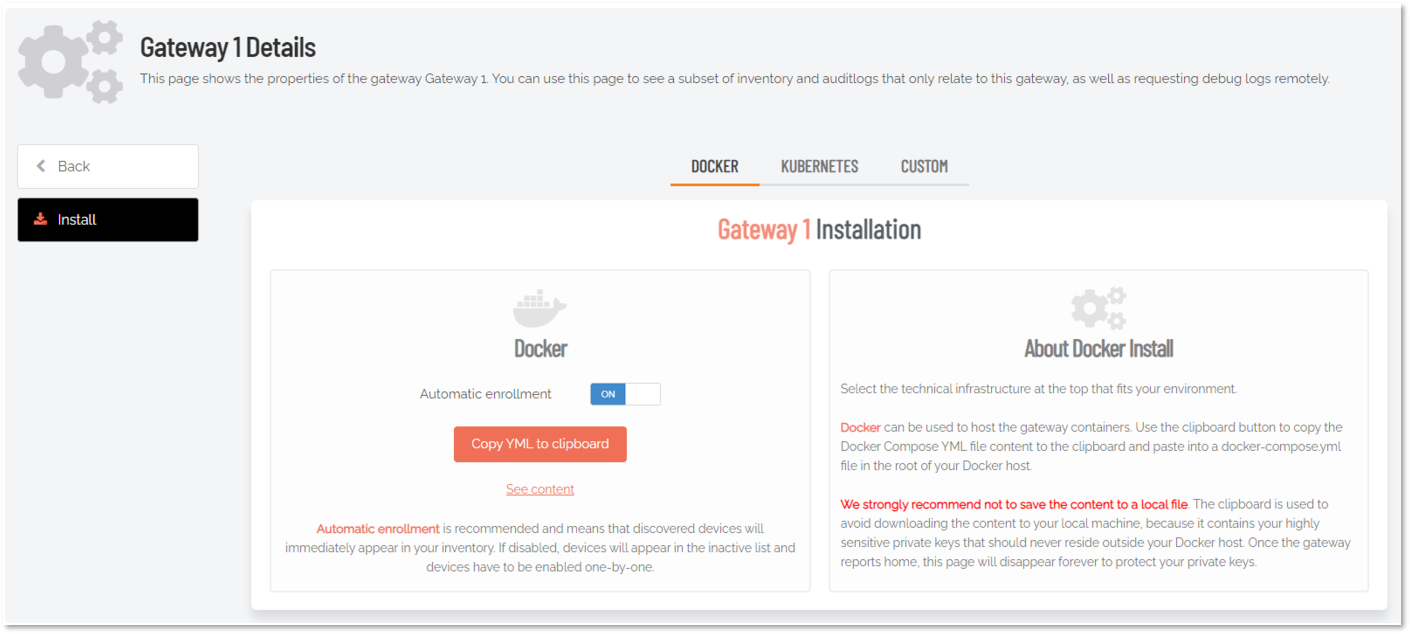
The Docker compose file contains all the information necessary to orchestrate the Docker containers required to make Unattended Access work.
-
Click Copy YML to clipboard to copy the Docker compose file to your clipboard.
-
Add a new
docker-compose.ymlfile to your Docker host, paste in the content and run the following command:Copysudo docker compose up -dThis will spin up the containers and communicate back to the Admin By Request portal with all of the necessary information. Furthermore, a secure tunnel will be initiated between Cloudflare and the Connector container.
-
-
Connect to an endpoint
Follow the procedures outlined at Connect to an endpoint to test your remote connection.
Upgrading Unattended Access On-Premise (Self-hosted)
An environment variable was introduced from version 2.0.9 that needs to be present in order for your gateway to function properly. The variable is called AUTH__TOKEN and, if missing in your environment, you can add it to your Docker setup to enable the next docker compose pull to complete successfully.
AUTH__TOKEN needs to be set for all three images: Connector, Proxy and Discovery. The value of the AUTH__TOKEN variable can be anything you choose - it just needs to be the same across the different services. We recommend setting it to a UUID value or something of similar complexity.
In the case of a Docker compose file, the change would look like this:
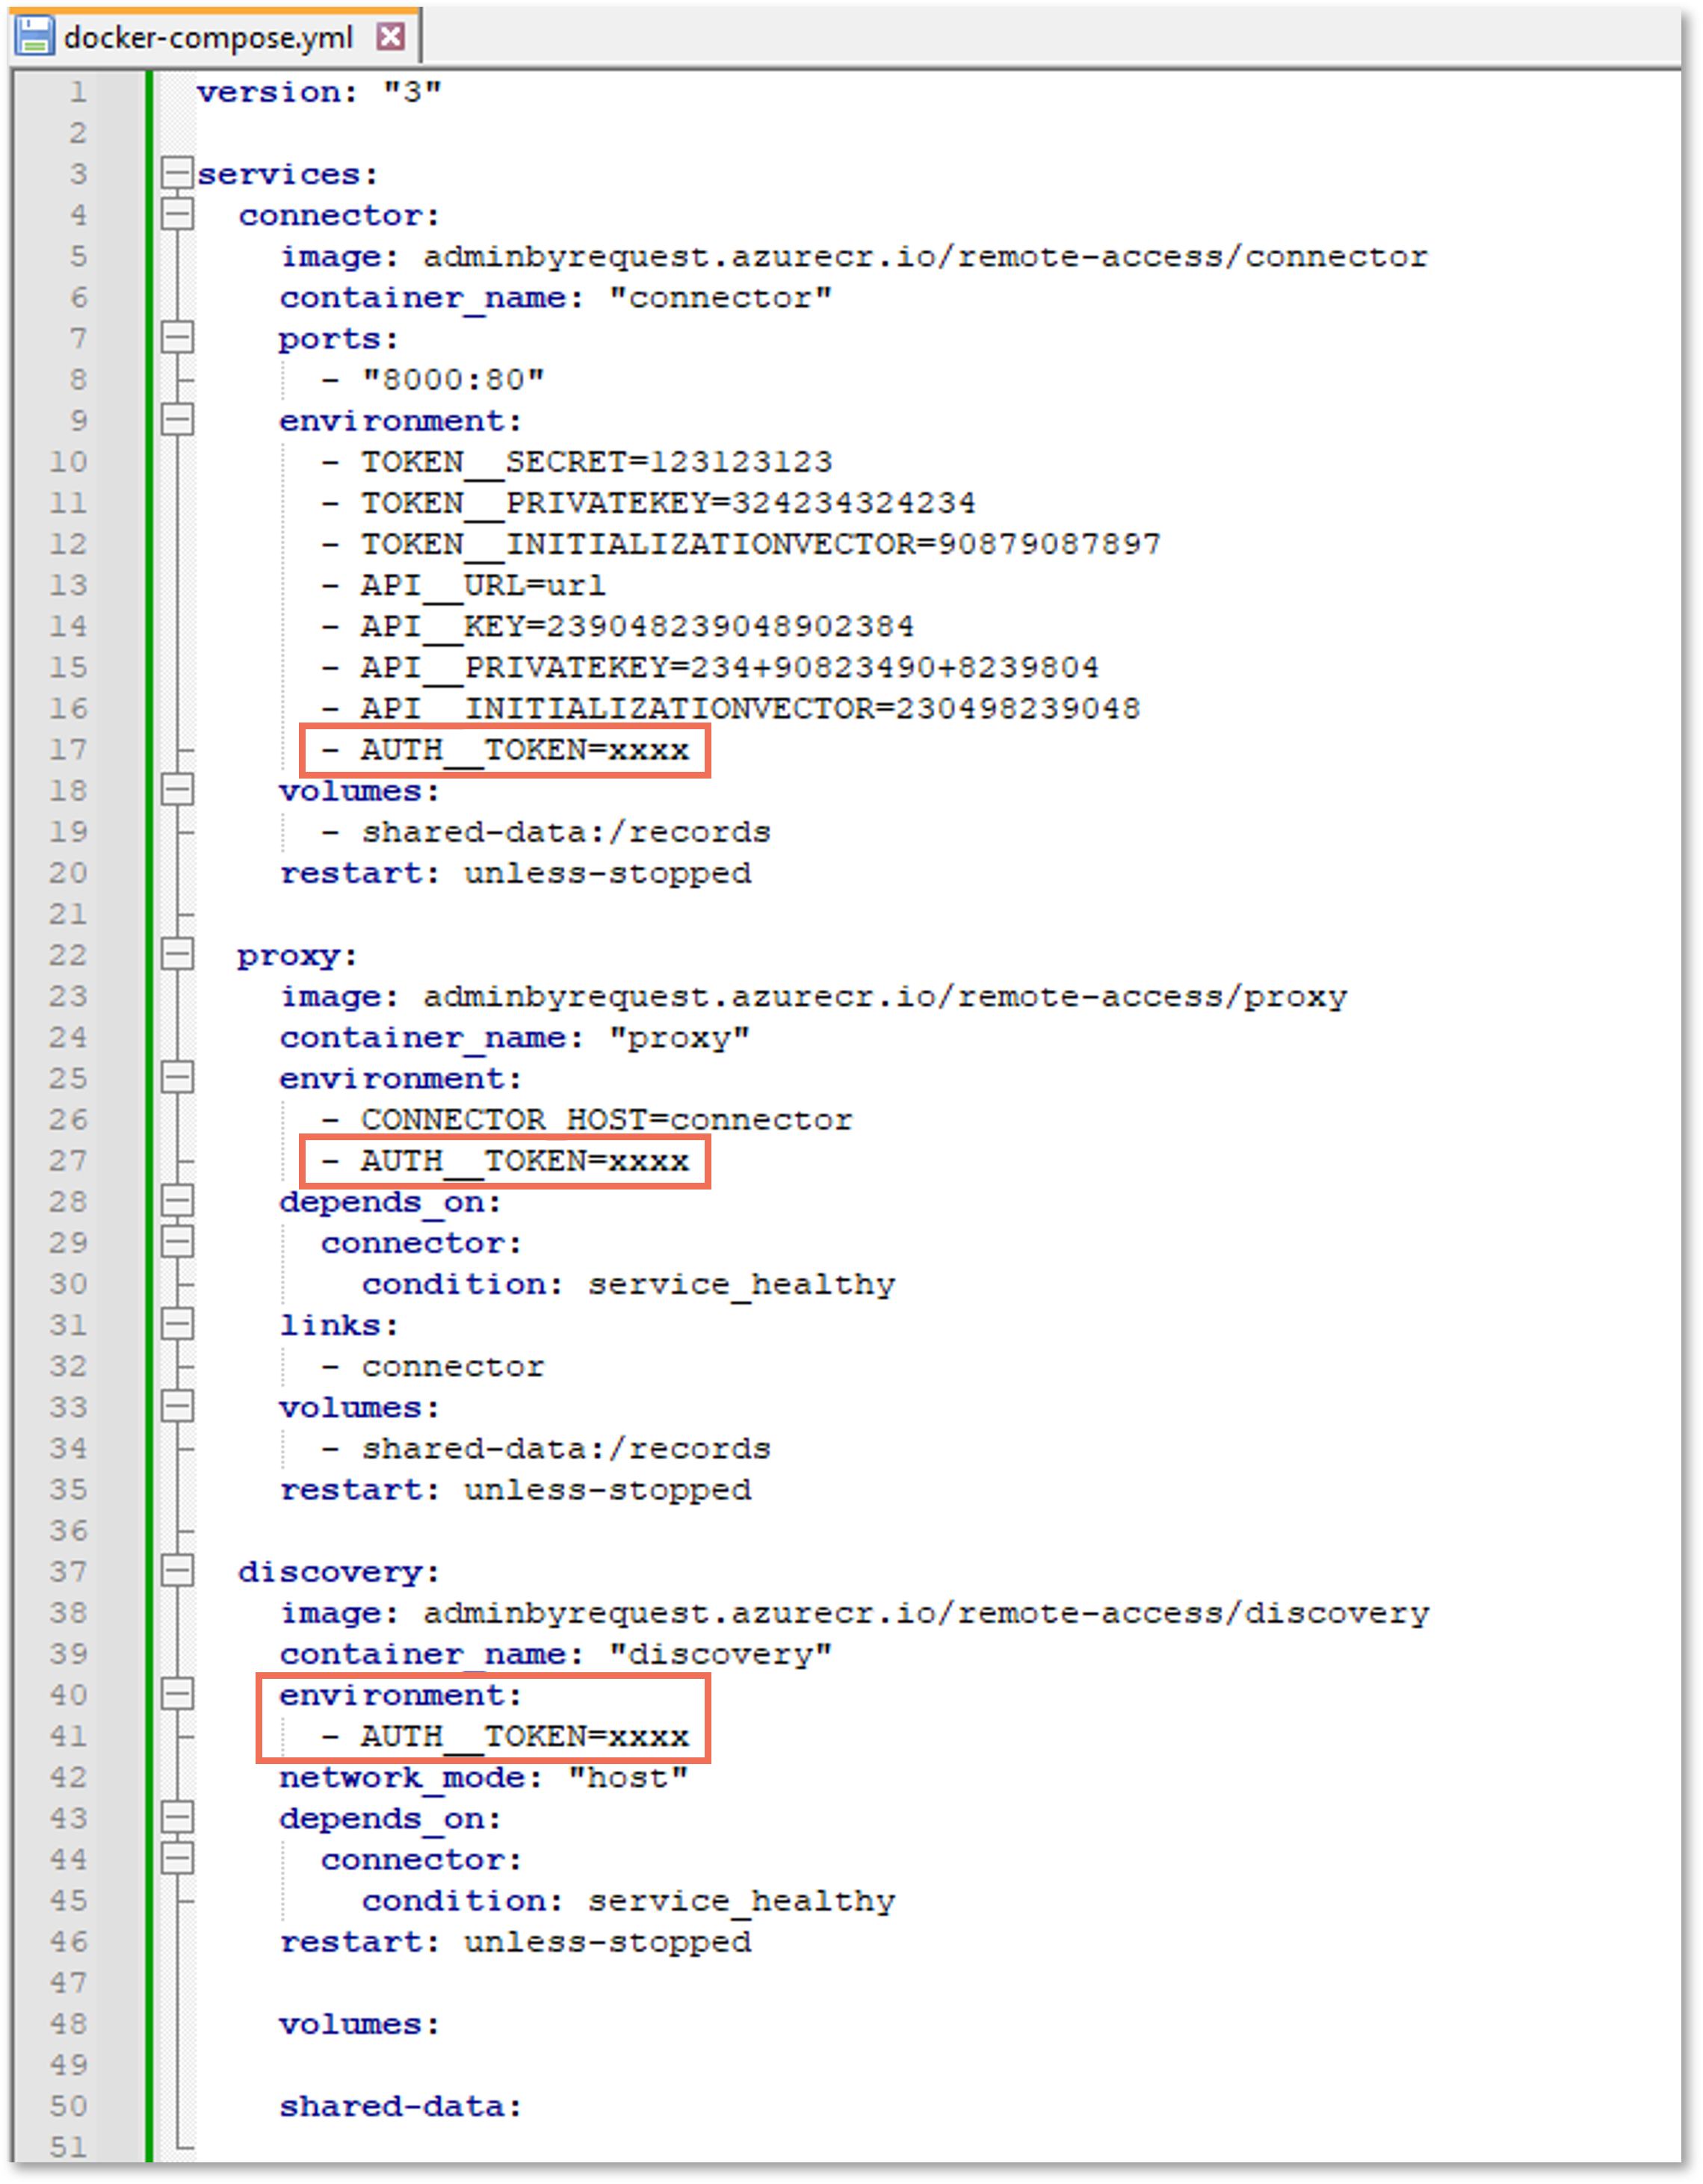
Once these changes have been made, you can run the following commands (in order):
sudo docker compose pull
sudo docker compose up -dThis will spin up the containers using the new image and the newly added AUTH__TOKEN variable.
If you spin up a new gateway using the portal, you will not need to change anything manually. The required changes will be incorporated into the docker compose file generated by the portal.
Discovery
When using the self-hosted on-premise setup, the Discovery module is also available. The Discovery module automatically looks at the current network in which it is running and reports findings back to the portal about endpoints responding on ports 3389, 22 or 5900/5901.
This gives you the advantage of not having to manually map endpoints that are not running the Admin By Request endpoint client. This also has the benefit of mapping your network(s) automatically to your Admin By Request inventory, allowing you to connect to agent-less devices like routers, firewalls etc.
Refer to Configuring Discovery for more information on Discovery.