Inventory
Introduction
The Inventory shows endpoints managed in your tenant.
Similar to the Summary and Auditlog pages, the information available in the inventory changes depending on the product view selected.
Product views
- Endpoint Privilege Management
- Secure Remote Access
The menu selection Endpoint Privilege Management shows the product view for managing local admin rights on your endpoint clients.
Header

The "Header" is available from every page in the portal. It contains company logos, Product and User Account drop-down menus and the portal main menu.
-
Logos:
Shows the Admin By Request logo and your organization's logo if configured.
To configure a logo in the portal, go to Endpoint Privilege Management > Settings > Windows Settings > Endpoint > BRANDING.
Refer to Branding tab for more information.
-
Product drop-down:
Lists products for selection:
-
Endpoint Privilege Management
-
Secure Remote Access
-
Mix Products
Choosing a product adjusts the options available under other menus. The Mix Products selection combines both Endpoint Privilege Management and Secure Remote Access so that all menu options are available.
-
-
User Account drop-down:
Shows the name of the organization and name + email of the logged-in user. Also provides Change password and Sign out links.
-
Main menu:
To find out more about each main menu option in the portal, click its corresponding link below.
Summary Auditlog Requests Inventory Reports Settings Download Logins Docs Support
Tabs
The inventory provides tabs for examining the following entries:
-
ALL - lists all endpoints currently known to the inventory (workstation and server)
-
WINDOWS - workstations running Windows
-
MACS - workstations running macOS
-
LINUX - workstations running Linux
-
SERVERS - servers running Windows Server
For any tab, in the table displayed, right-click column headings for sort, search, group and filter options.
For an entry in the table, click the either the name of the endpoint (Computer column) or the Details link (Details column) to go to its Inventory record.
Buttons
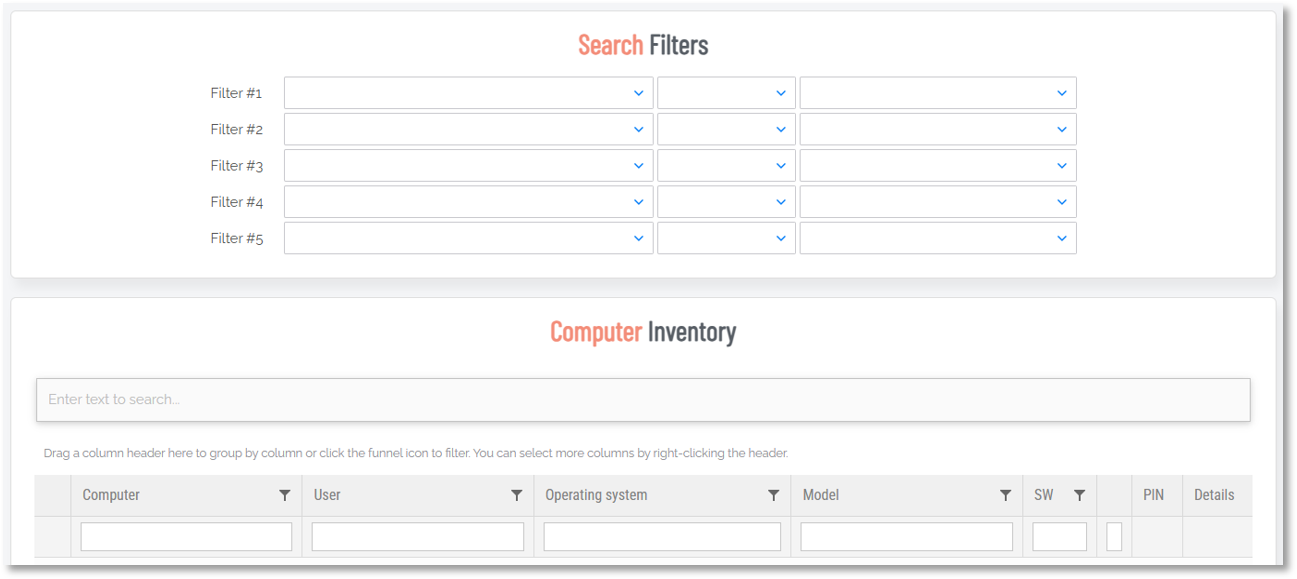
Search
Use this button to search the inventory. Either use the Search Filters or right-click the table column headings and select any combination of the options available for further group, search and filter options.
Export buttons
Four export buttons are also provided:
-
Simple PDF Export
-
Simple XLSX Export
-
Full CSV Export (;)
-
Full CSV Export (,)
The Full CSV Export buttons always export the full inventory; they do not export sublists. Refer to Exporting Portal Data for more information.
The menu selection Secure Remote Access shows the product view for managing your endpoints that can be remotely accessed.
Header

The "Header" is available from every page in the portal. It contains company logos, Product and User Account drop-down menus and the portal main menu.
-
Logos:
Shows the Admin By Request logo and your organization's logo if configured.
To configure a logo in the portal, go to Endpoint Privilege Management > Settings > Windows Settings > Endpoint > BRANDING.
Refer to Branding tab for more information.
-
Product drop-down:
Lists products for selection:
-
Endpoint Privilege Management
-
Secure Remote Access
-
Mix Products
Choosing a product adjusts the options available under other menus. The Mix Products selection combines both Endpoint Privilege Management and Secure Remote Access so that all menu options are available.
-
-
User Account drop-down:
Shows the name of the organization and name + email of the logged-in user. Also provides Change password and Sign out links.
-
Main menu:
To find out more about each main menu option in the portal, click its corresponding link below.
Summary Auditlog Requests Inventory Reports Settings Download Logins Docs Support
Tabs
The inventory provides tabs for examining the following entries:
-
ALL - lists all endpoints currently known to the inventory (workstation and server)
-
WINDOWS - workstations running Windows
-
MACS - workstations running macOS
-
LINUX - workstations running Linux
-
SERVERS - servers running Windows Server
For any tab, in the table displayed, right-click column headings for sort, search, group and filter options.
For an entry in the table, click the either the name of the endpoint (Computer column) or the Details link (Details column) to go to its Inventory record.
Buttons
Search
Use this button to search the inventory. Either use the Search Filters or right-click the table column headings and select any combination of the options available for further group, search and filter options.
Export buttons
Four export buttons are also provided:
-
Simple PDF Export
-
Simple XLSX Export
-
Full CSV Export (;)
-
Full CSV Export (,)
The Full CSV Export buttons always export the full inventory; they do not export sublists. Refer to Exporting Portal Data for more information.
Inventory refresh frequency
The inventory refreshes every four hours when the endpoint is online.
Device inactivity period
The 60-day device inactivity period cannot be modified, but, for licensed users, you can delete endpoints manually through the Inventory or with the Inventory API and this way make the period shorter.
Unlicensed (i.e. free plan) users must wait for 60 days before licenses are released.
If the device comes back online with ABR still installed, it will reappear in the inventory and the 60-day inactivity period will reset.