Modifying Configurations
Configuring Discovery
If you run your gateway behind a reverse proxy, you need to ensure that the end user's IP is forwarded to the gateway using the X-Forwarded-For header.
When using the self-hosted on-premise setup, the Discovery module is also available. The Discovery module automatically looks at the current network in which it is running and reports findings back to the portal about endpoints responding on ports 3389, 22 or 5900/5901.
This gives you the advantage of not having to manually map endpoints that are not running the Admin By Request Server agent. This also has the benefit of mapping your network(s) automatically to your Admin By Request inventory, allowing you to connect to agent-less devices like routers, firewalls etc.
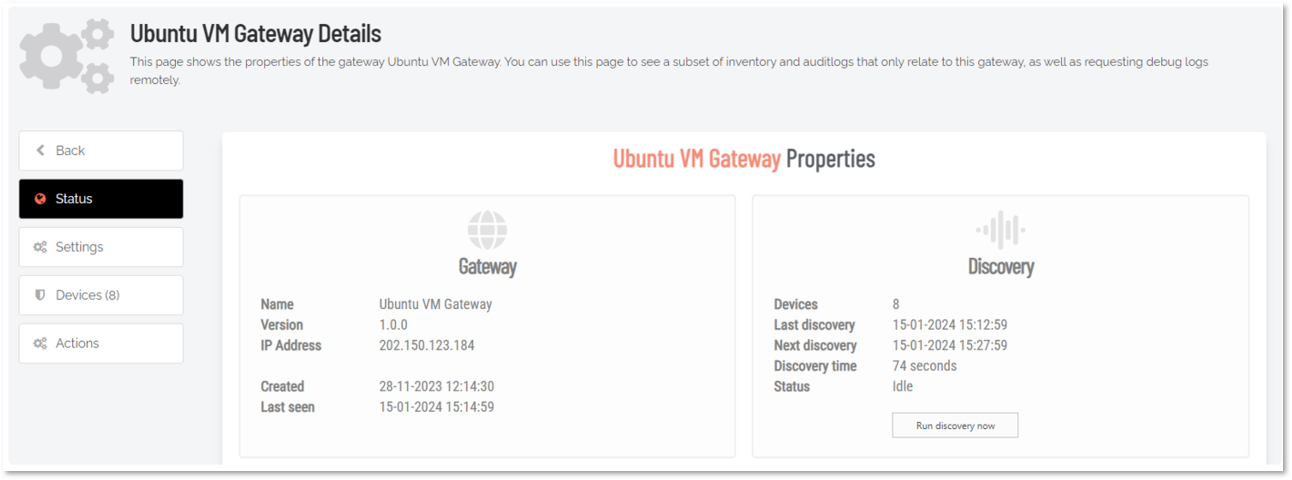
The Discovery service can be configured by going to the details view of a gateway and accessing the Settings menu:
-
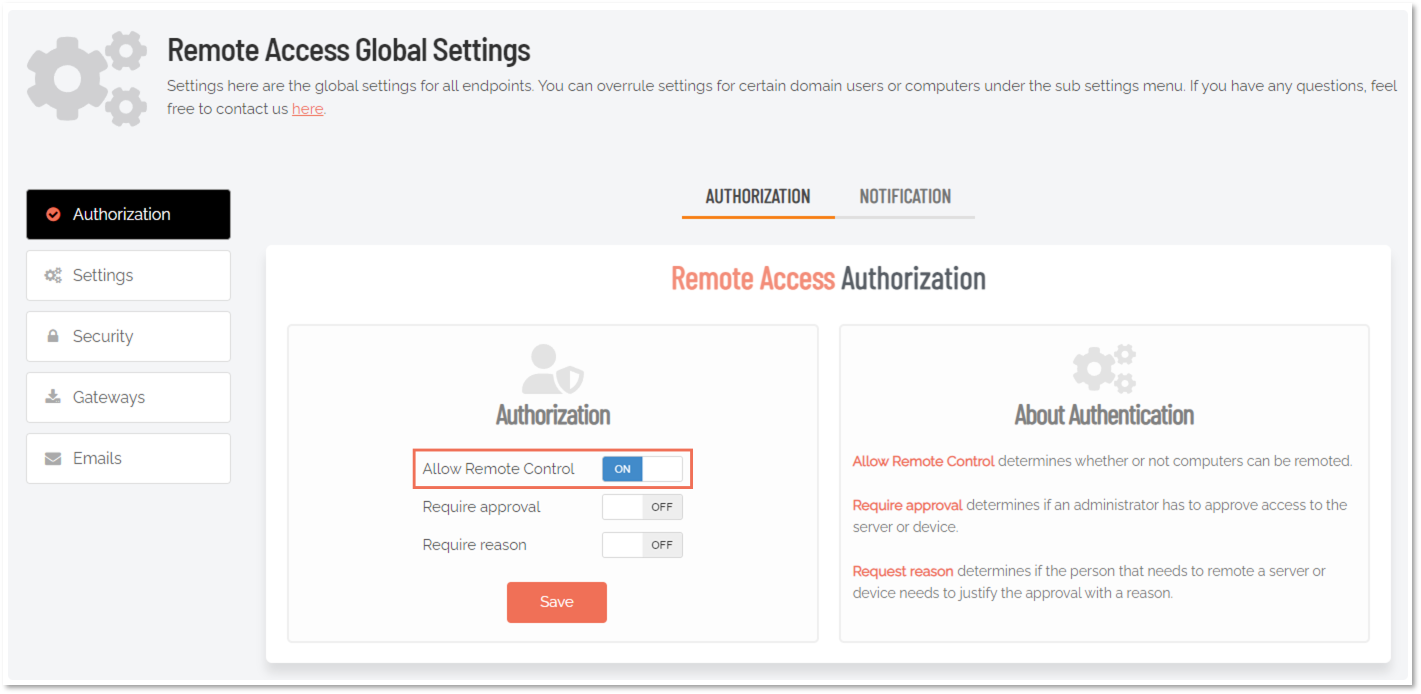
In the portal, go to Settings > Server Settings > Remote Access Settings.
-
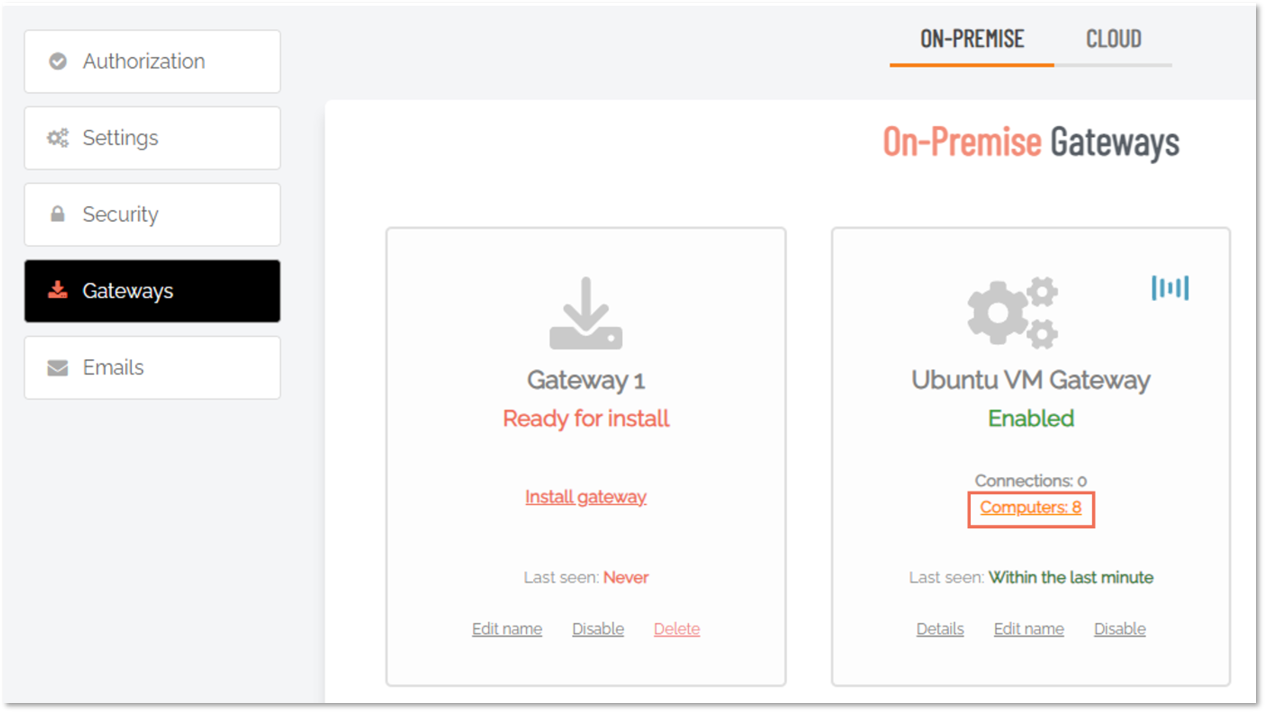
Select the Gateways menu and click the Computers (n) link:
-
This action opens the Devices (n) menu, which is the default and shows a list of devices the gateway can access. Select the Settings menu to view Discovery Settings for the selected gateway:
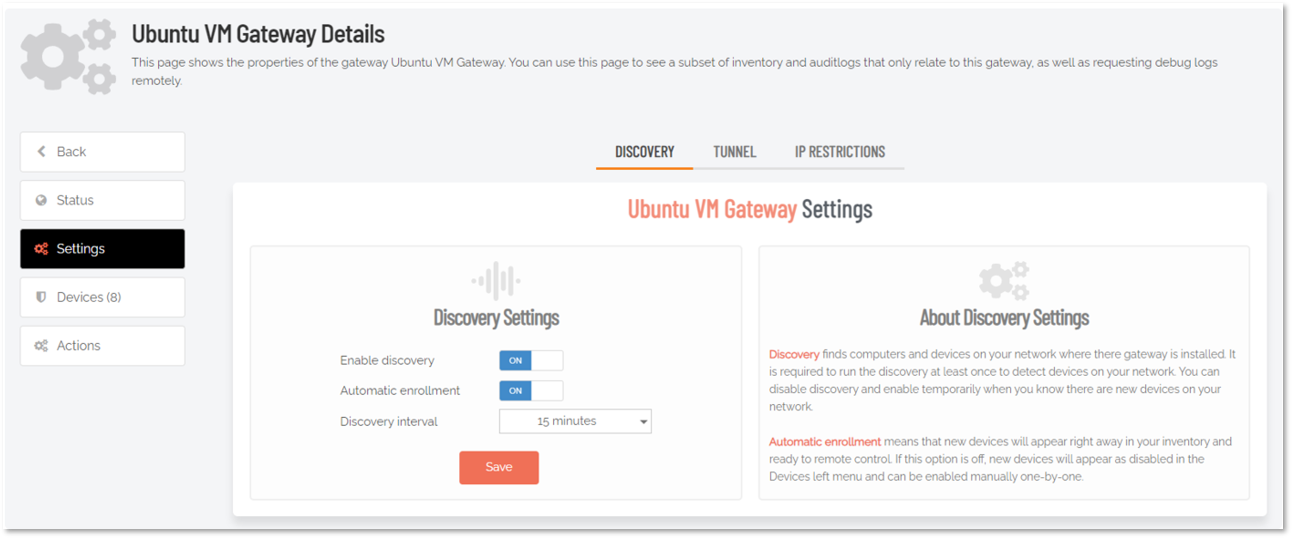
The discovery service runs at the selected interval (every 15 minutes in this case). If automatic enrollment is enabled, the discovered devices will automatically be added as active endpoints to your inventory. If automatic enrollment is disabled, devices will be shown as inactive devices within your inventory.
Refer to Settings for more information on configuring discovery settings.
Password-less
If you do not wish to let users connect to your remote endpoints using username and password, the Admin By Request Server agent allows you to connect password-less by using a Just-In-Time account that gets created for a specific session and then gets disabled immediately afterwards.
To enable password-less accounts for endpoints running the agent:
-
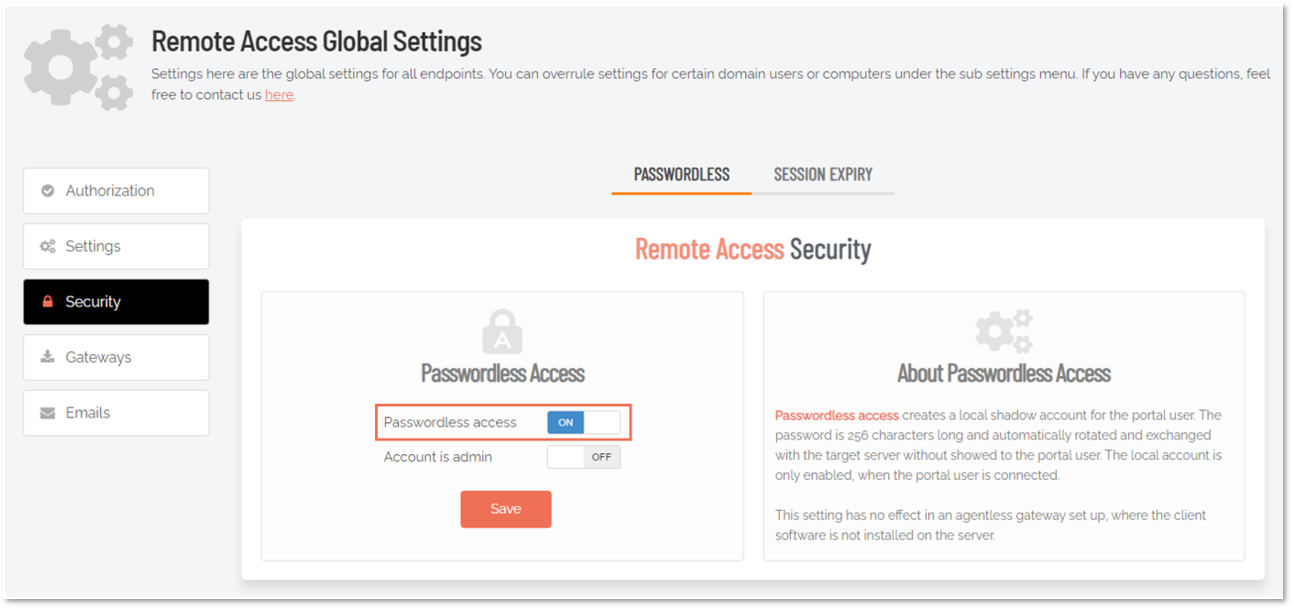
In the portal, go to Settings > Server Settings > Remote Access Settings and select the Security menu.
-
Turn on Password-less access:

-
Don't forget to click Save.
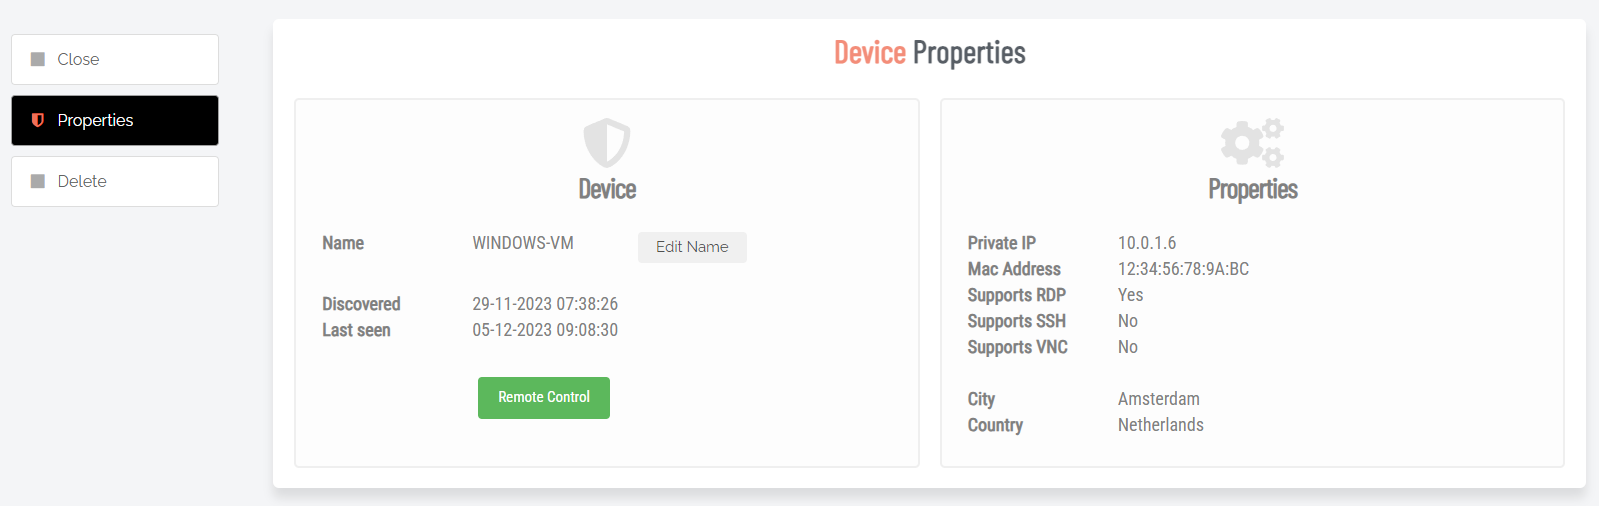
Now, if you select an endpoint with the Admin By Request Server agent installed, you wont be prompted to enter username and password, but will instead be signed in using a Just-In-Time account.
What if I don’t want to use Docker compose?
You can use the on-premise Remote Access setup without Docker compose. In order to make the setup work without docker compose, you will need to spin-up containers using the following Docker images:
-
Connector:
adminbyrequest.azurecr.io/remote-access/connector -
Proxy:
adminbyrequest.azurecr.io/remote-access/proxy -
Discovery:
adminbyrequest.azurecr.io/remote-access/discovery
From the downloaded Docker compose file, you can see the necessary environment variables for the containers. These are also available from the Gateway installation page under the Custom Setup tab (see Install).
Furthermore, the following needs to apply:
-
Your endpoint needs to be reachable via RDP, SSH or VNC from the Proxy container.
-
The Proxy container needs to be reachable from the Connector container.
-
The Connector container needs to allow HTTPS-traffic.
-
If you wish to use the discovery functionality, the Discovery container needs to be reachable from the Connector container.
Once spun up, the Proxy container will automatically register with the Connector container, which will automatically register with the Admin By Request portal, allowing you to use the same connection flow described in How does Remote Access work?.
What if I don’t want to use Cloudflare tunnels?
You can also use the Remote Access setup without using Cloudflare tunnels. In this scenario, you need to have a webserver, HTTP proxy or reverse proxy configured that can direct traffic to the Connector container on the Docker host.
A way to accomplish this would be to spin up something like Traefik (https://traefik.io/traefik/) within the Docker host and use this as the receiving endpoint for the Secure WebSocket communication.
In order to configure the Admin By Request portal to disable tunnels and setup a custom domain or IP to point the traffic to, you need to do the following:
-
In the portal, go to Settings > Server Settings > Remote Access Settings and select the Gateways menu.
-
Click the Details link to go to the properties view of the gateway you want to configure and select the Settings menu.
-
Click the TUNNEL tab. From here you can disable the Use Cloudflare tunnel option:
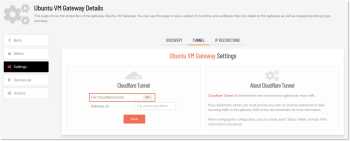
Disabling the Use Cloudflare tunnel option makes the Gateway URL field visible, which is where you can enter the URL of your own gateway.
-
Enter the address of your webserver, reverse proxy or similar and click Save.

All connection requests will be directed to that URL – and the Connector will not be instructed to set up a Cloudflare tunnel.
Auditlog
All sessions with Remote Access are documented in the Auditlog, regardless of the setup in use. The Auditlog shows which users have connected to which endpoints, as well as the session duration and gateway used.
Refer to Remote Access Auditlog for more information about the Auditlog.
Multi-Gateway Setup
In order for the on-premise gateway to allow connections to your remote endpoints, there needs to be a direct connection path. This means that the user needs to be able to connect to the Connector, the Connector needs to be able to connect to the Proxy container and the Proxy container needs to be able to connect to your endpoint on any of the supported ports.
If you have multiple segregated networks, you simply create and spin up a gateway per network, location, subnet or however your setup is segregated. Each gateway will establish a connection with the portal and make itself available without further configuration.
The endpoint you choose to connect to will simply handle the connection via the gateway(s) available to it:

You can even spin up multiple gateways on the same network if you want to scale for better performance. In this case, the portal will simply select the gateway with the fewest active connections whenever a remote session is requested:
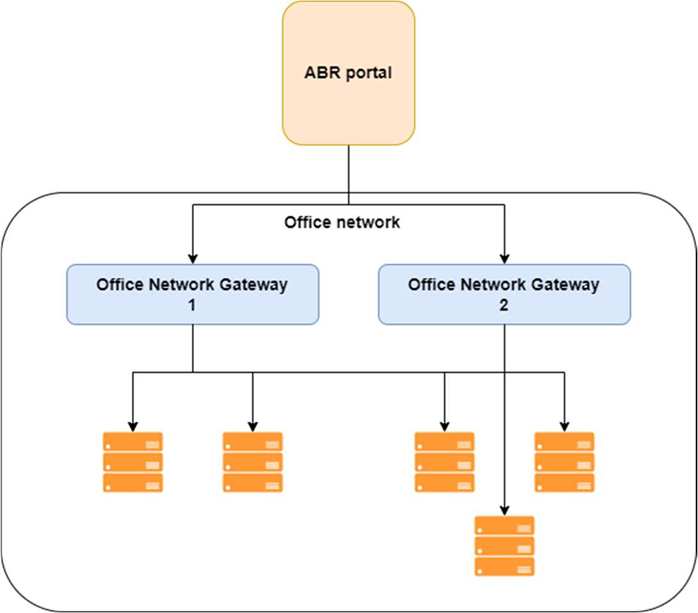
Each gateway will deliver discovery information, allowing you to map your entire network(s) to the Admin By Request inventory, as well as remote connecting directly each endpoint.
Gateway details
Besides the inventory, each gateway will also show information about the devices available for the specific gateway, active connections, auditlogs, callbacks made by the gateway, logs and much more: