Integration Tasks (V2)
Introduction
The following tasks are covered in this section:
B. Ensure the App has required permissions
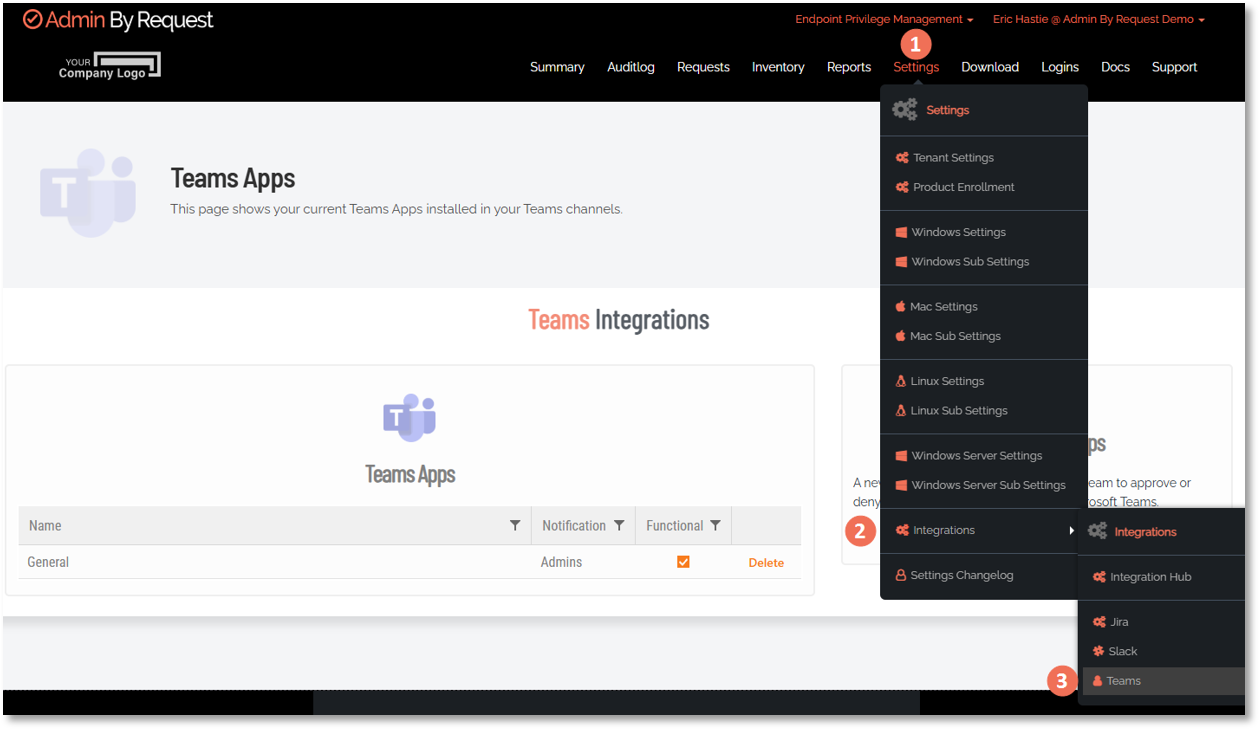
D. Submit API Key and Configure Channel Scope
A. Upload the App File
The V2 app comes preconfigured as a zip file that is ready to upload (this is the same file linked to in Prerequisites).
If you haven't already, download teams-v2.zip.
Refer to Teams App Zip File (V2) for the contents of this file, including the updated manifest.
This task describes two options for uploading the zip file to Teams:
 Option 1 - Upload via the Teams Admin Center console
-
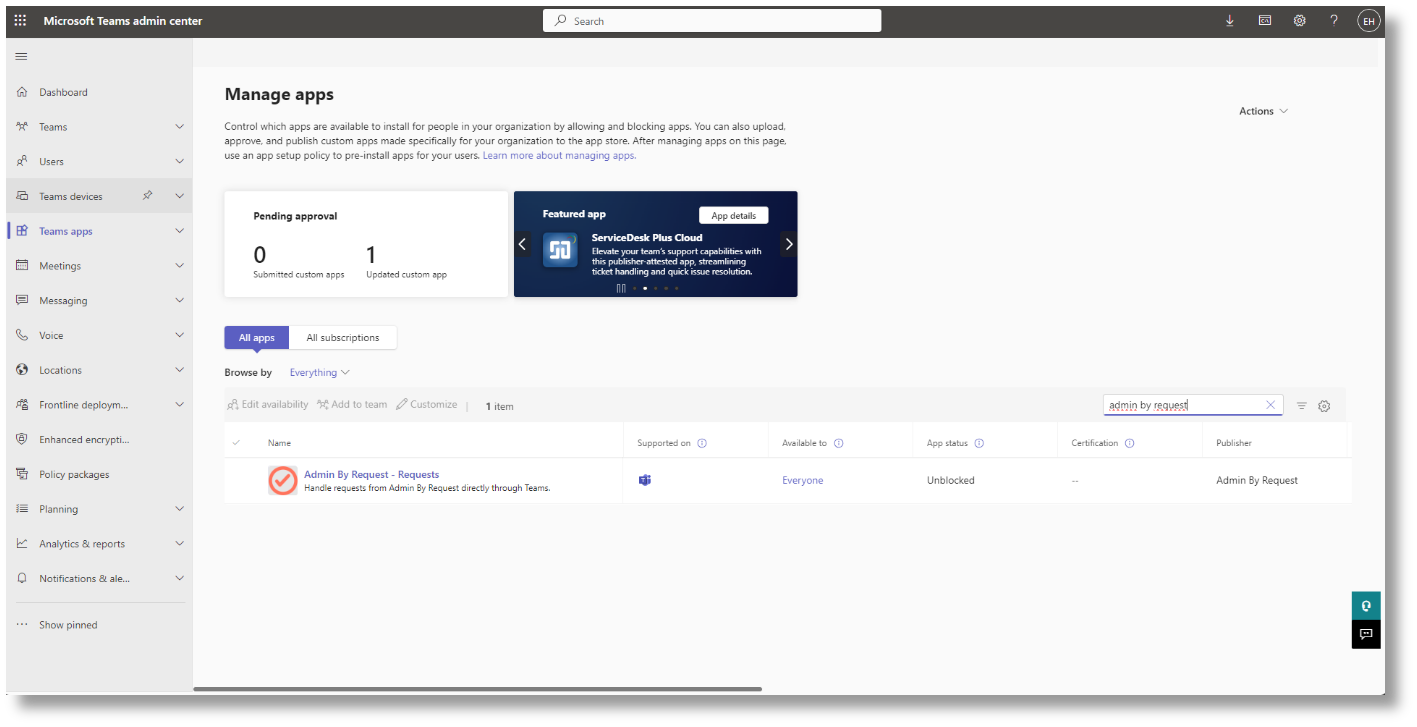
In the Teams Admin Center, navigate to Teams apps > Manage apps.
-
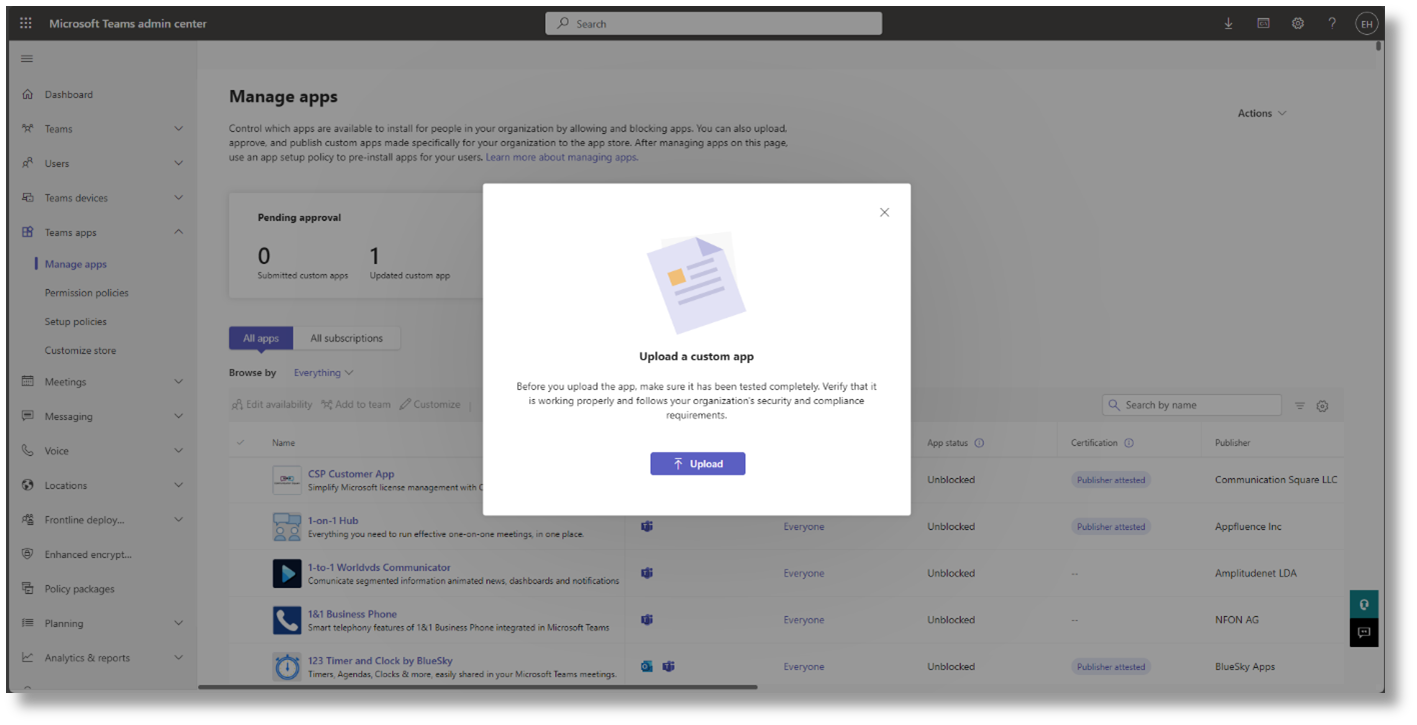
On the newly opened page, click the Actions drop-down menu in the top-right corner and click the Upload option.
-
Finally, click the Upload button available in the pop-up window and navigate to wherever you saved the teams-v2.zip file:
Option 2 - Upload from inside the Teams application
-
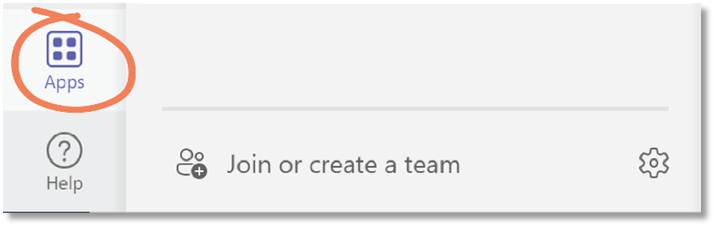
From within the regular Teams application, select Apps from the bottom left-hand corner:
-
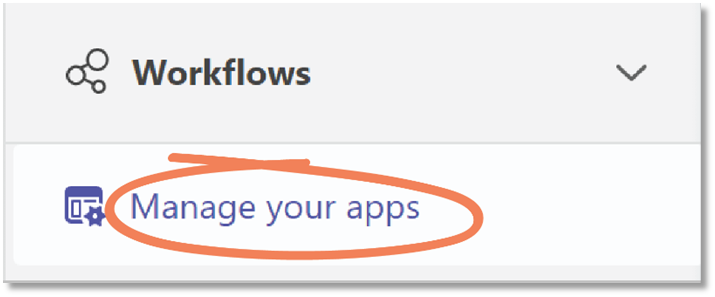
From the bottom left-hand menu, select Manage your apps:
-
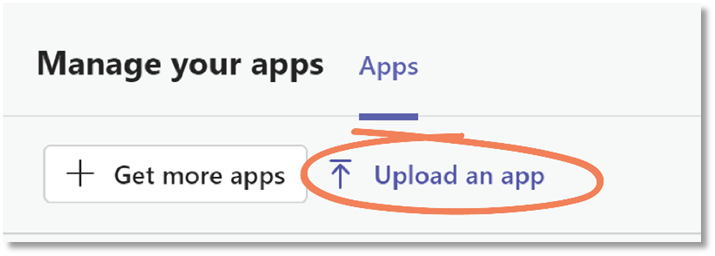
From the top menu, select Upload an app:
-
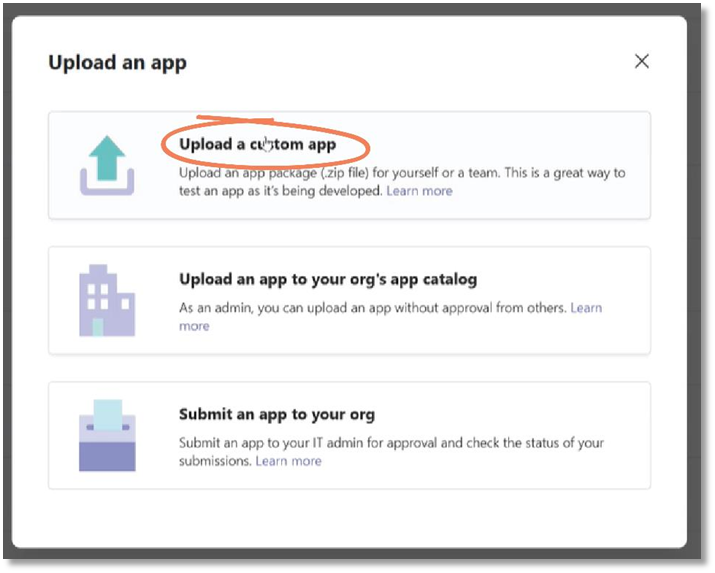
Select the Upload a custom app option:
-
Locate and select the teams-v2.zip file downloaded in Prerequisites.
B. Ensure the App has required permissions
This task ensures the integration has the necessary rights to function correctly.
-
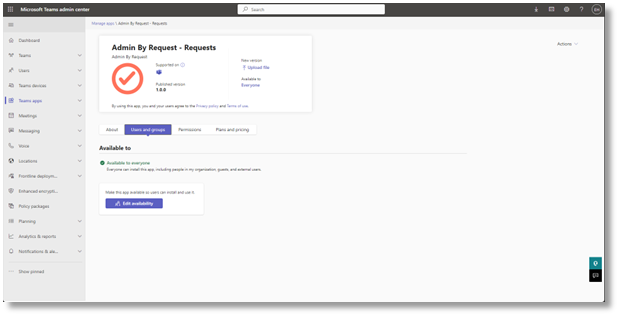
On the Manage apps page, find and double-click the uploaded Admin By Request v2 – Requests application:
If necessary, use the search function located to the right to easily find the application.
-
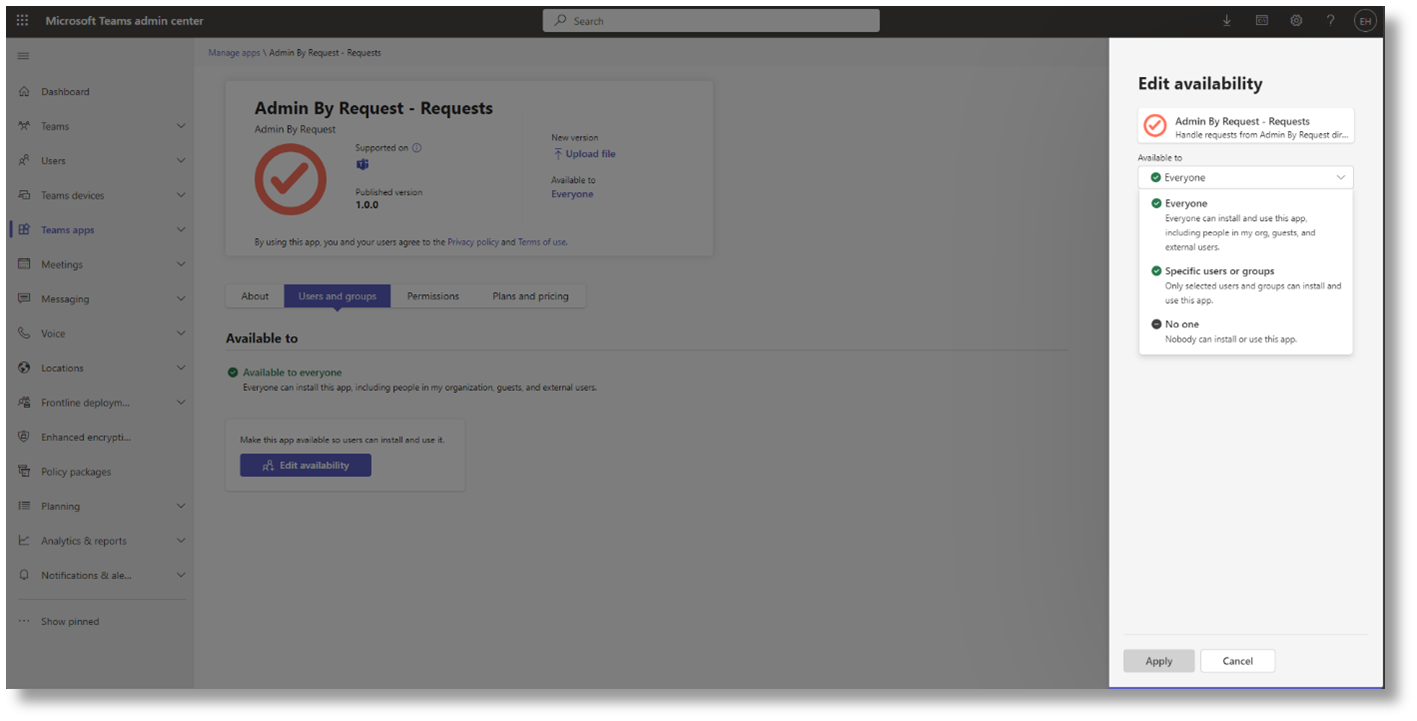
On the newly opened page, switch the tab to Users and groups. The Available to status should either indicate it's available to everyone or specific users and/or user groups:
-
Click the Edit Availability option if you wish to change the availability status of the application. If the button is greyed-out, ensure the account you're using has administrative privileges in the Teams Admin Center:
-
Finally, click Apply once you have configured the availability status.
When configuring the Specific users or groups option, you may experience applicable users and/or user groups being unable to use the application straight away. It may take some time for the configuration to be fully applied to your Teams Admin Center.
Please reach out to Admin By Request Support if the setting hasn't gone through after 24 hours of waiting.
C. Create a Team and Channels
The Admin By Request V2 integration is installed once per team. Within that team, you can configure one or more channels to receive requests. Each channel can optionally be scoped to a specific Sub Settings Name to control which requests it receives.
Planning your channel layout
-
A channel with no Sub Settings Name set (or with "Global" as its value) acts as a catch-all: it receives all requests regardless of the request's settings name.
-
A channel with a specific Sub Settings Name set will only receive requests whose settings name matches. Global (catch-all) requests are not sent to scoped channels.
-
You can have multiple catch-all channels. When a request matches, it is sent to every eligible channel, and all channels remain synchronized — see Task E for details.
Steps
-
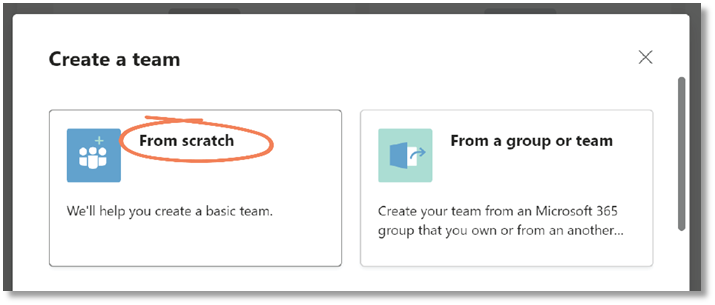
In Microsoft Teams, select Join or create a team from the bottom of the left-hand menu:

-
Click the Create team button in the Create a team option.
-
In the Create a team pop-up window, click From scratch:
-
In the What kind of team will this be? window, select Private.
Choosing Private means users need permission from you to join the team. If you do not select Private for this team, anyone in your organization can join the channel and will have the ability to approve or deny Requests. -
In the next window, give your new team a Team name (and optional Description):
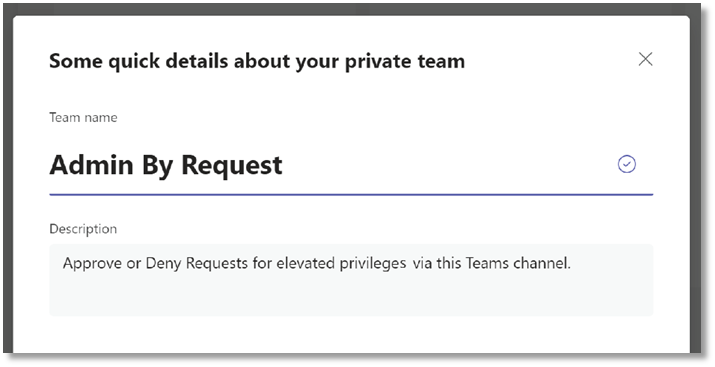
In this example, our Team channel is named Admin By Request and our description reads, Approve or Deny Requests for elevated privileges via this Teams channel.
-
Click Create.
-
Skip adding members for now.
-
If you want to route requests to multiple channels based on Sub Settings scope, create additional channels and teams now. Note that one team can be associated with only one channel. You will assign a Sub Settings Name to each channel in Task D.
Remember that this integration overrides portal settings, so all users with access to the Teams channel(s) created above will have the ability to approve or deny requests via Teams, regardless of whether they have been granted these abilities in your portal sub-settings.
D. Submit API Key and Configure Channel Scope
An API Key must be created for use with Teams. In V2, you also have the option to specify a Sub Settings Name per channel to control which requests that channel receives.
-
In your Admin By Request portal, navigate to Settings > Tenant Settings > Data > API KEYS and click the Add New button:
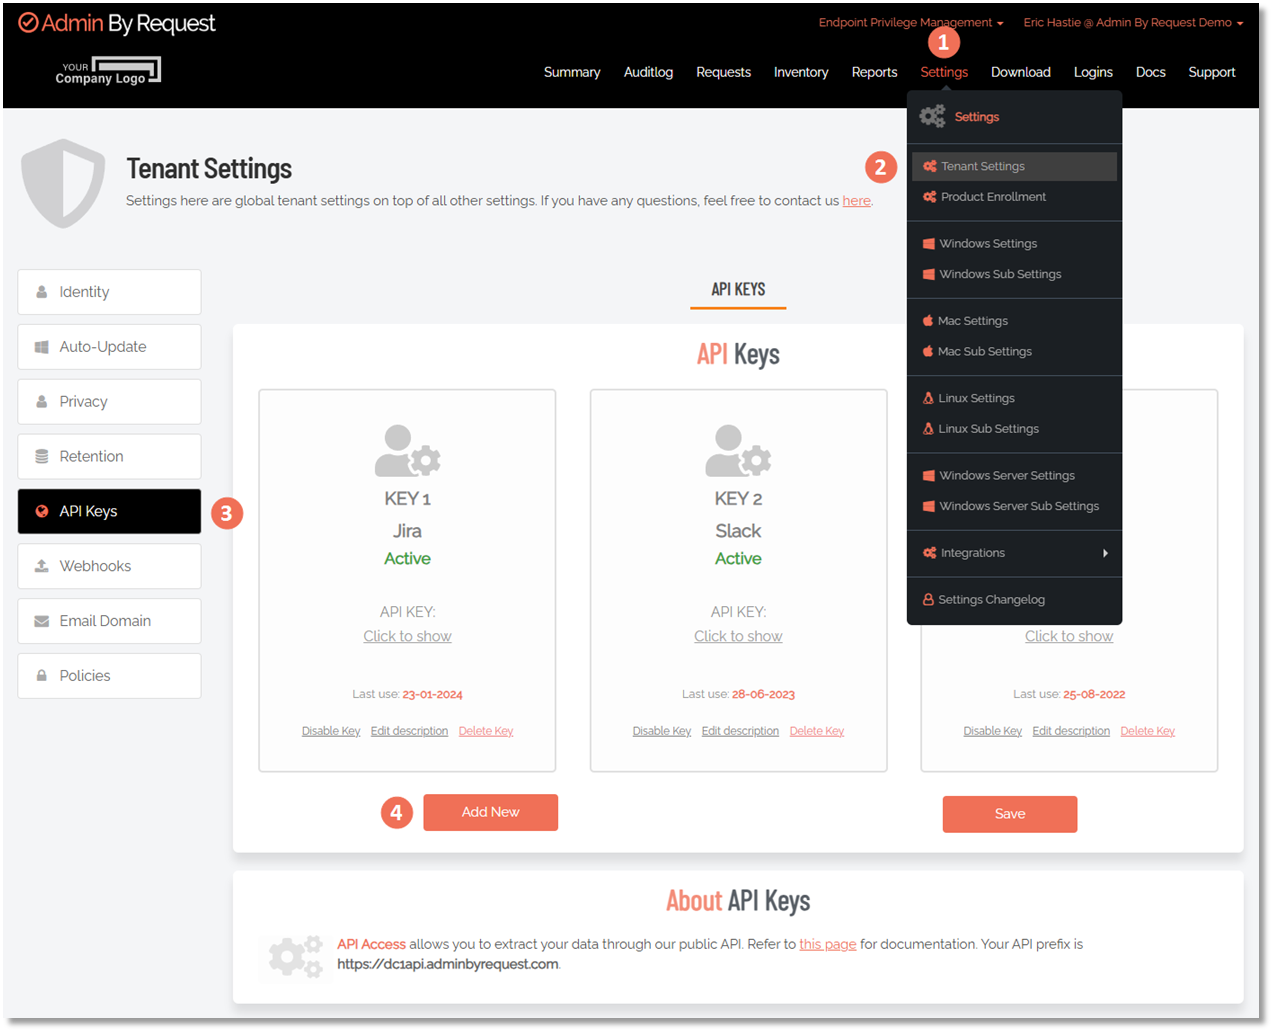 Your API prefix (i.e. data center) is shown at the bottom of this page, under About API Keys.
 -
Click the Edit Description button, type Teams (or similar descriptive name) as the description, and click the Save icon:
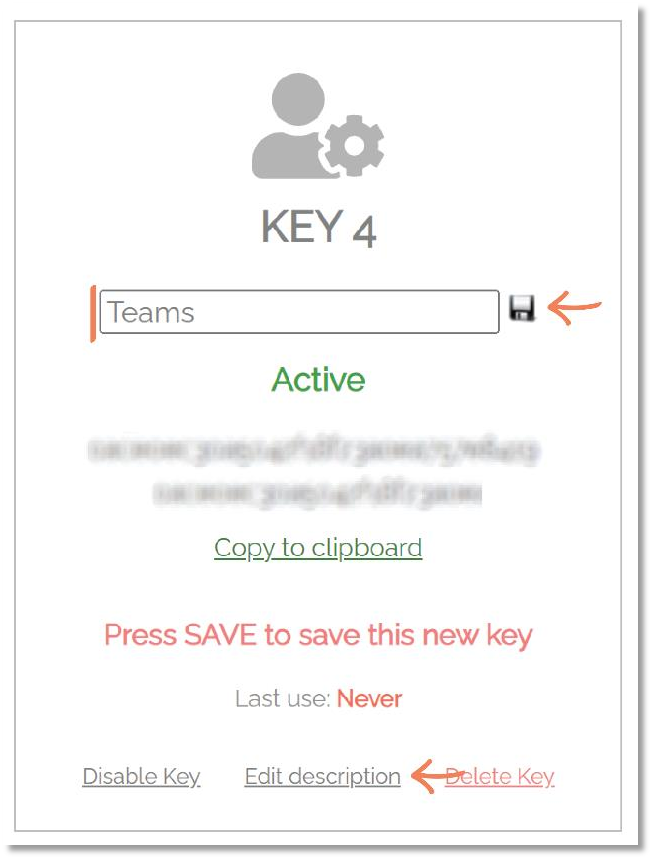 IMPORTANT
The little Save icon is for saving the new description only - after adding a new API Key you must then ensure you click the general Save button (i.e., outside of the individual API Key):

-
For the new API Key just created, select Click to show, and then Copy to clipboard.
-
Navigate back to Teams and paste the copied API Key into the API Key field in the Teams channel:
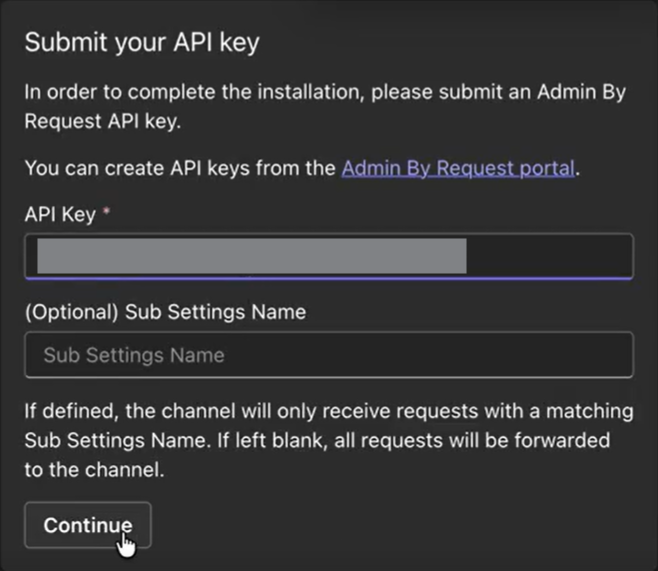
If the integration prompt does not initially request an API key as in the above picture, please ensure that the required permissions are provided. Refer to B. Ensure the App has required permissions for instructions.
-
(Optional) Enter a Sub Settings Name for this channel.
Sub Settings NameThe Sub Settings Name controls which requests are routed to this channel. It must match the
settingsNamevalue returned in the ABR Audit Log API for a request to be delivered here.-
Leave this field blank (or enter Global) to receive all requests, including those from sub-settings and global settings.
-
Enter a specific sub-settings name (e.g., Finance) to receive only requests originating from that sub-setting. Requests from Global settings will not be sent to this channel.
-
To confirm the correct Sub Settings Name to use, check your audit log entries — the
settingsNamefield in the JSON payload is the value to enter here.
-
-
Click Continue.
-
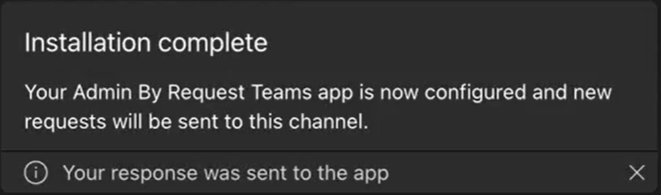
When the connection is complete, a success message is displayed:
-
Repeat steps 4–7 for each additional channel and team, specifying a different Sub Settings Name per channel where required.
NOTEThe same API key can be reused across all channels in the team.
E. Manage Requests
This task demonstrates how to use Teams channels to approve or deny Requests made by your users.
Receiving requests
-
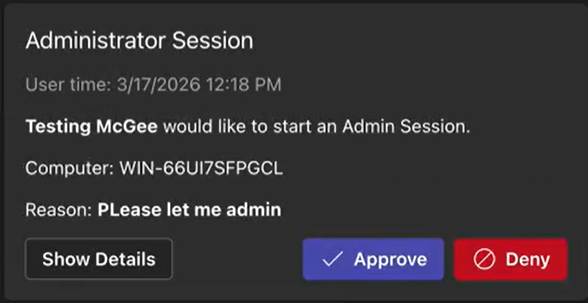
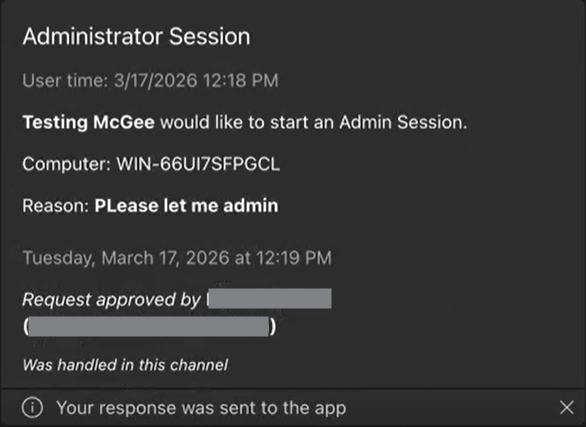
New / Pending requests appear in the appropriate Teams channel(s) as a card, displaying the request type (Run As Admin or Administrator Session), the time the request was made, the name of the user, the computer name, the reason provided (if enabled in your ABR settings), and the application name where applicable. For Run As Admin requests, the card also includes the program version, file path, and scan result:
 Which channels receive the request
A request is delivered to every channel whose Sub Settings Name matches the request's
settingsName. Channels with no scope set (Global) receive all requests. Channels scoped to a specific sub-setting receive only requests from that sub-setting.
Approving or denying a request
-
Click Approve or Deny on the request card — the same way you would in the Requests page of your Admin By Request portal:
-
If denying, you may optionally enter a Deny Reason. The deny reason is recorded in the ABR audit log for the request.
Multi-channel synchronization
If the same request was delivered to more than one Teams channel, approving or denying it in any channel automatically updates the cards in all other channels. Each updated card indicates the outcome and identifies the team and channel where the request was handled.
When handled in Teams, the card displays the Teams display name of the user who handled the request. When handled via the portal or another integration, the portal admin's name is displayed on the card instead.
In the ABR audit log, if the Teams user's email address matches a portal admin's email address, the portal admin's name is recorded. If no match is found, the "Approved by" field is omitted from the audit log entry.
Requests handled outside of Teams
If a request is approved or denied in the Admin By Request portal, Slack, or any other integration (rather than through Teams), all Teams channels that received the request card are updated to reflect the outcome. When handled via the portal, the portal admin's name is also shown on the updated card.
Your IT staff can now use Teams for more than just communication; they can approve or deny requests for administrative access via one or more dedicated Teams channels, with full synchronization across all channels.