Jira Integration V2 Overview
Introduction
This guide describes integration between Admin By Request and Jira Service Management for cloud-based Jira implementations. The integration comprises three mechanisms: one to create issues in Jira from requests made in ABR, one to handle approved requests, and one to handle declined requests. Beyond these three mechanisms, it is up to the customer to further automate the handling of tickets through Jira's own automation rules.
We include in this guide two simple automation rule examples to illustrate some common automation patterns. Customers can adapt these as the basis for their own workflows.
-
The integration covered here is available for Jira Cloud, but not on-premise installations like Jira Data Center Edition.
-
Disclaimer - Admin By Request is not a Jira consultancy and we do not have extensive experience working with Atlassian tools, including Jira. Our integrations and examples are provided for the customer's convenience; they do not carry any warranty whatsoever and must be used entirely at the customer's own risk. We recommend testing everything in a non-production environment. We are not liable for any downtime, loss of productivity, or data loss that might result from using the integrations.
In this guide
1. Creating custom fields in Jira
2. Adding custom fields to your Jira Space
3. Creating a custom Request Type
4. Integrating Jira with Admin By Request
Updating your Atlassian API token
Creating Jira automation rules
Prerequisites
To complete the setup, you will need all four items listed below. It is worth gathering them before you begin - particularly the API tokens, which each take a few minutes to create in their respective systems. Having everything to hand avoids interrupting the setup wizard partway through.
-
Administrator access to both Jira Service Management and the Admin By Request Portal.
You need Jira Service Management admin rights to create custom fields, configure field settings, and create request types. You need Admin By Request portal admin access to generate an API key.
-
Jira Service Management active in your Atlassian organization, with the correct user role configured.
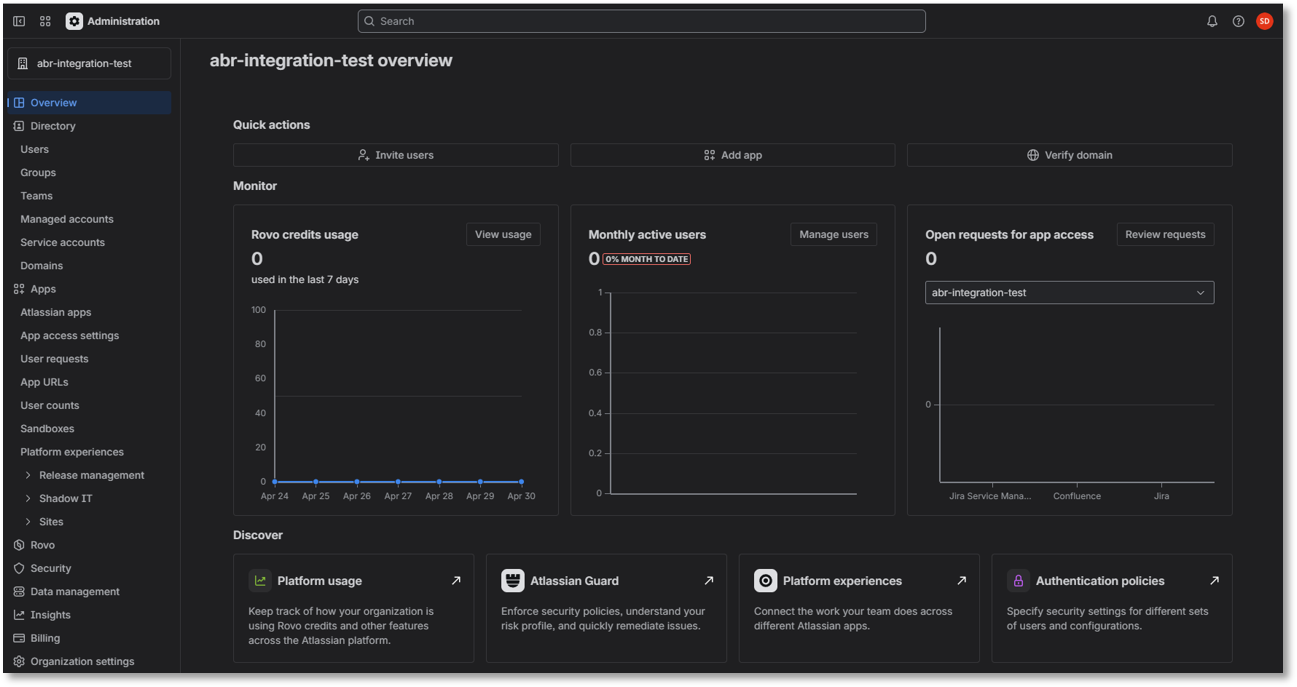
Before starting the integration tasks, verify that your Atlassian organization account has Jira Service Management active and that the correct role is assigned. This check is done at
admin.atlassian.com- the organization-level administration portal for your Atlassian account. This is a different place from your Jira instance itself. If you have never used admin.atlassian.com before, you will need your Atlassian organization administrator credentials to log in. Verify Jira Service Management
-
Go to admin.atlassian.com and log in with an Atlassian organization administrator account:
-
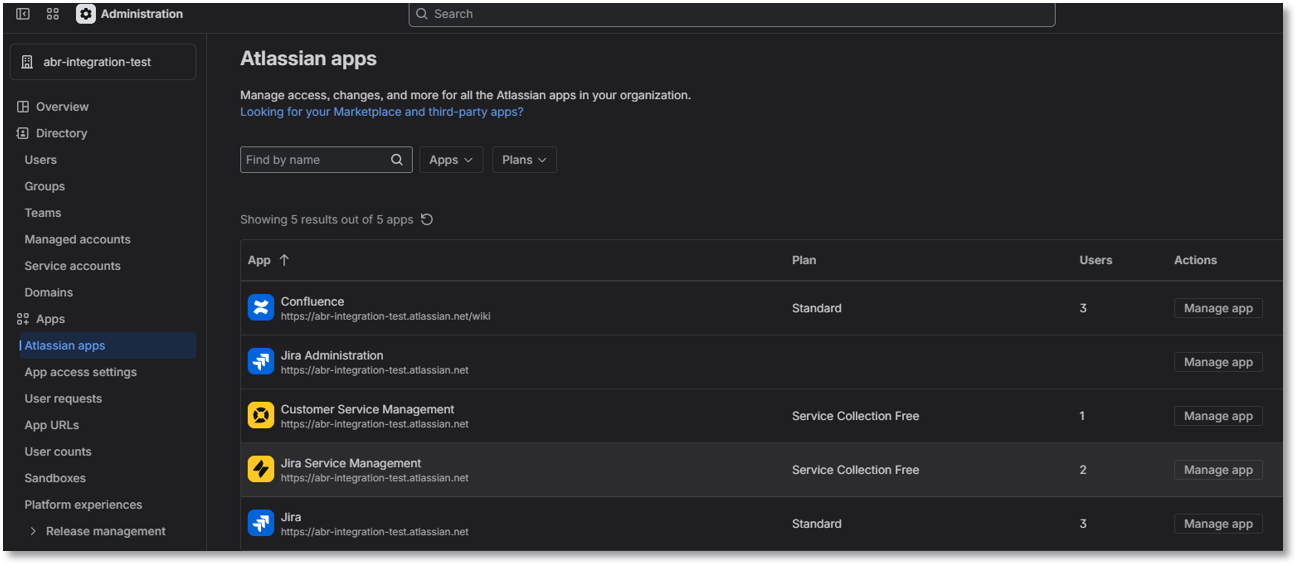
Navigate to Apps - Atlassian apps.
-
Confirm that Jira Service Management appears in the list of installed apps and is active. If it is not listed, it needs to be added to your Atlassian organization before you can proceed.
-
Click Manage app under Jira Service Management Actions to open its settings.
-
Verify that the role User (agent) is assigned to the group named jira-servicemanagement-users-{your-jira-domain}.
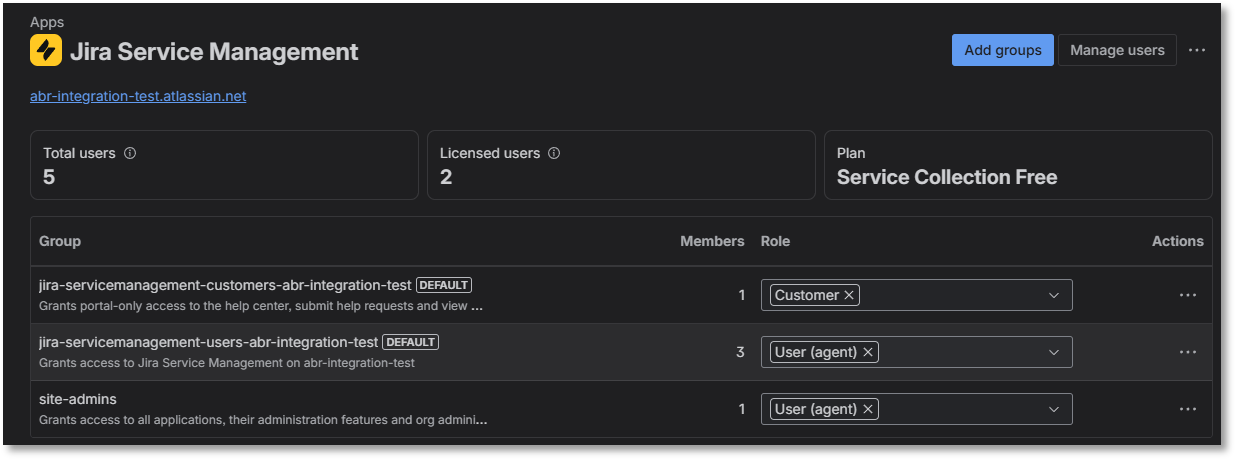
The {your-jira-domain} portion matches your Atlassian subdomain - for example, if your Jira URL is acme.atlassian.net, the group name would be jira-servicemanagement-users-acme. If the User Agent role is not present, add it.
-
-
A Jira Service Management API token associated with your username.
Atlassian supports two types of API token. Both work with the Admin By Request integration, but scoped tokens are recommended for new installations because they follow the principle of least privilege and are better positioned for Atlassian's future deprecation of global tokens.
-
Global (unscoped) token - a standard Atlassian API token with no scope restrictions. Simpler to create, but grants broad API access across your Atlassian account.
-
Scoped token - a token restricted to exactly the API permissions Admin By Request requires. If you create a scoped token, you must enable all 14 of the following scopes - no more, no less:
Copyread:application-role:jira
read:avatar:jira
read:field:jira
read:field-configuration:jira
read:group:jira
read:project:jira
read:project-category:jira
read:request:jira-service-management
read:requesttype:jira-service-management
read:servicedesk:jira-service-management
read:user.property:jira
read:user:jira
write:issue:jira
write:request:jira-service-management
IMPORTANT: API token expirationAs of March 2026, Atlassian no longer permits API tokens with no expiration date. When you create a new API token for this integration, you must set an expiration date. Tokens that were created before March 2026 without an expiration date will be given an automatic expiration of March 2027 - they will stop working at that point without any further warning.
When your token expires, the integration stops working - no new Jira issues will be created, and approved or denied requests will not update existing issues. Plan ahead for token renewal. In V2 of the integration, you can update the API token without reinstalling the entire integration - see the procedure below for a new token or Updating your Atlassian API token for an existing token.
Create a Jira API scoped token
-
Log in to your Jira Service Management admin console, navigate to
https://id.atlassian.com/manage-profile/security/api-tokens. and click Create API token with scopes: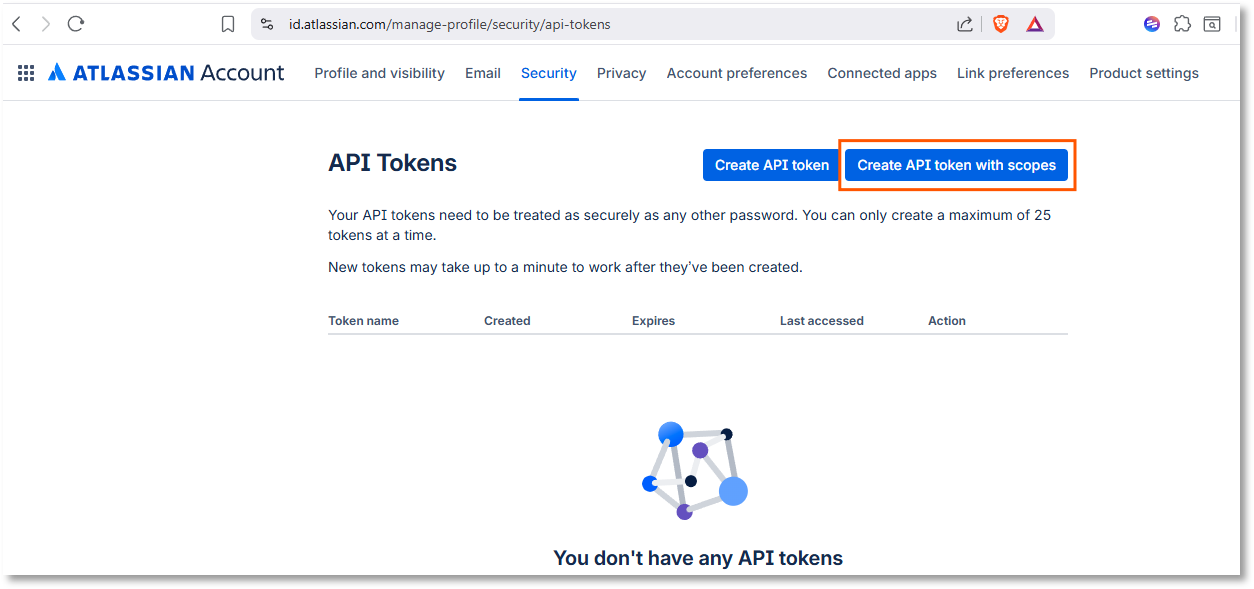
-
Enter Name and Expires on and click Next.
-
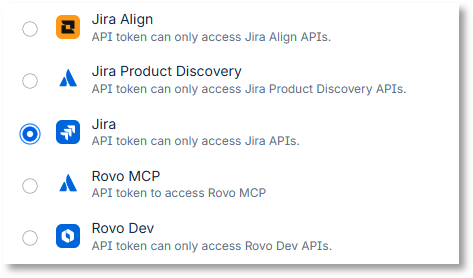
Select Jira and click Next:
-
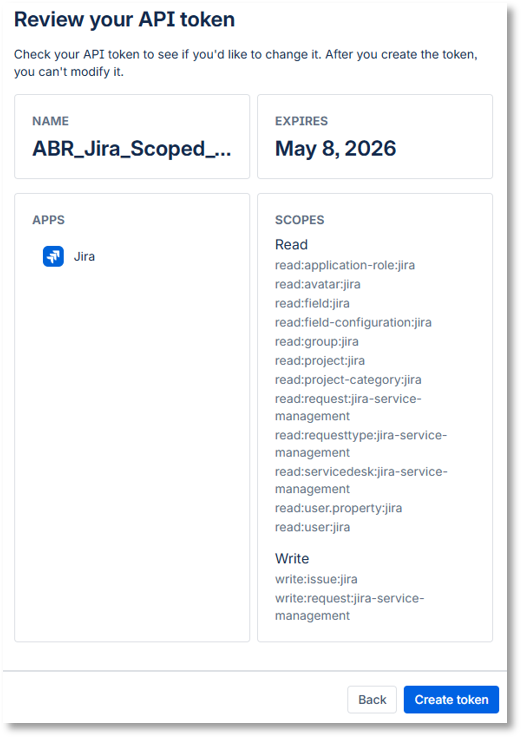
For each of the 14 scopes listed, search for it and select it.
-
When done, click Next, review the token and click Create token:
- Copy the API token to somewhere safe and click Close.
For more information on creating and managing API tokens in Jira, refer to
https://support.atlassian.com/atlassian-account/docs/manage-api-tokens-for-your-atlassian-account/. -
-
An API key in your Admin By Request Portal.
Create an Admin By Request API key
-
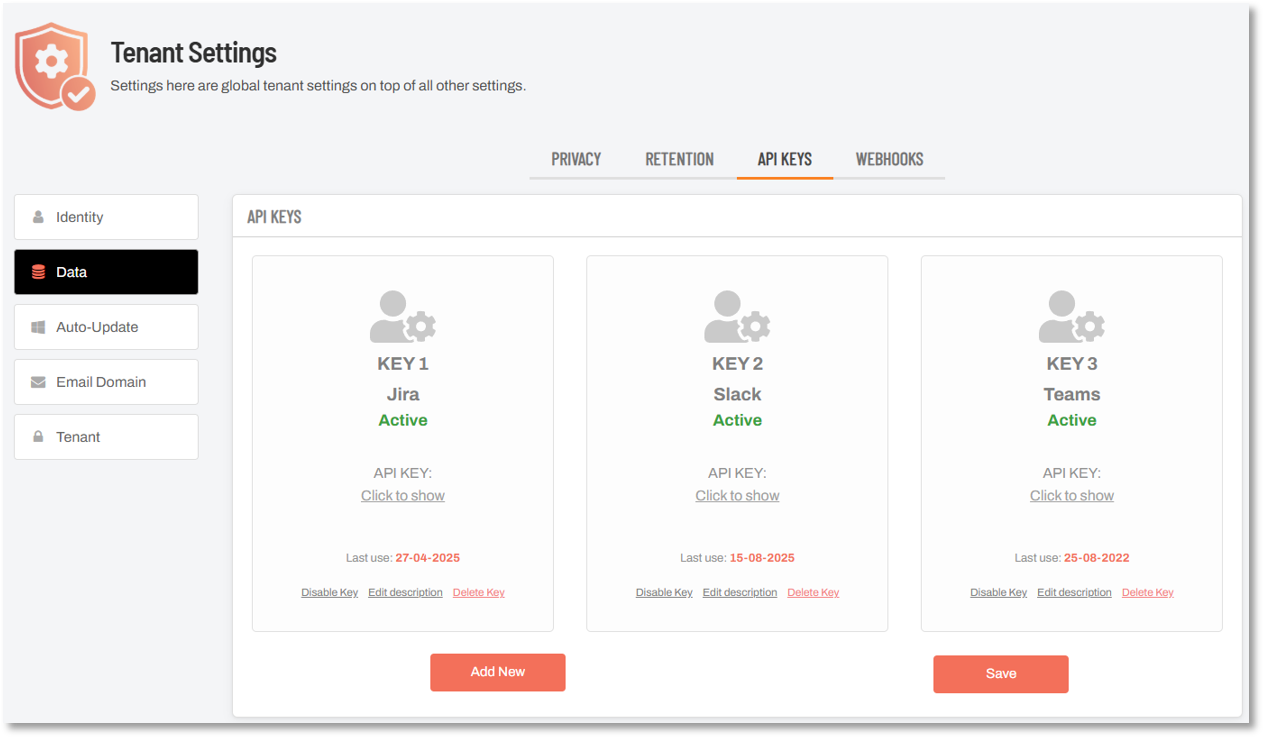
Log in to the portal and navigate to Settings > Tenant Settings > Data > API KEYS.
-
To create a new API key, click Add New.
-
Click Edit description and give the key a recognizable name - for example, Jira. This makes it easy to identify the key's purpose later.
-
Click Save to save the new API key:
Copy the key to the clipboard, ready for pasting later in the setup. Also store it somewhere secure - you will need it again if you ever use the "update API token" feature.
Keep a secure record of this key - you will need it during setup and again if you ever need to update your Atlassian API token later (the original ABR API key is used as a verification step in the token update process).
-
Once you have all four items above ready, proceed through the integration tasks in the next section.
Something Missing?
If you’ve identified a bug or have a suggestion for this integration, or another SIEM integration you’d like us to add, contact us here and we’ll see what we can do.
The task descriptions in this guide (and screenshots in particular) cover the state of Microsoft Teams at the time of writing. While every effort is made to ensure currency, the screens you see during setup may look a little different, especially color schemes and the placement of buttons and links.
Related Articles
This guide may refer to, and should be read in conjunction with, the following:
-
Commitments and responsibilities in ABR's Data Processing Agreement
-
Support provisions in ABR's Terms and Conditions and Customer Support Services
-
Collection, use and disclosure of personal data in ABR's Privacy Policy and Data Privacy Settings
Refer also to ABR's Trust Center documents.
This guide is available in PDF format: