Integration Tasks
1. Creating custom fields
The integration requires you to set up a few custom fields. These fields hold information about:
-
The ID of the request from Admin By Request (can be used for further automation).
-
The name of the approver (if the request is approved from the platform or via another integration).
-
The reason supplied if a request is denied.
-
Log in to Jira Service Management and click the cog in the upper right corner to navigate to Settings > Issues:
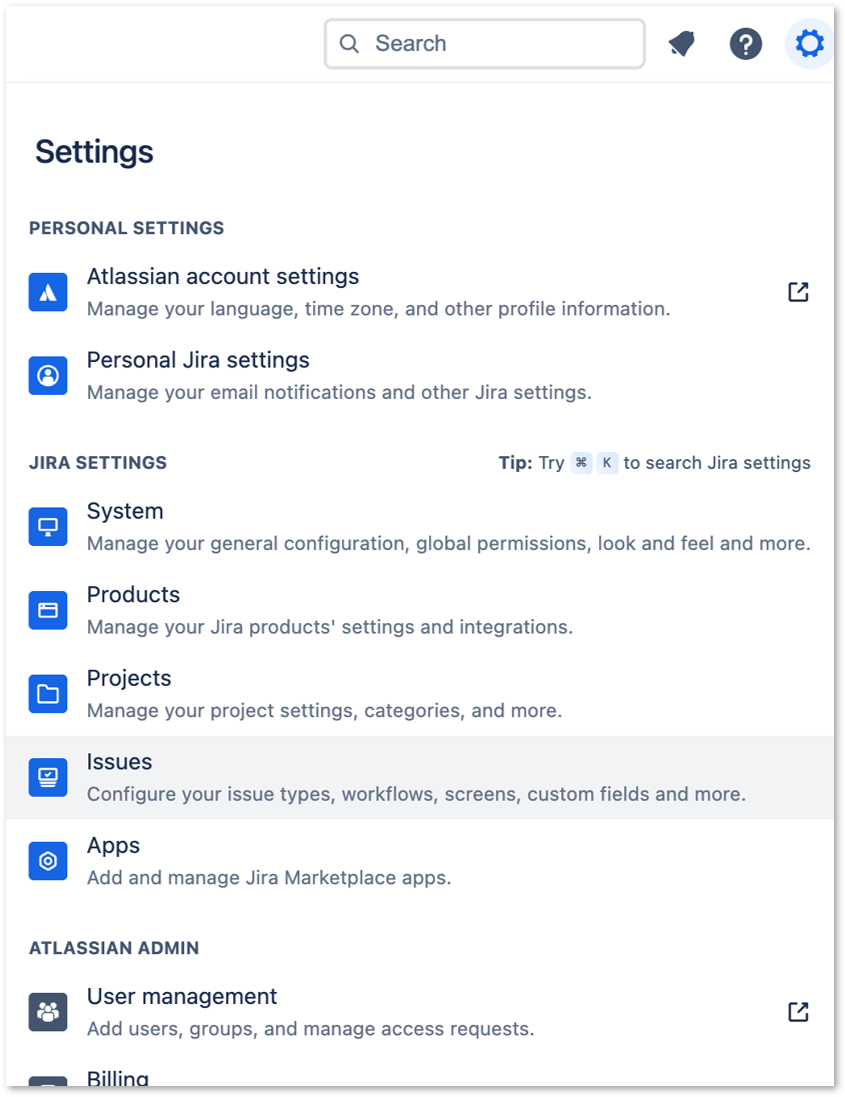
-
In the left menu, select Custom fields:
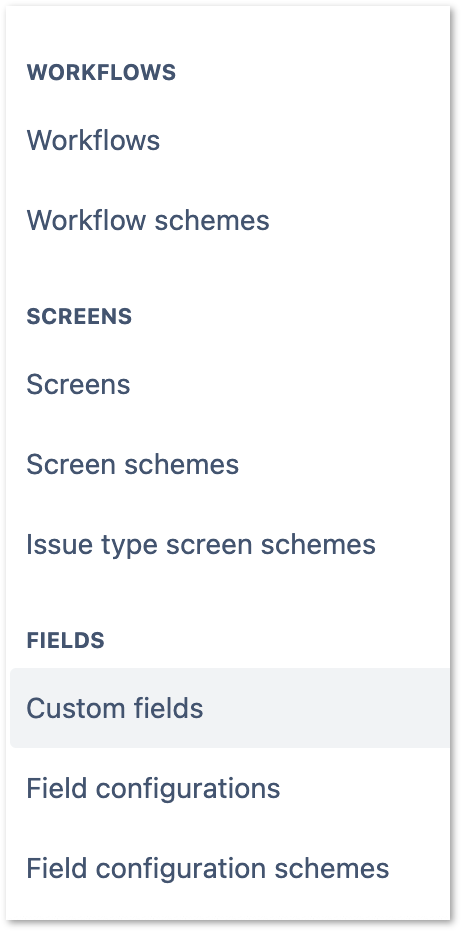
-
In the Custom fields screen, click button Create custom field and select Field Type Short text (plain text only):
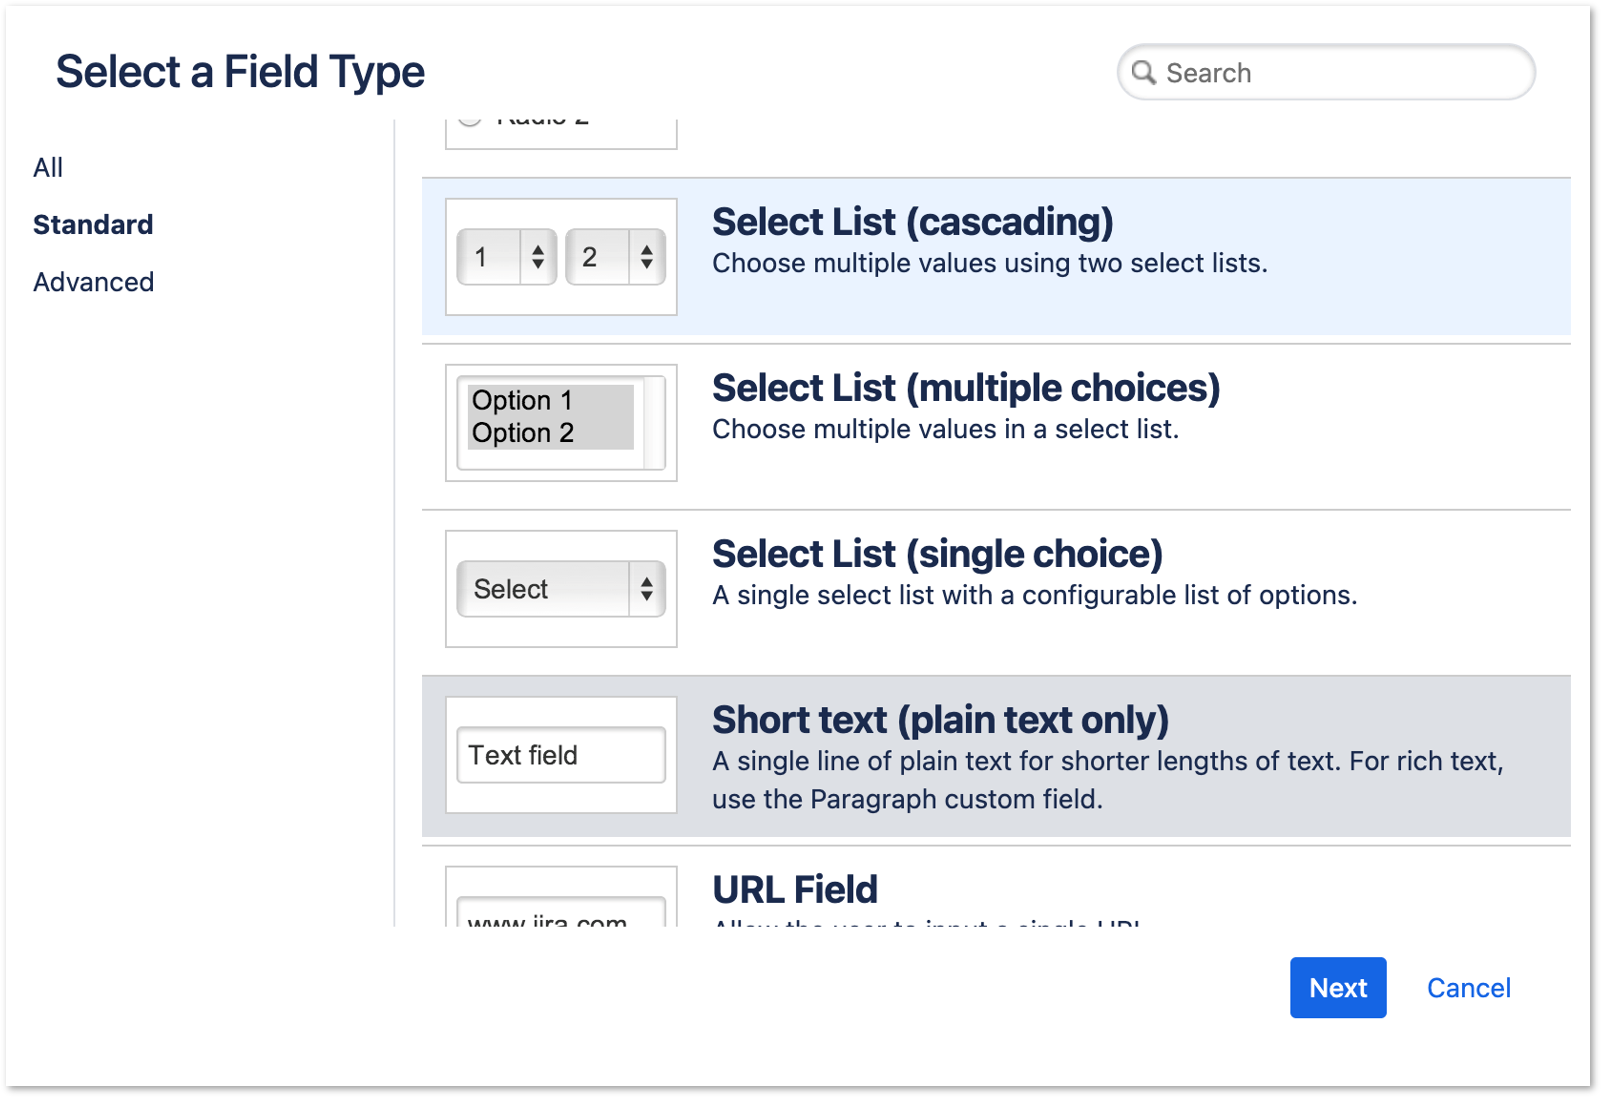
-
Name the field (e.g. ABR Request ID) and, optionally, provide a description.
-
Repeat these steps for field ABR Handled by.
-
Repeat the steps one more time for field ABR Reason, but select the multiline option Paragraph (supports rich text) as the Field Type.
NOTEYou don’t have to select any specific views for the fields - these will be assigned when creating the Request Type in the next section.
-
Finally, find the ids of the fields just created. To do this, make sure at least one issue exists in your project. Identify the issue number and enter the following URL in a browser:
Copyhttps://<your-jira-website>.atlassian.net/rest/api/2/issue/<your-jira-issue-number>?expand=namesCopy and paste the resulting JSON into an editor that can format it nicely (e.g. Notepad++) and find the labels of the fields created.
The following example has issue number ABRJIRA-40 (from the "key" field) and shows both field id (customfield_10064) and field name for ABR Request ID:

The field id for ABR Request ID is needed later in task Overview.
NOTEThis is an example - your field id(s) will almost certainly be different.
2. Creating a custom Request Type
A custom Request Type enables Jira to identify any requests coming from theAdmin By Request servers.
-
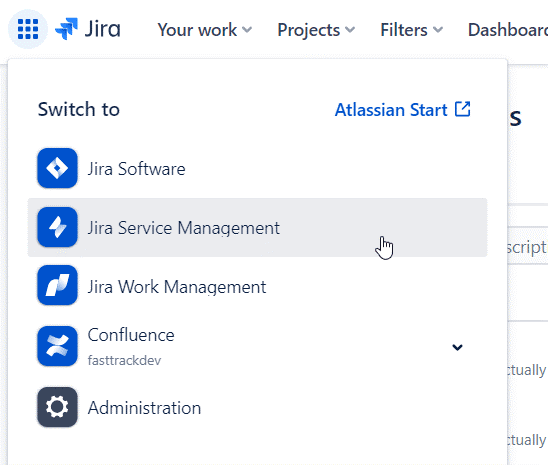
Login to Jira and, from the Switch to... menu, select Jira Service Management:
-
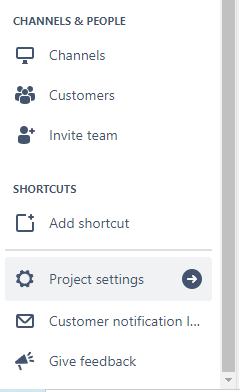
From within Jira Service Management, either create a new project or select the project you want to integrate with. Open the project and select Project settings towards the bottom of the left menu:
-
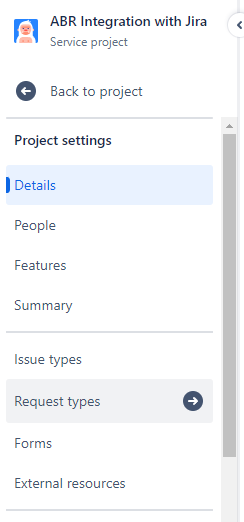
From the Project settings menu, select Request types:
-
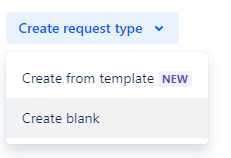
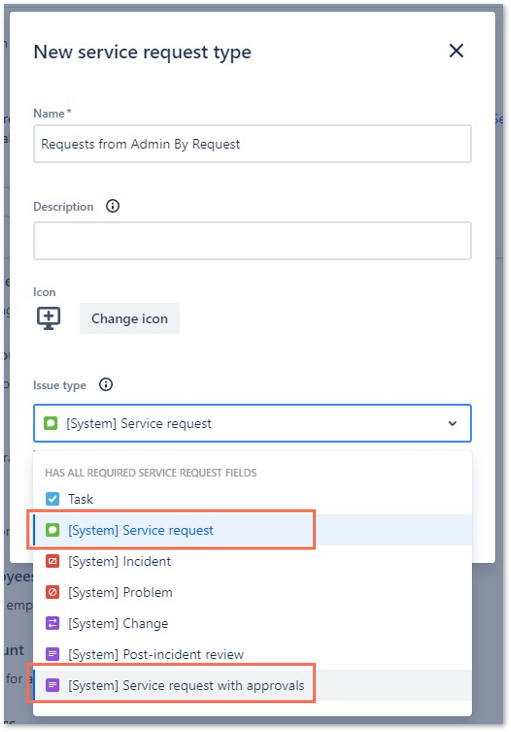
On the Service requests screen, use the Create request type button (top right) to create a request type (click the button and select Create blank):
-
Give the request type a name and select the Issue type as either:
-
This sends requests to Jira and updates them as they get approved or denied, OR
-
[System] Service request with approvals
Works in the same way as the ordinary service request type, but allows designated approvers to approve or deny requests from within Jira.
With a bit of automation, this also enables Jira to call the Admin By RequestAPI to approve or deny requests directly from within Jira.
NOTEThe automation example (Overview) requires that [System] Service request with approvals is the option chosen at this point:
-
-
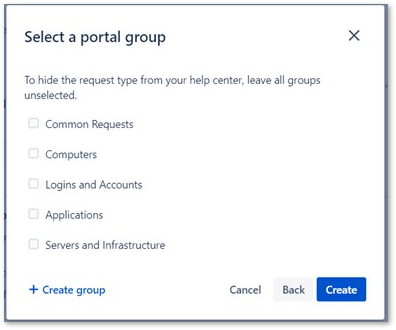
Select the portal group to assign to this new request type (or leave all options blank):
-
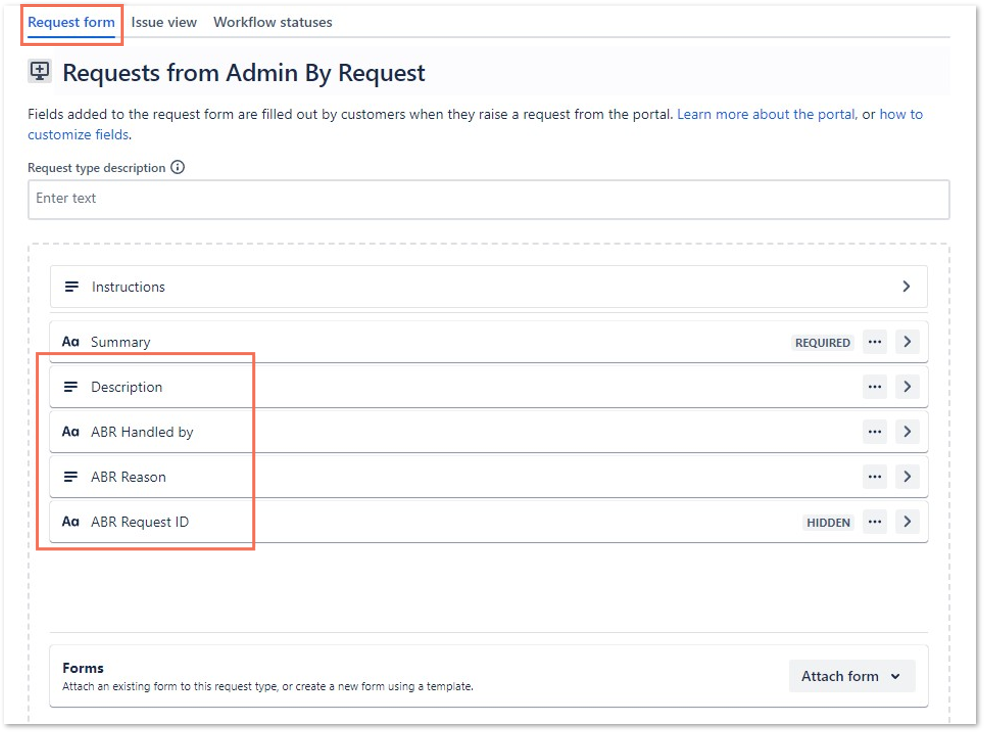
Finally, drag and drop the three newly created custom fields, as well as the Description field into the view of the new request type:
 NOTE
NOTE-
Make sure you are on the Request form tab and not Issue view or Workflow statuses.
-
Make sure the Description field is added along with the three custom fields. Summary and Instructions should already be there.
-
You can leave the ABR Request ID field as “Use preset value and hide from portal” if you do not wish the ABR Request ID to be visible.
-
-
Save the changes.
Everything is now ready to create the ABR-Jira integration.
3. Integrating Jira with Admin By Request
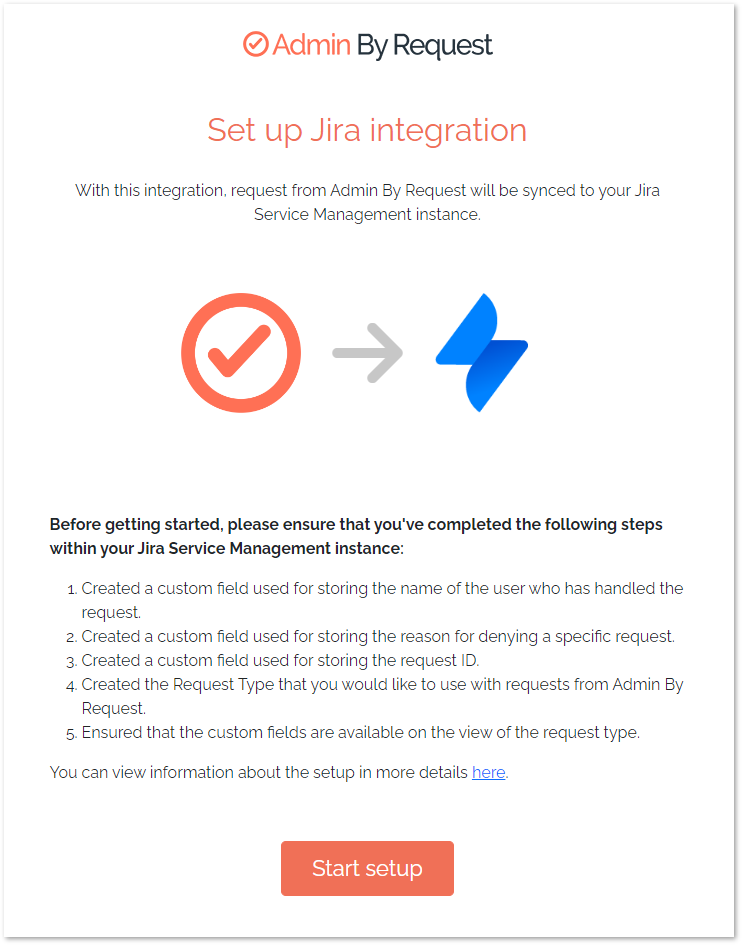
Now that the pre-requisites are in place, head over to https://jira.adminbyrequest.com to start the setup process.
-
From the Set up Jira integration screen, check once again that you've completed all the prerequisite steps and click button Start setup:
-
Retrieve your Atlassian API Token as well as your Admin By Request API key and enter these into the setup form alongside your Atlassian username and instance URL:
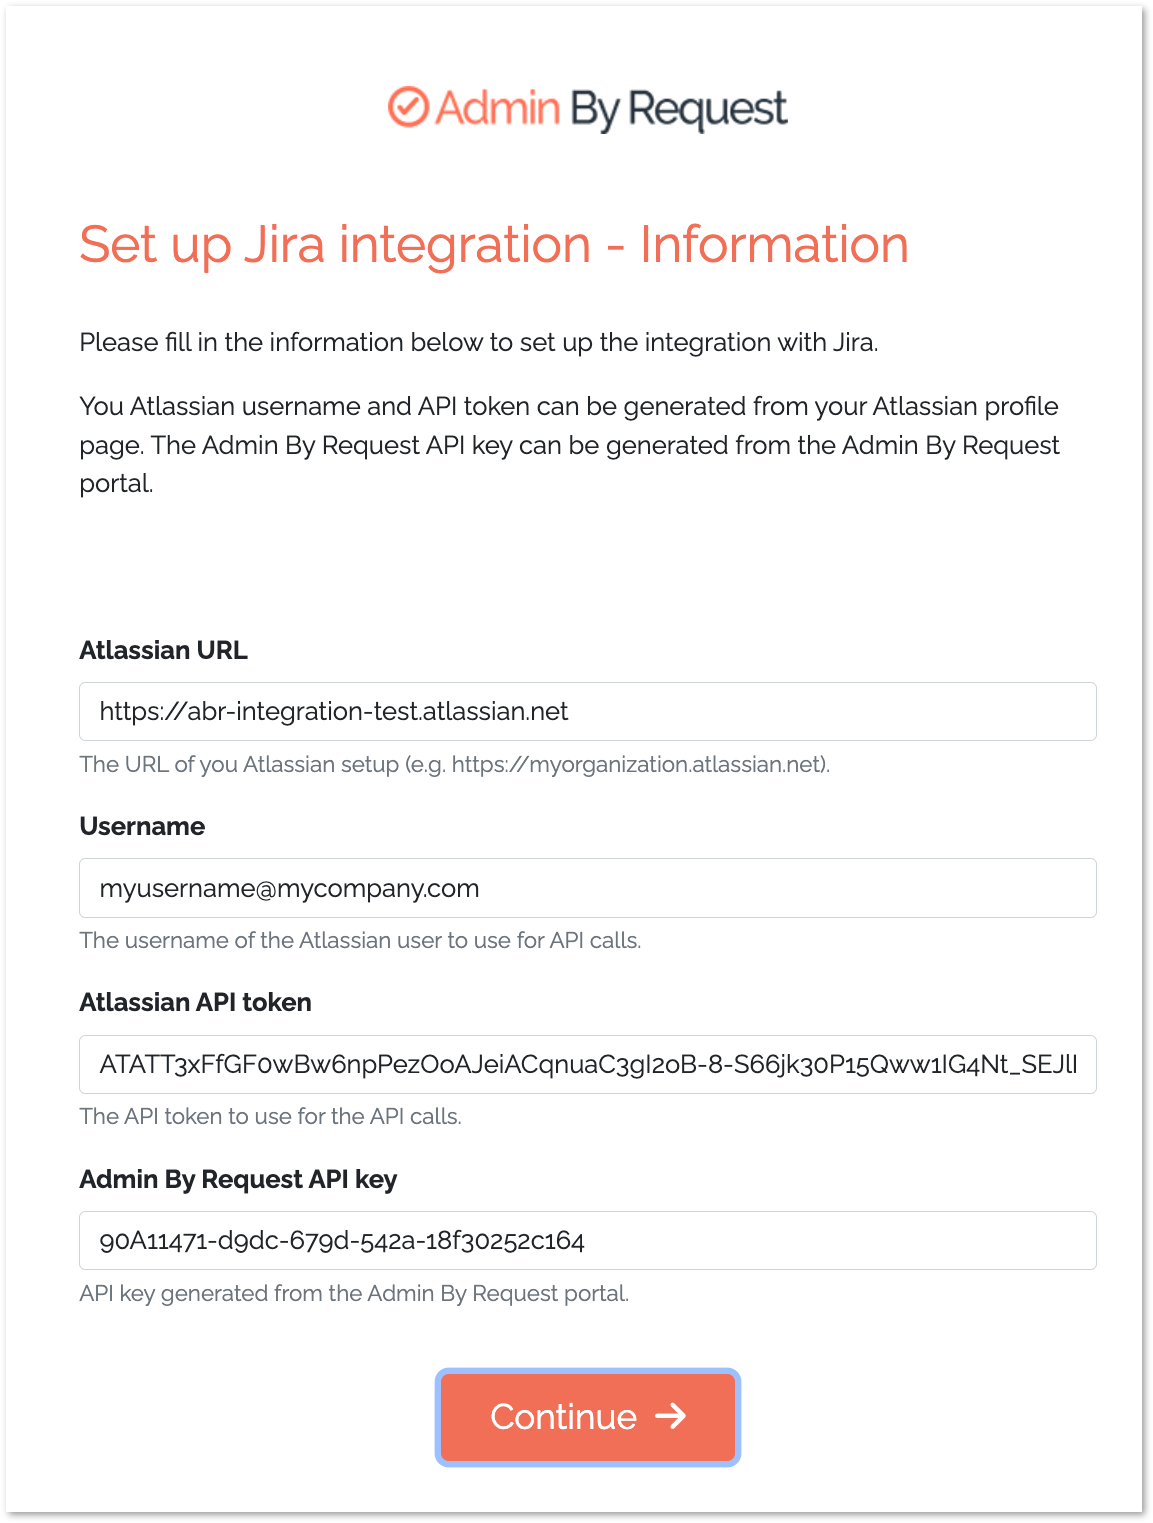 NOTE
NOTEYour username needs to be one that is authorized to make API calls. It is generally the email address recorded under your profile at the top right of the Jira Service Management screen:

-
Next, you are prompted to select the Jira service desk to associate with the integration:
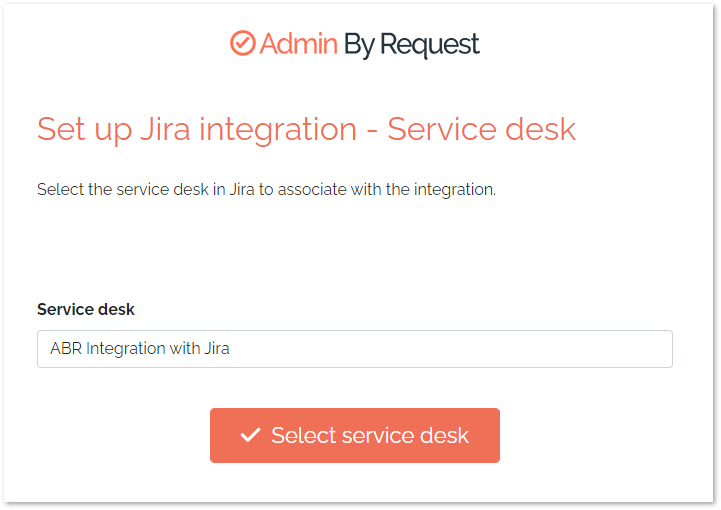
If you have more than one service desk project in Jira, a drop-down arrow will appear at the right of the Service desk field, allowing you to select the one you want.
-
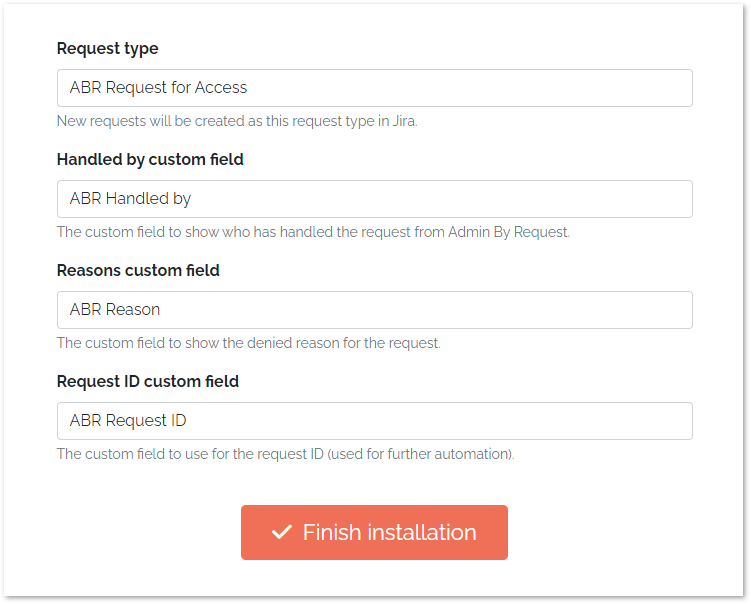
The final screen is where the custom fields you created are associated with the three required by the ABR integration. Request type is already selected for you - choose the other three to match your custom fields:
-
Click Finish installation to complete setting up the Jira integration.
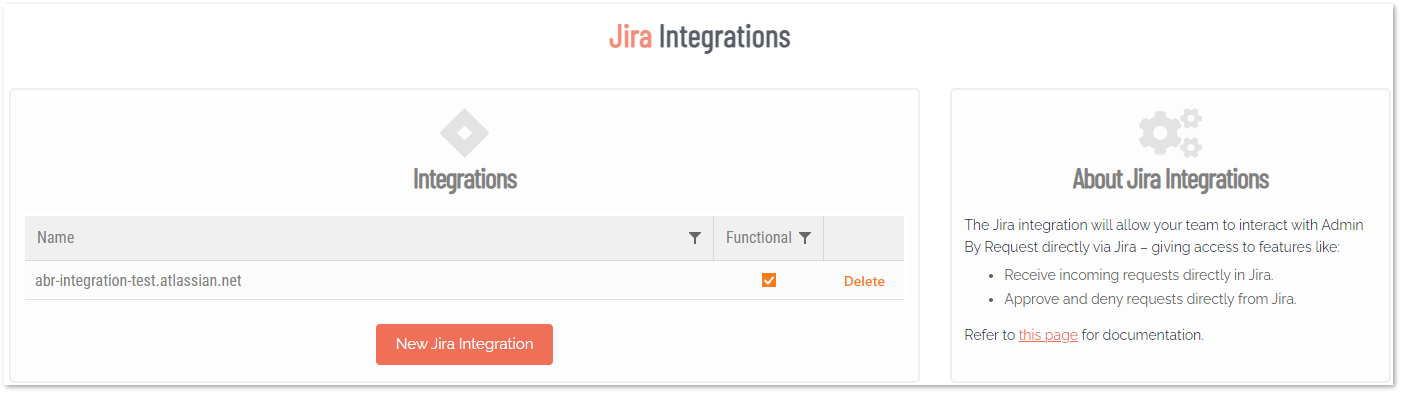
New requests from Admin By Request will now be sent to your Jira instance as service requests.
You can check the status of your Jira integration via the portal (Settings > Integrations > Jira):
Updating Jira issues
When a user makes a request via ABR for either an "Admin Session" or to execute something "Run As Admin", a Jira issue is created in your selected service desk instance.
It can take several minutes after the ABR request is submitted for the issue to be created in Jira.
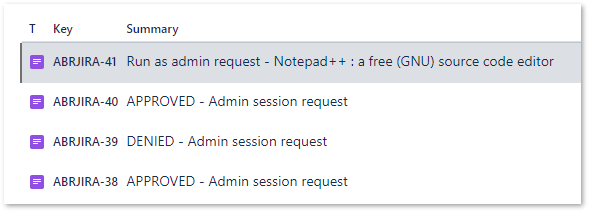
The Jira Summary indicates the type of request: Admin session or Run as admin. This field is updated once the request is either APPROVED or DENIED.
For example, the following list of issues shows one "Run as admin request" waiting for approval, two "Admin session" requests approved and one admin session denied:
What next?
The preceding sections cover the extent of the Admin By Request Jira integration. If you want to do more with Jira issues once they have been created, you can use Jira automation to populate issues with more information or to carry out actions such as email notifications.
The examples provided in the next section are for convenience only - we do not support any Jira automation rules and they must be used entirely at the customer's own risk.
If you do decide to work with Jira automation, note the following:
-
If you selected Service request as the Request Type (see 2. Creating a custom Request Type), you can use simple automation to interrogate the Summary field to carry out further actions (illustrated in Example 1 - Populating issue fields after issue creation).
-
If you selected Service request with Approval as the Request Type, you can use more advanced automation, as illustrated in Example 2 - Approving or Denying ABR Requests in Jira.
Creating Jira automation rules
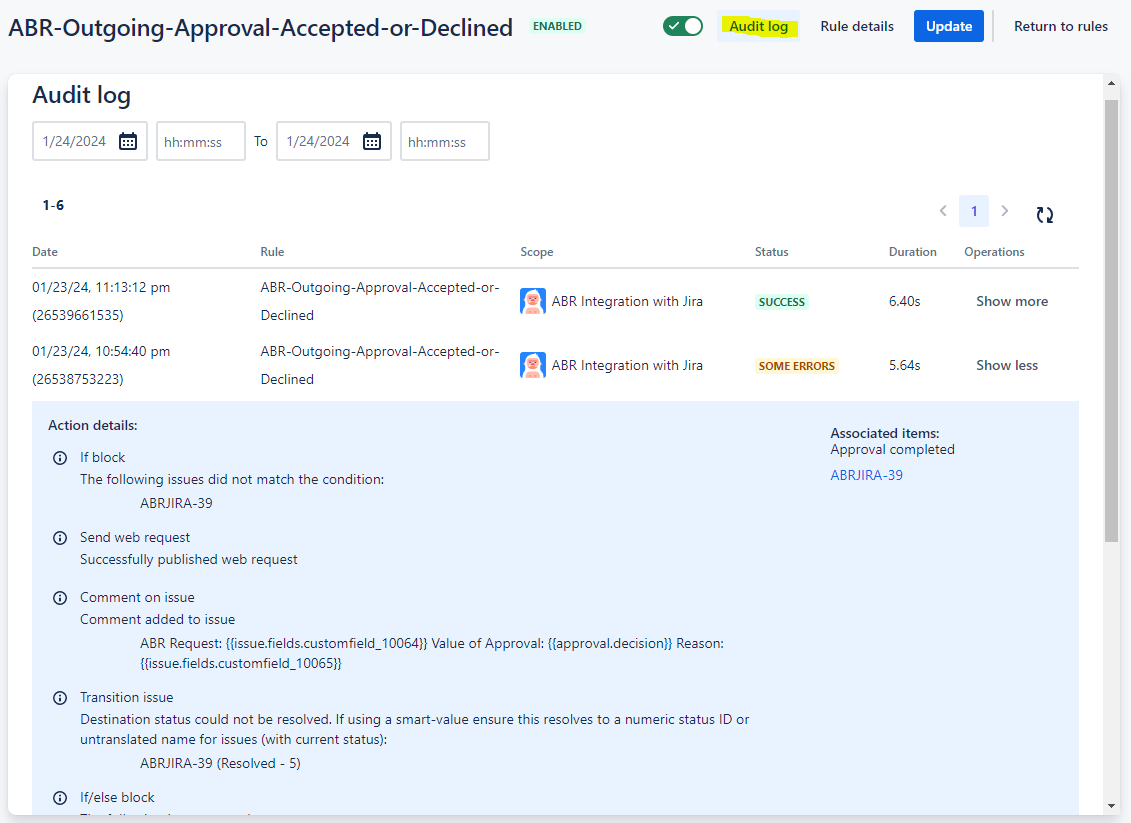
Using the Jira Audit log
The Jira Audit log is a very useful tool when working with Jira automation, especially as an aid in troubleshooting.
Each rule has its own Audit Log:
Linking back to the ABR Portal
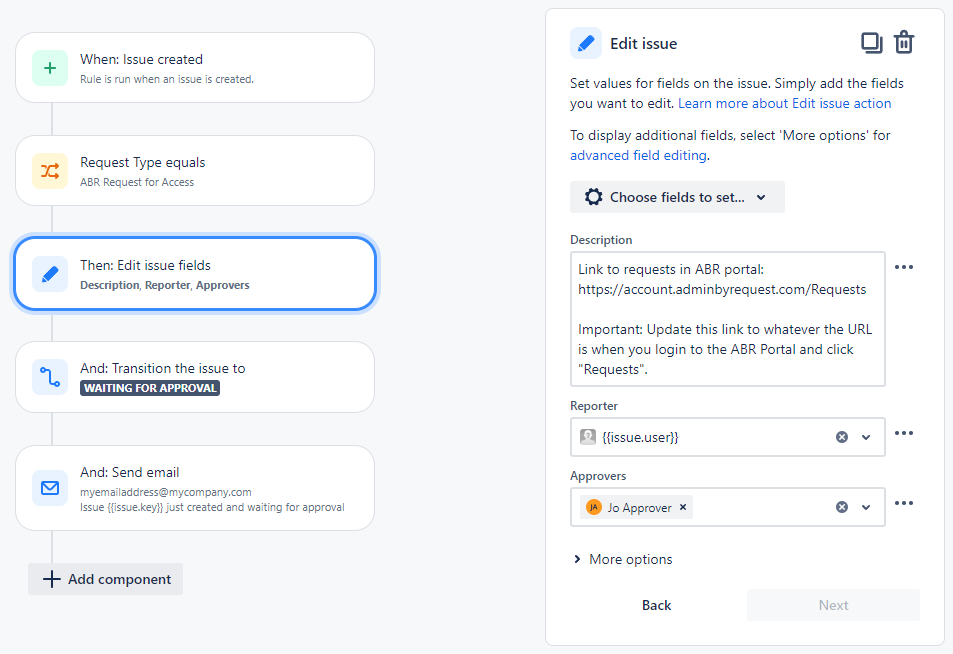
A future release of the Jira integration will almost certainly include a link back to the ABR Portal "Requests" page, from where requests can be approved or denied. Until this is available, Example 1 below provides a workaround that customers can implement using a Jira rule (Action 1 - set fields, Description).
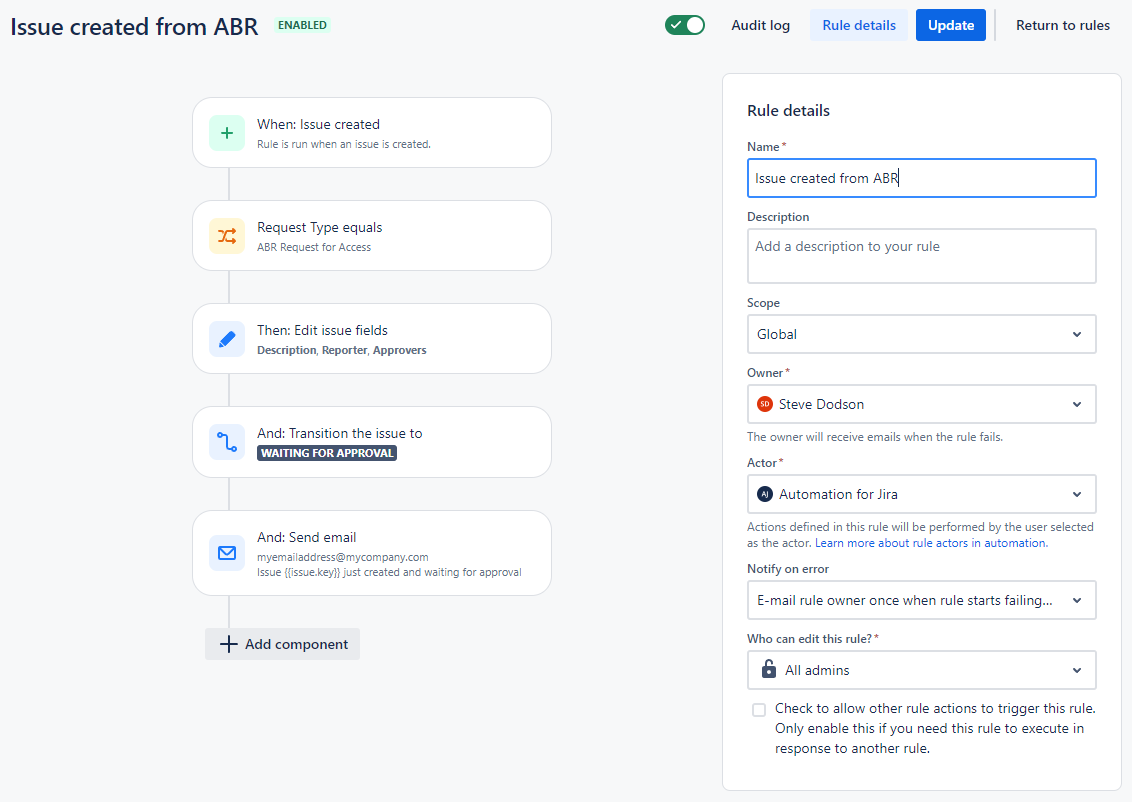
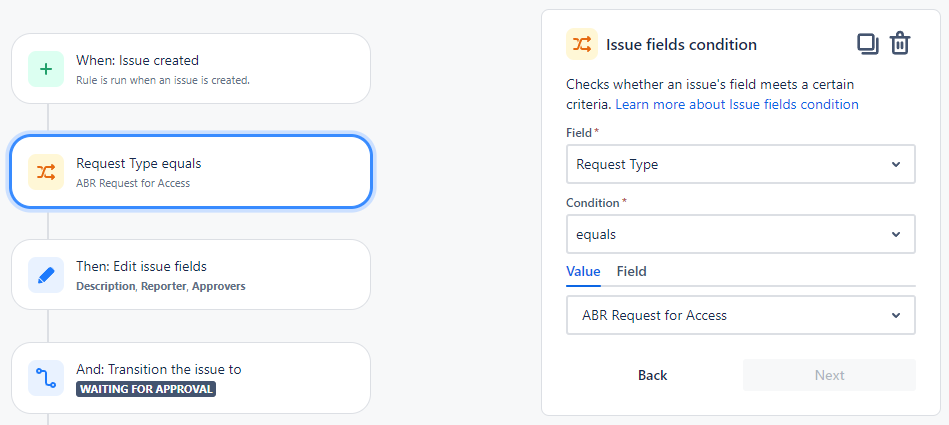
 Example 1 - Populating issue fields after issue creation
-
Trigger:
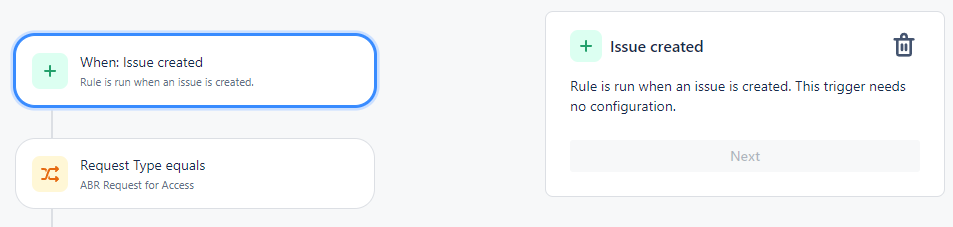
-
IF Request Type is ABR Request for Access:
-
Action 1 - set fields:
-
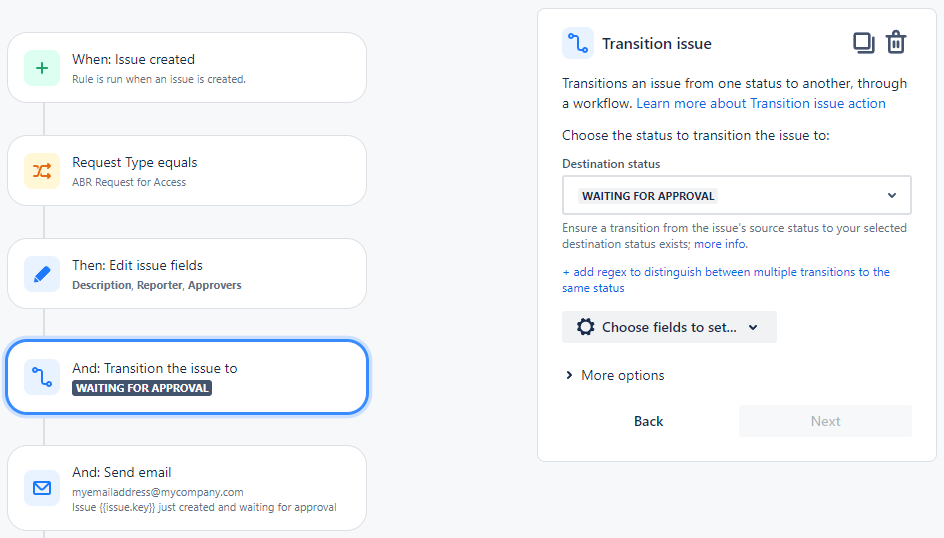
Action 2 - Set Status to Waiting for Approval (possibly optional, depending on workflow):
-
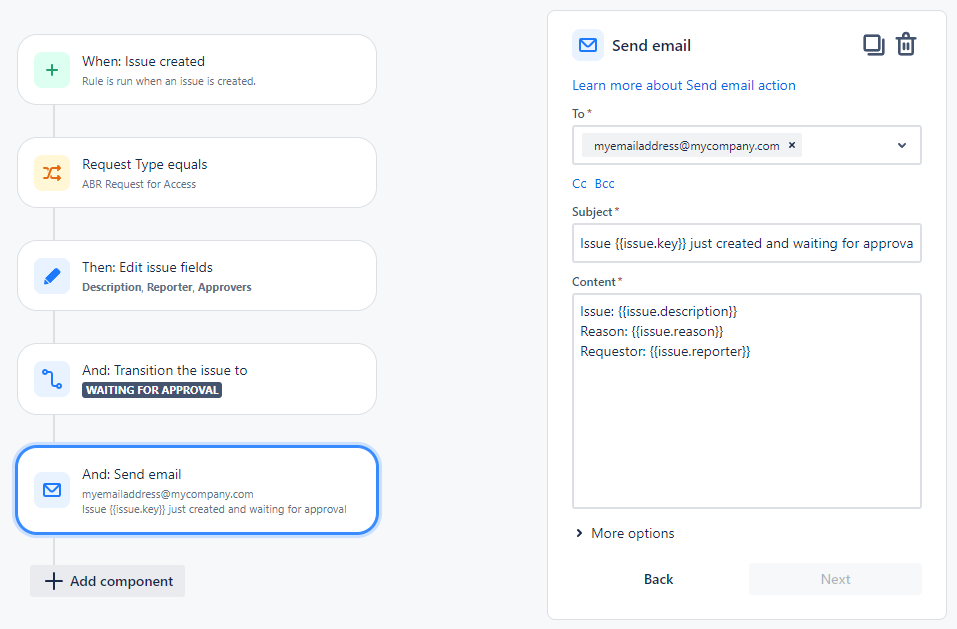
Action 3 - Send email:
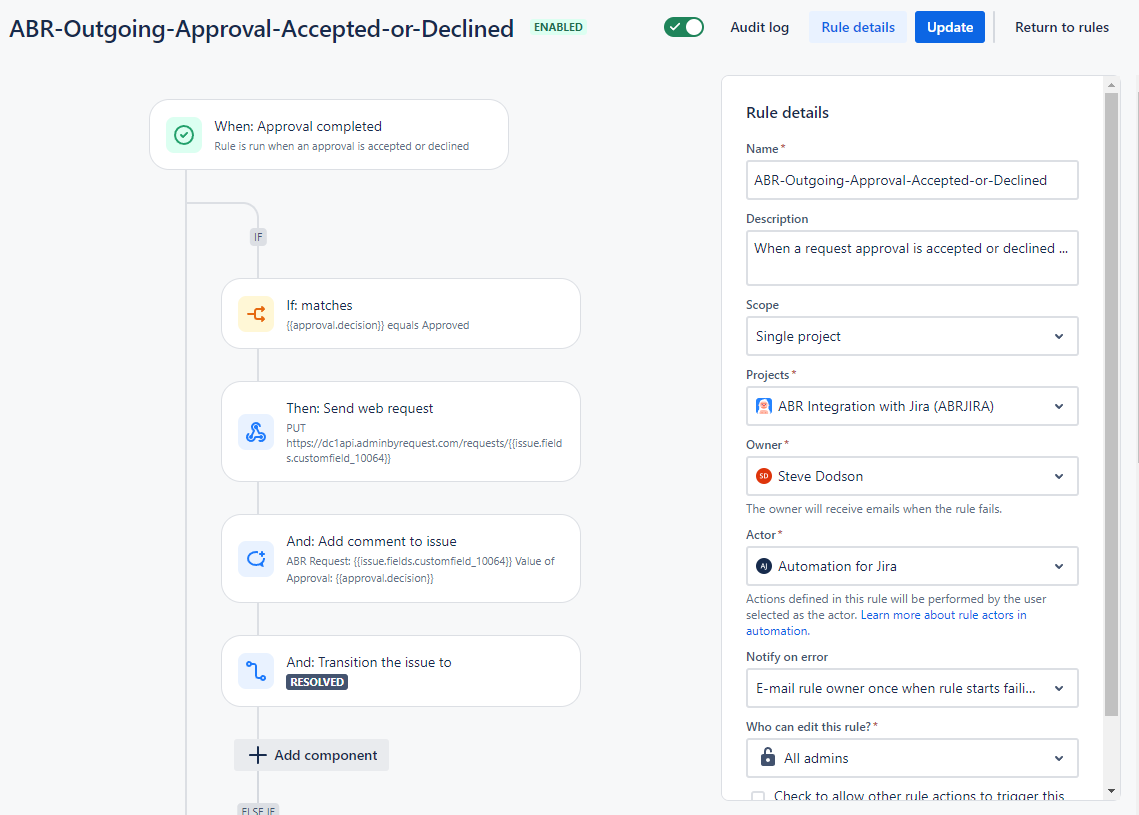
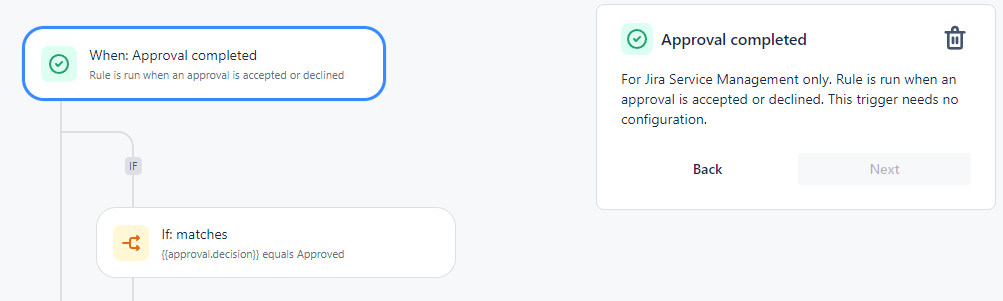
Example 2 - Approving or Denying ABR Requests in Jira
-
Trigger:
-
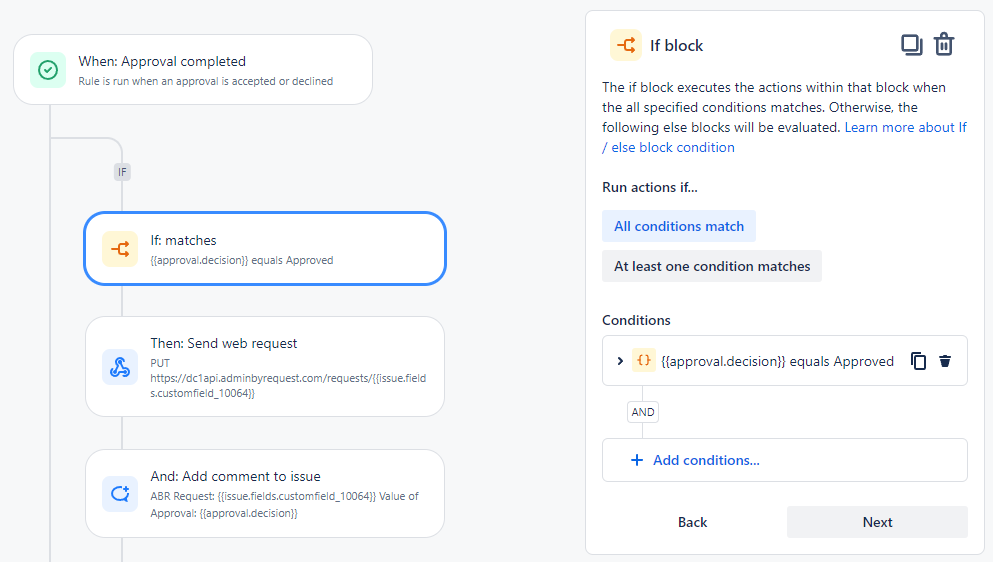
IF Approved:
-
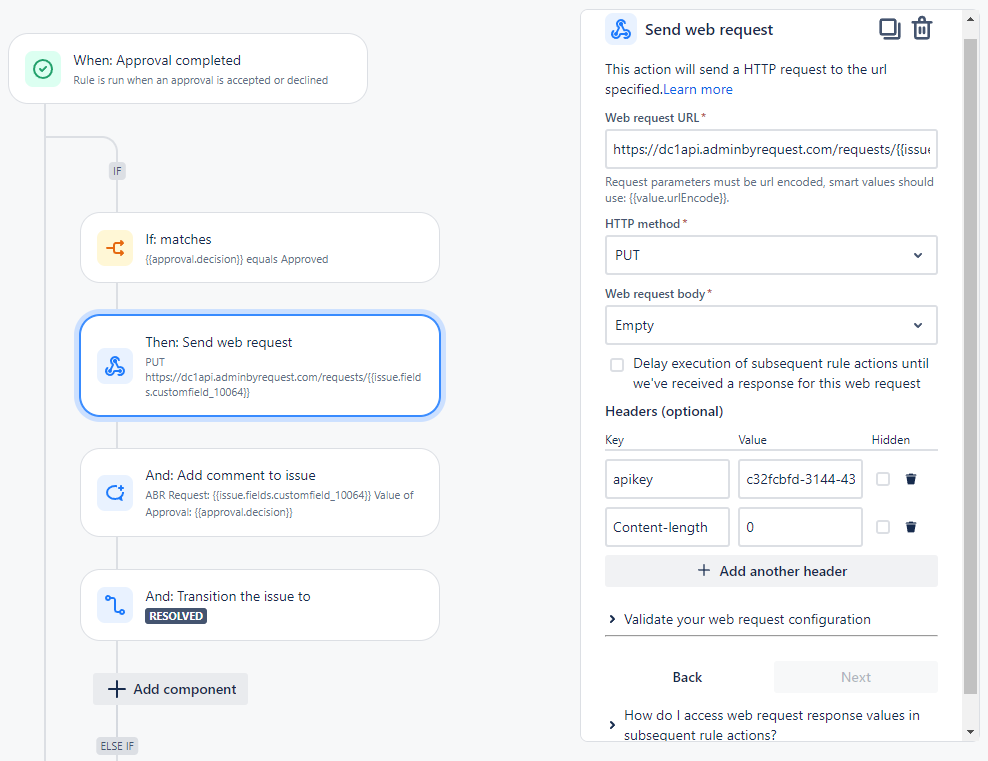
Action 1 - Send web request (PUT). Important - make sure you read up on API calls here (API Overview):
-
Action 2 - Add Comment to Jira issue (Important - make sure you identify the correct customfield ids - yours might be different from the example):
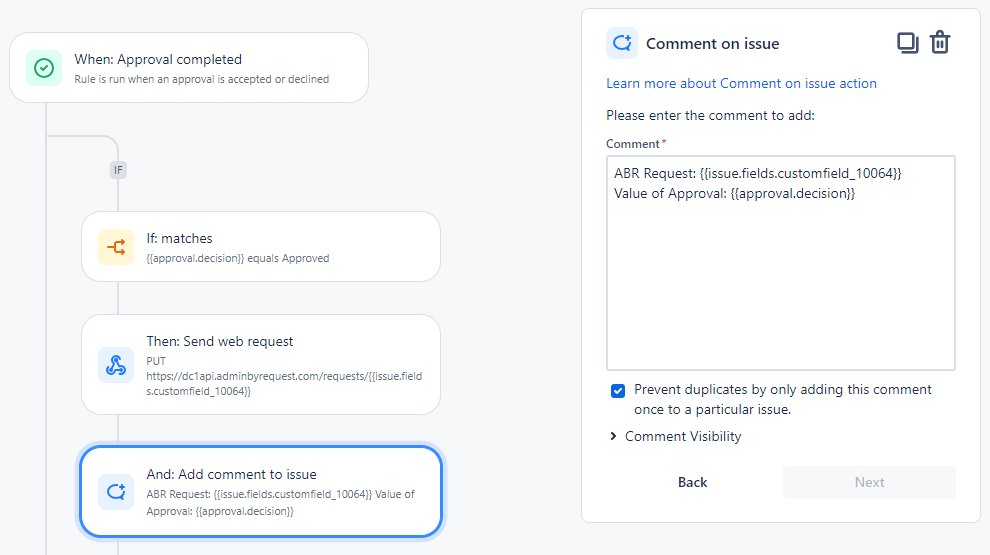
-
Action 3 - Set Status to Resolved:
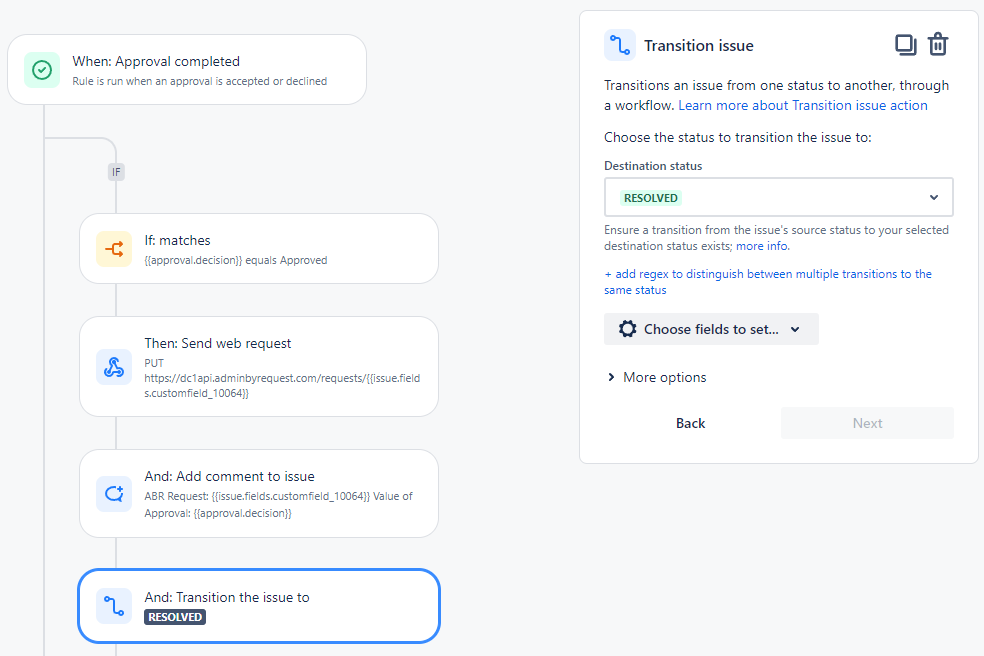
-
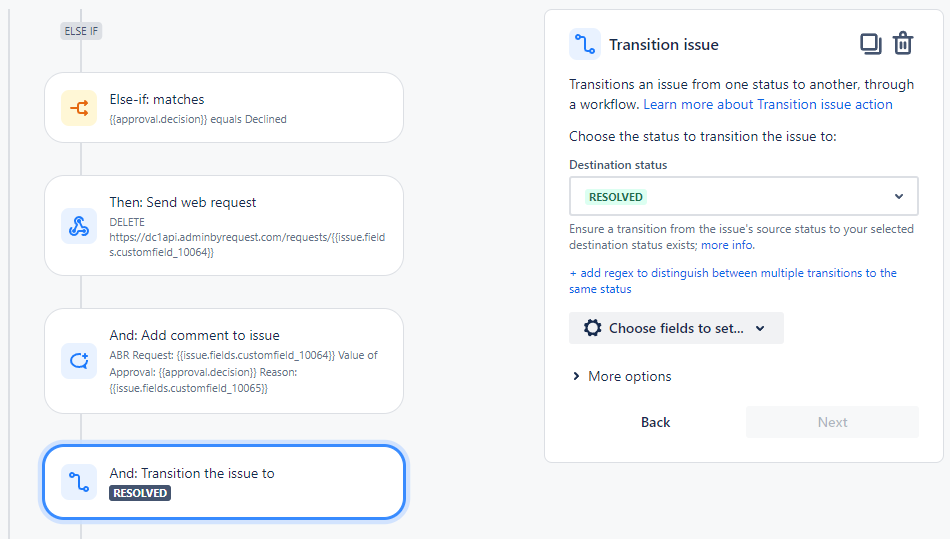
IF Declined:
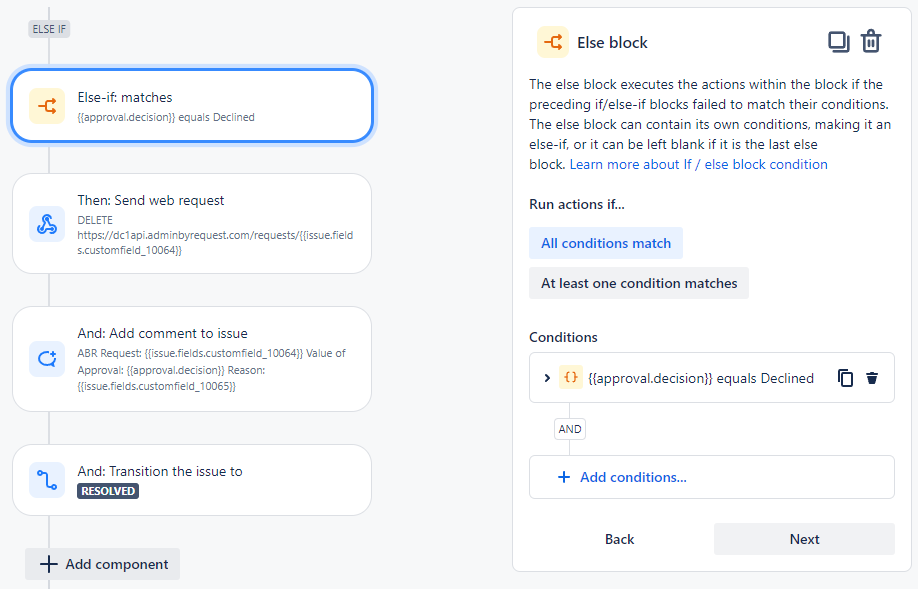
-
Action 1 - Send web request (DELETE). Important - make sure you read up on API calls here (API Overview) and here (Requests API):
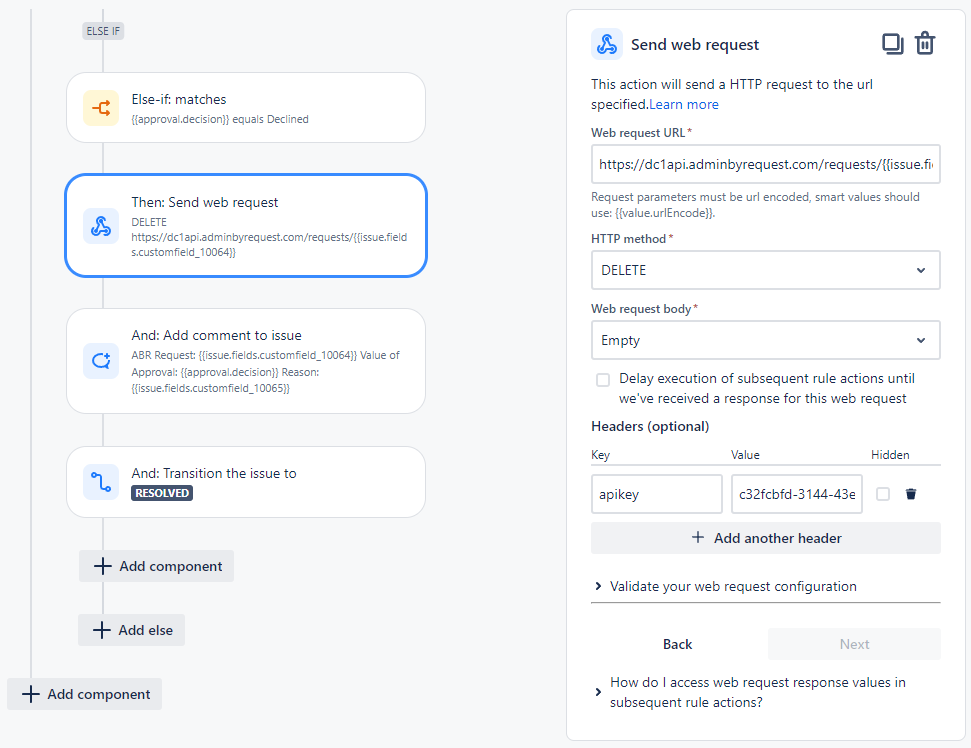
-
Action 2 - Add Comment to Jira issue (Important - make sure you identify the correct customfield ids as described in 1. Creating custom fields in Jira - even if your field names are the same as the example, your customfield ids might be different):
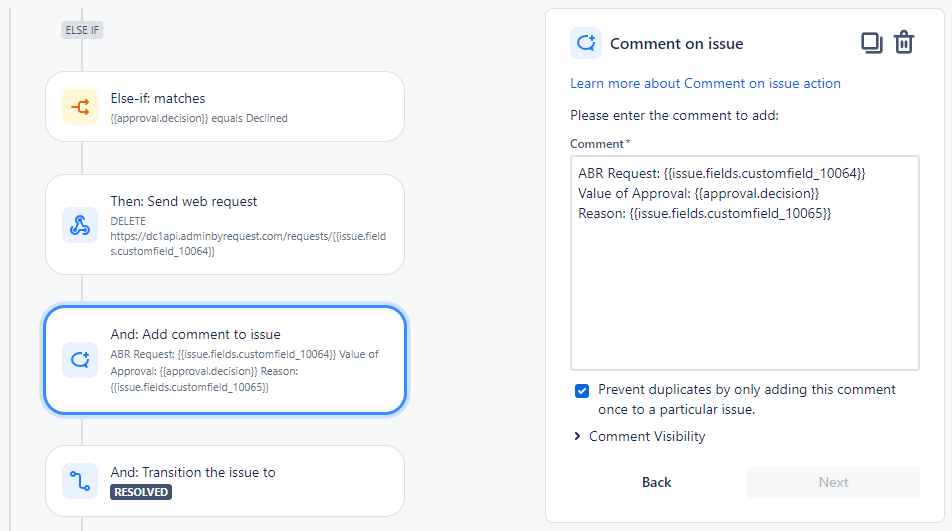
-
Action 3 - Set Status to Resolved: