Working with Intune
Introduction
Microsoft Intune supports a variety of app types and deployment scenarios on both Mac and Windows 10/11 devices. Some preparation is involved prior to installing via Intune, including configuring apps according to the Intune format (.intunewin).
Full details on preparation and configuration for Windows devices can be found at:
Windows 10/11 app deployment by using Microsoft Intune.
Further information on creating Mac profiles can be found at:
Create a device profile in Microsoft Intune.
This article describes the following:
-
How to prepare and add Admin By Request for Windows to an Intune package ready for deployment.
-
How to create an Intune Configuration Profile for a Mac.
Once packages and profiles are created and added to Intune, they can be deployed to users and devices.
Refer also to Updating Client Software for Large Enterprises.
In this article
How to add a Windows package
This guide outlines the full process for deploying Admin By Request Workstation via Microsoft Intune using the Win32 app packaging method.
Prerequisites
-
Devices must be Azure AD joined and Intune MDM-enrolled
-
Devices must be assigned to an AD group. The example below uses group ABR Installation Dep ("Dep" for deployment).
-
Users must be assigned an Intune-enabled license (e.g. EMS E3)
-
The Administrator must have permissions to create Win32 apps in Intune
-
The ABR MSI installer must be downloaded from the Admin By Request portal and must match your tenant
Identify the exact version of this installer by right-clicking and selecting Properties, then selecting the Details tab. The version is given in the Comments field (e.g. 8.5.1.0).
Procedure
-
 Download and Convert the ABR Installer
-
If you haven't already, login to your ABR portal and download the latest ABR MSI installer file for Windows Workstation Endpoints.
-
Create a local folder (e.g. C:\ABRInstall) and copy or move the downloaded MSI file there.
-
Download the Microsoft Win32 Content Prep Tool (IntuneWinAppUtil.exe) and place it in the same folder.
-
From the folder, open PowerShell as Administrator and run the following (assuming folder is C:\ABRInstall and downloaded MSI file is Admin By Request 8.5 Workstation.msi):
Copy.\IntuneWinAppUtil.exe -c "C:\ABRInstall" -s "Admin By Request 8.5 Workstation.msi" -o "C:\ABRInstall"IMPORTANTThe code snippet is all one line. Use the Copy button in the top right corner of the code box to copy the code to the clipboard.
If successful, this generates a file named Admin By Request 8.5 Workstation.intunewin in the same folder.
Common issues:
-
Make sure you are running PowerShell as Administrator.
-
Make sure the command is entered as one line in PowerShell.
-
If you get an error message "The folder you specified cannot be accessed", make sure the -c parameter in the command points to the folder and not the MSI file.
-
-
-
Add the App in Intune
-
Login to your Intune Admin Center and go to Apps > Windows and click Add.
-
Select Windows app (Win32) and upload your new .intunewin file (in this example, Admin By Request 8.5 Workstation.intunewin).
-
Add the details required in the following tabs:
- App Information
- Program
- Requirements
- Detection rules
- Dependencies
- Supercedence
- Assignments
- Review

-
Name: Admin By Request Workstation
-
Description: Admin By Request Workstation
-
Publisher: Admin By Request
-
App Version: 8.5.1.0 (must match version identified from Prerequisites)
Leave other fields as is.
-
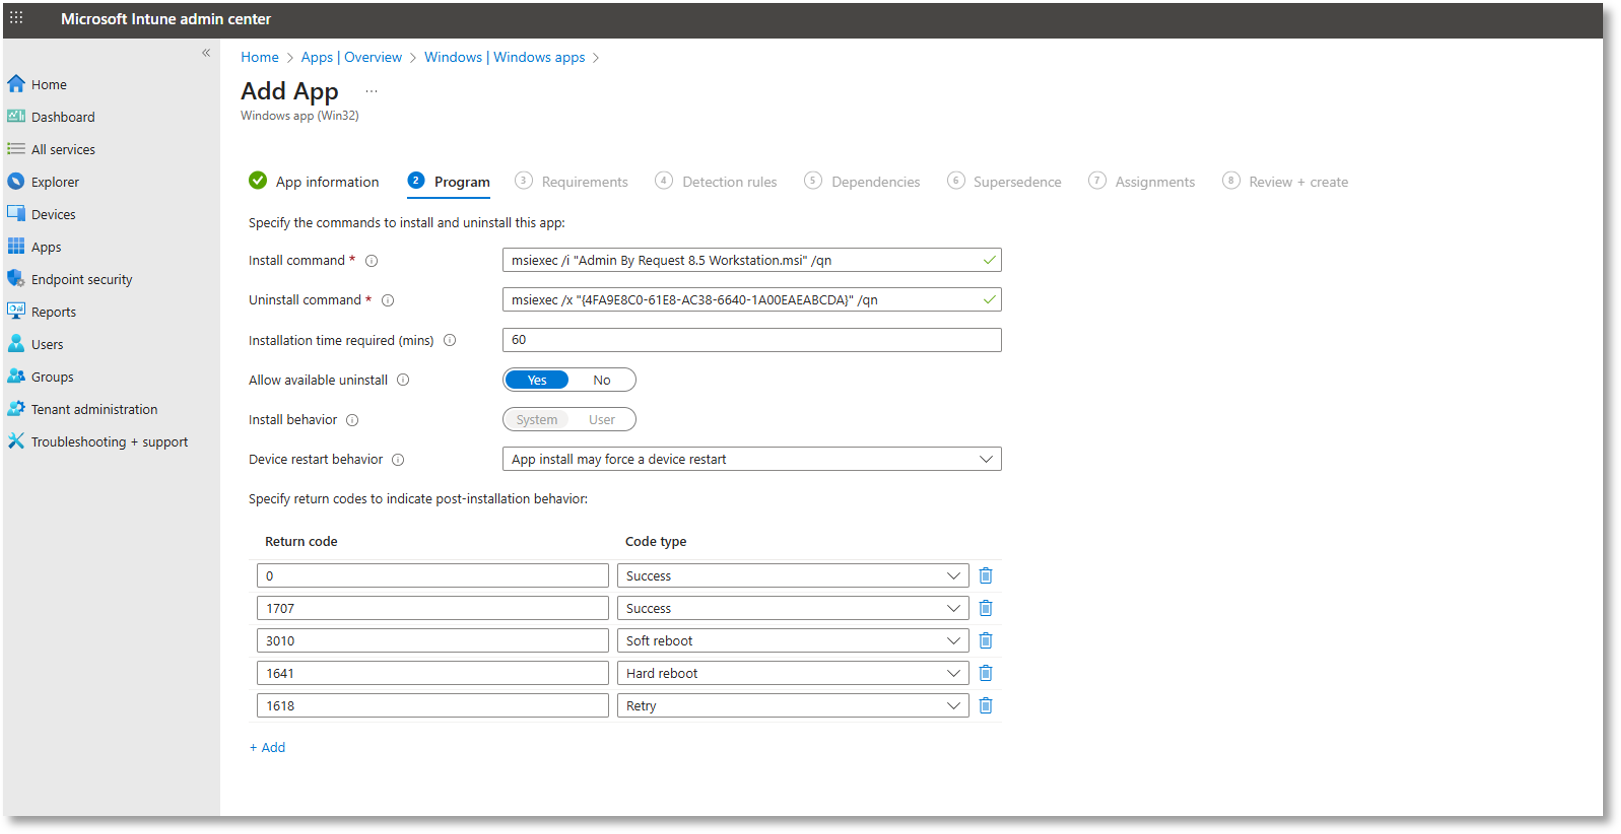
Install command: msiexec /i "Admin By Request 8.5 Workstation.msi" /qn
-
Uninstall command: msiexec /x "{ProductCode}" /qn
-
Install behavior: System
-
Restart command: App install may force restart
To get the ProductCode and other properties for your MSI installation file, start a PowerShell session and run the following script:
Copy$msiPath = "[Path_To_File]\Admin By Request 8.5 Workstation.msi"
$properties = @("ProductCode", "ProductName", "ProductVersion", "Manufacturer", "UpgradeCode")
$installer = New-Object -ComObject WindowsInstaller.Installer
$database = $installer.GetType().InvokeMember("OpenDatabase", "InvokeMethod", $null, $installer, @($msiPath, 0))
foreach ($prop in $properties) {
$view = $database.OpenView("SELECT Value FROM Property WHERE Property = '$prop'")
$view.Execute()
$record = $view.Fetch()
if ($record) {
"{0} = {1}" -f $prop, $record.StringData(1)
} else {
"{0} = (not found)" -f $prop
}
}If Admin By Request is already installed on the endpoint, you can run a simpler command (where ProductCode is returned in MSIProductId):
CopyGet-ItemProperty -Path 'HKLM:\SOFTWARE\FastTrack Software\Admin By Request' -Name MSIProductId
-
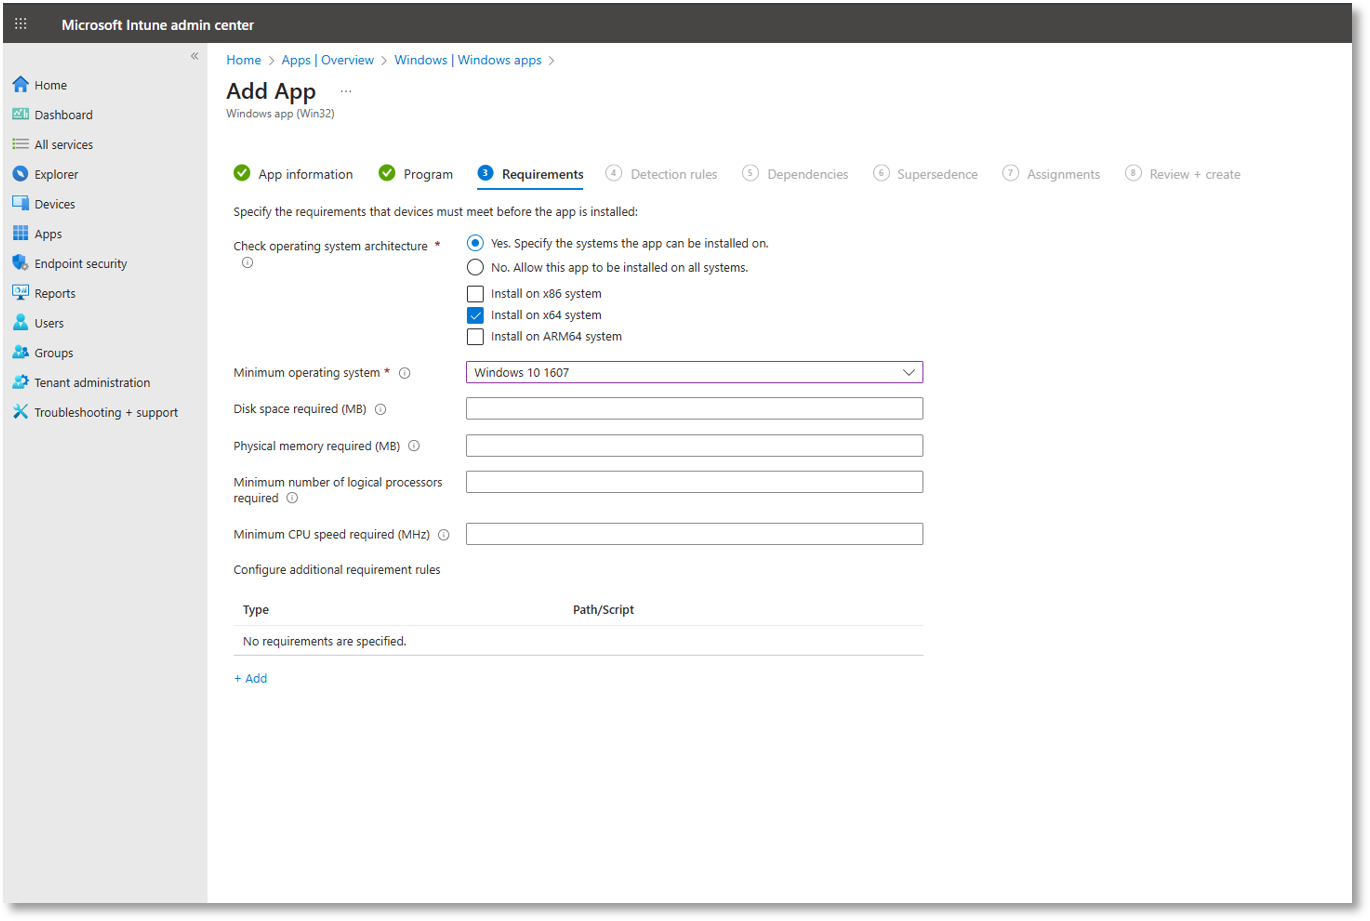
Operating System Architecture: x64
-
Minimum OS: Windows 10 1607
-
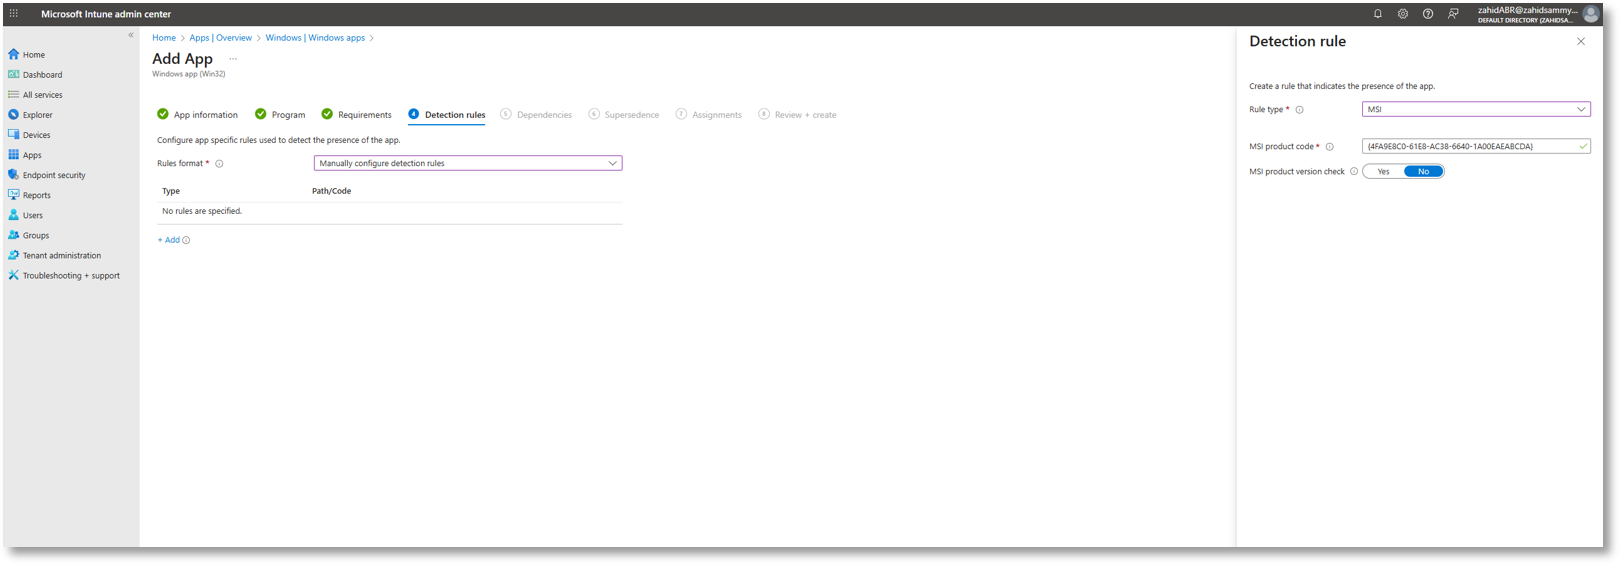
Rules format: Manually configure detection rules
-
Rule type: MSI
-
MSI Product Code: {ProductCode}
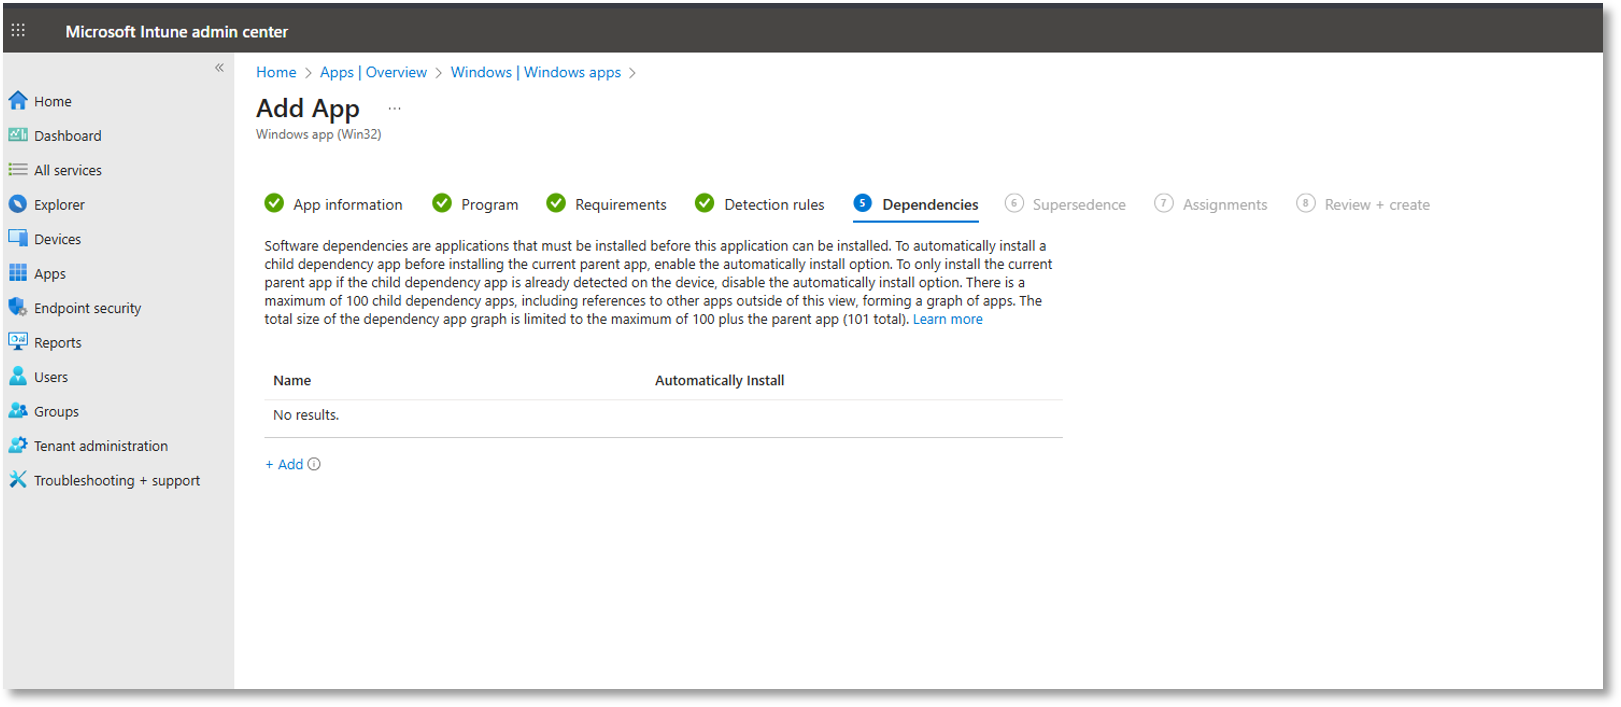
Leave empty. Information is required only if ABR depends on another Win32 app.
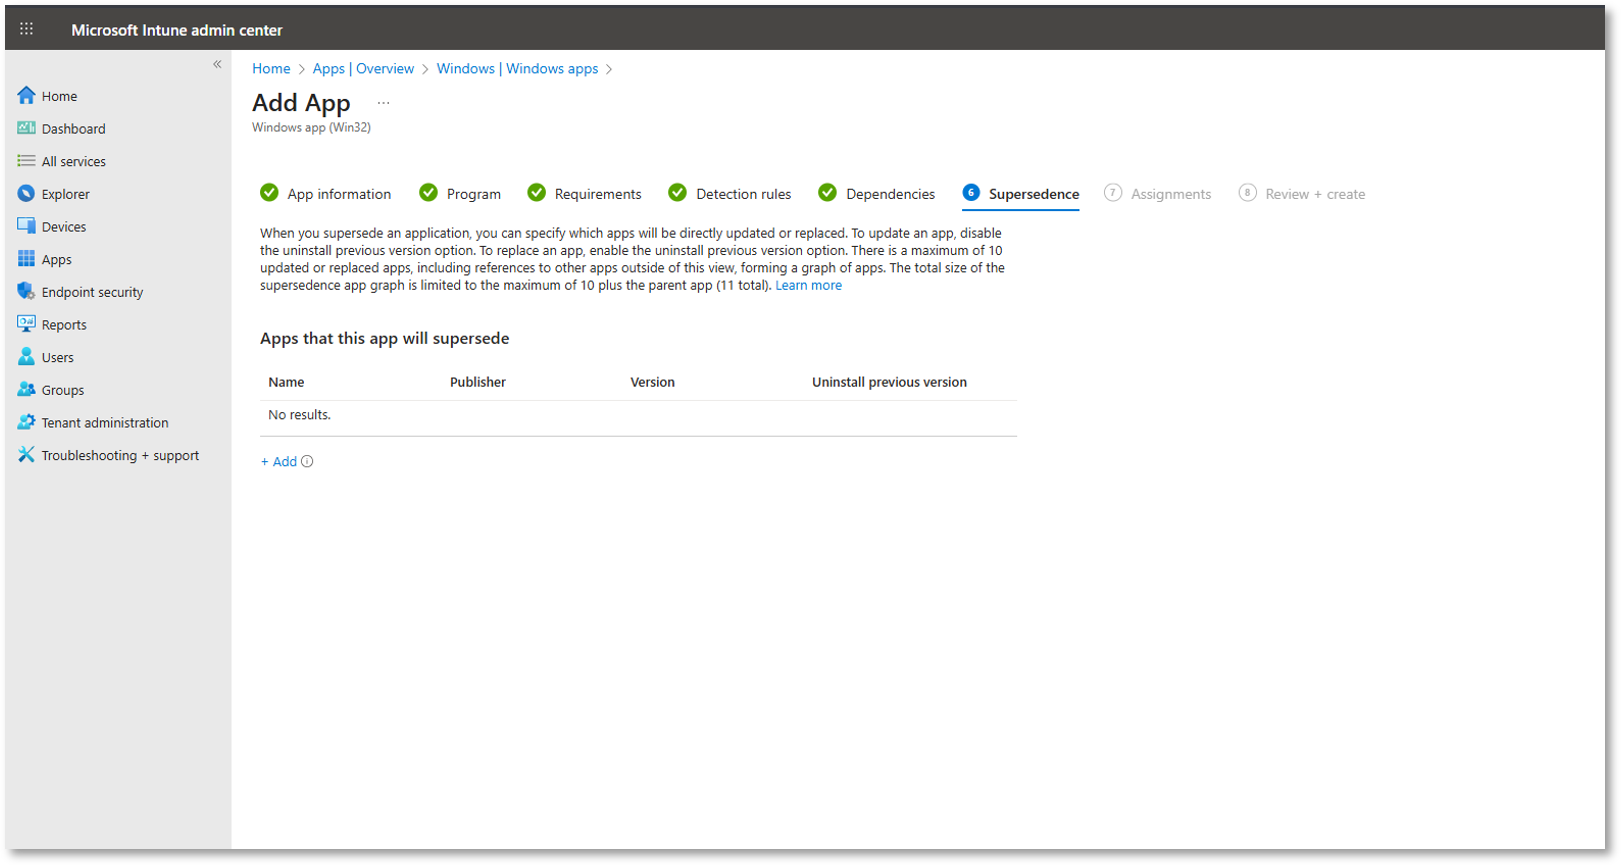
Leave empty.

In the Required section, click + Add group to assign the app to the appropriate device group.
In this example, the app is assigned to group ABR Installation Dep.
You can also add the group under section Available for enrolled devices if manual install via Company Portal is preferred.

Review all selections and choices, then click Create.
-
-
Monitor Deployment
-
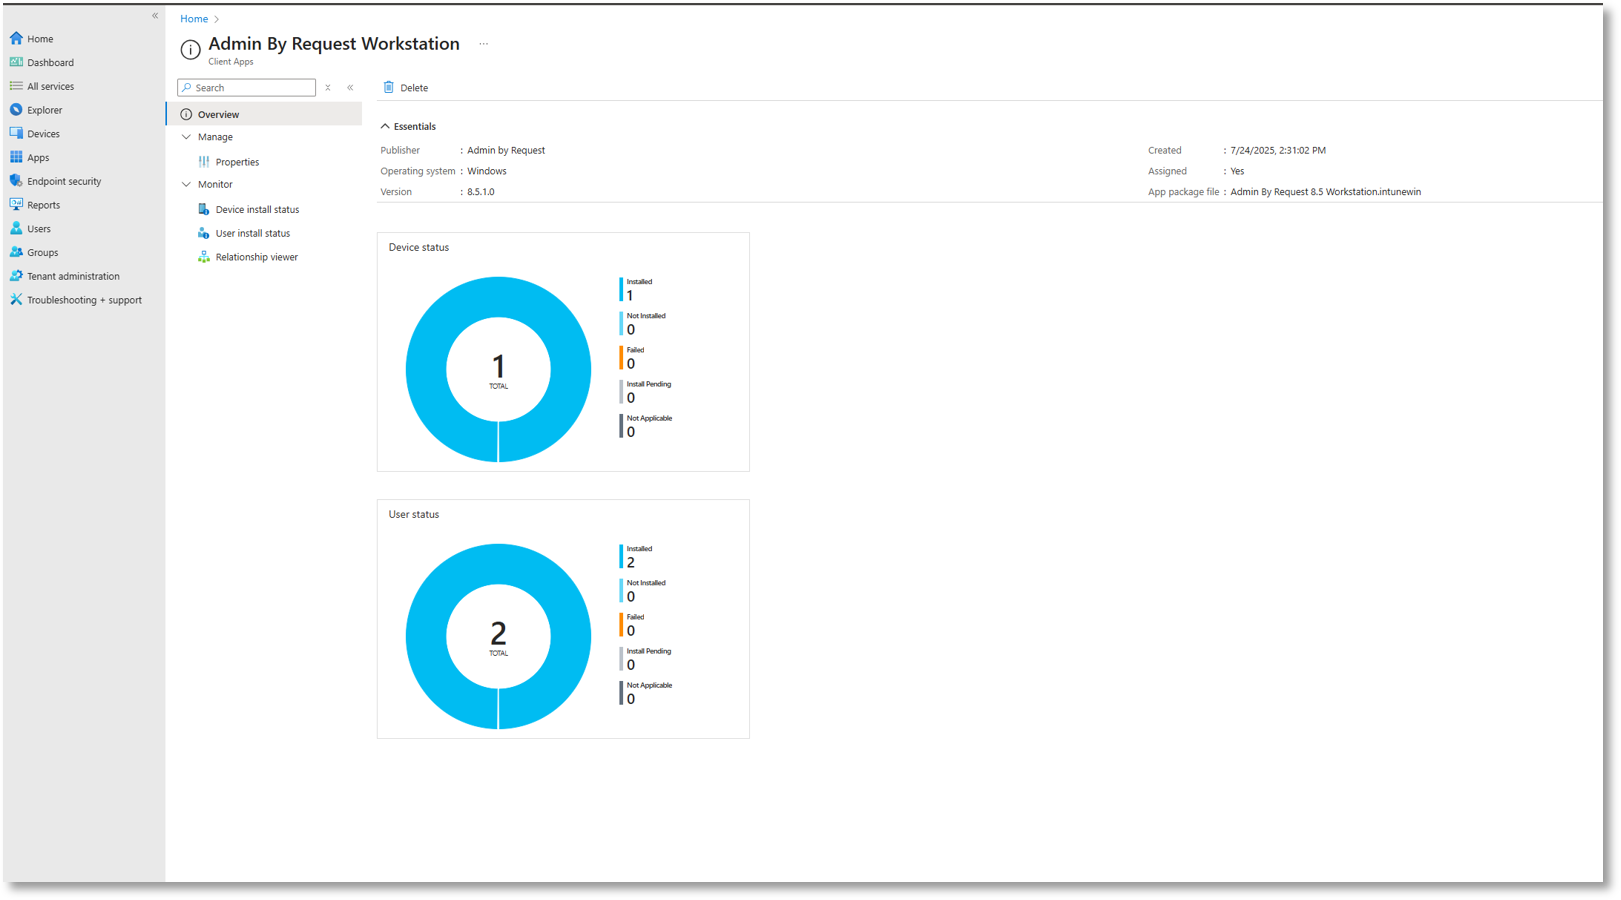
In the Microsoft Intune Admin Center, go to Devices > [Device Name] > Managed Apps.
-
Check the Status of devices (should indicate Installed):
-
On an installed endpoint, confirm the following:
-
Folder C:\Program Files (x86)\FastTrack Software\Admin By Request exists
-
In Task Manager, AdminByRequest.exe is running
-
Logs in Event Viewer > Application (MSI Installer) show expected entries for successful installation
The Intune Client Apps Overview may not instantly reflect install status - use device-level status for reliable results.
-
-
Outcome
Admin By Request is successfully deployed across all targeted devices silently via Microsoft Intune. No end-user interaction is required.
Test the Installation on Random Endpoints
Testing the installation involves a quick connection check:
-
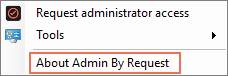
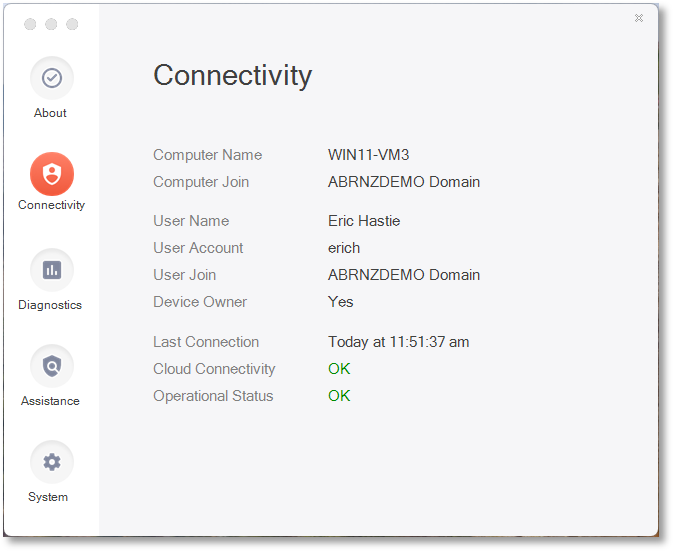
On an endpoint with Admin By Request installed, launch the application by selecting it from the system tray and clicking About Admin By Request:
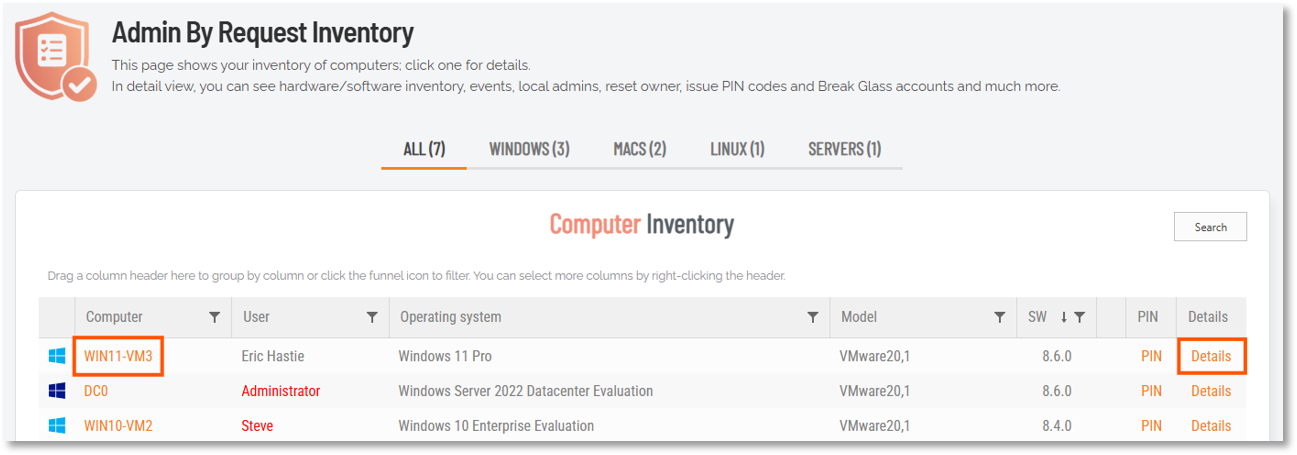
As a further test, you might also want to check the inventory in the portal, to review the details that are now being logged for this endpoint:
-
From the portal top menu, select Inventory.
-
Locate the endpoint and click either the computer name link or the Details link:
How to create a Mac configuration profile
This procedure was developed for earlier versions of macOS and ABR and some steps are inaccurate for later versions. The procedure is currently being rewritten.
In the meantime, when following the steps here, please refer also to:
-
ABR - Installing Admin By Request on macOS (Multiple endpoint installation)
-
Microsoft - Create a device configuration profile in Microsoft Intune
-
In Intune, under Configuration Profiles, select Create Profile.
-
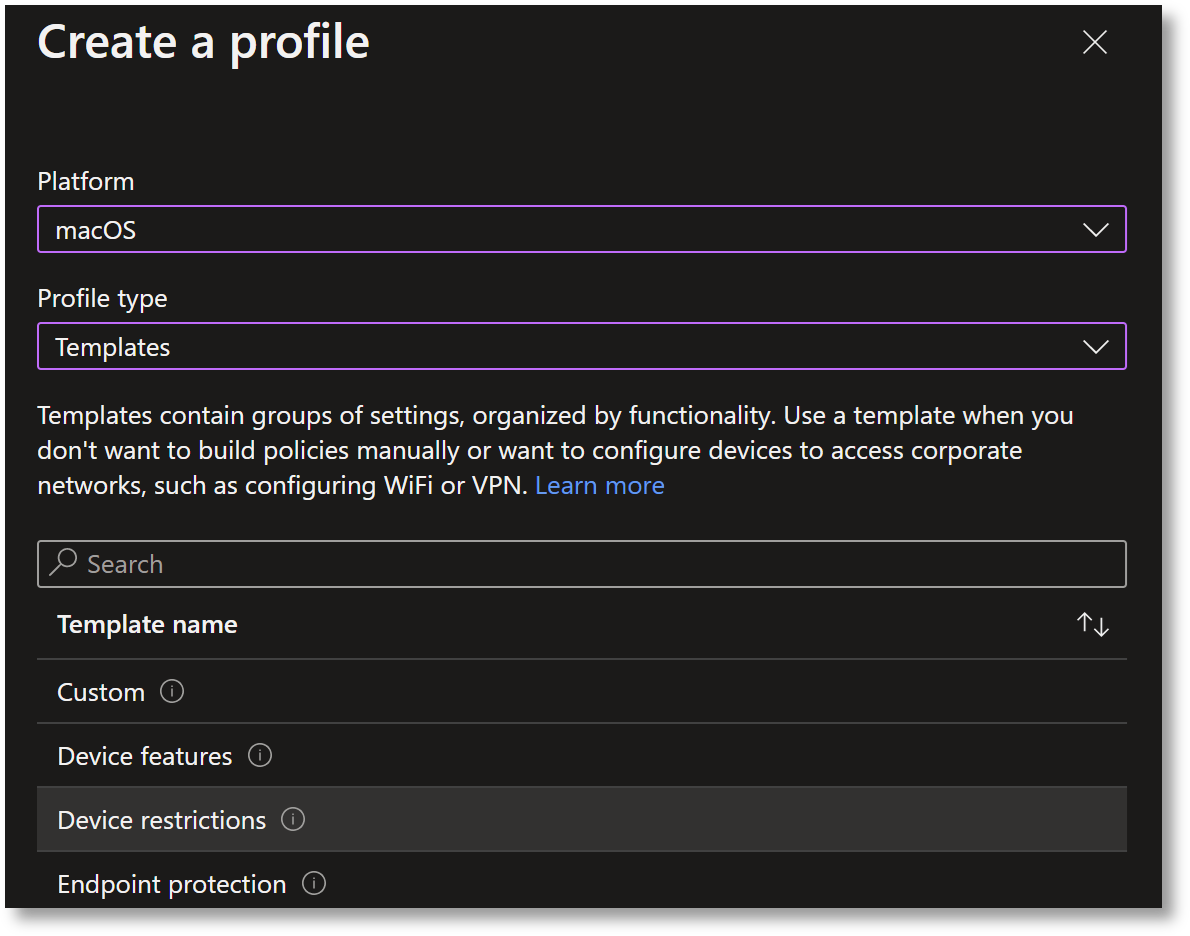
Enter the following details into the Create a Profile form:
-
Platform: macOS
-
Profile type: Templates
-
Template name: ABR – FDA
-
-
Click Create.
-
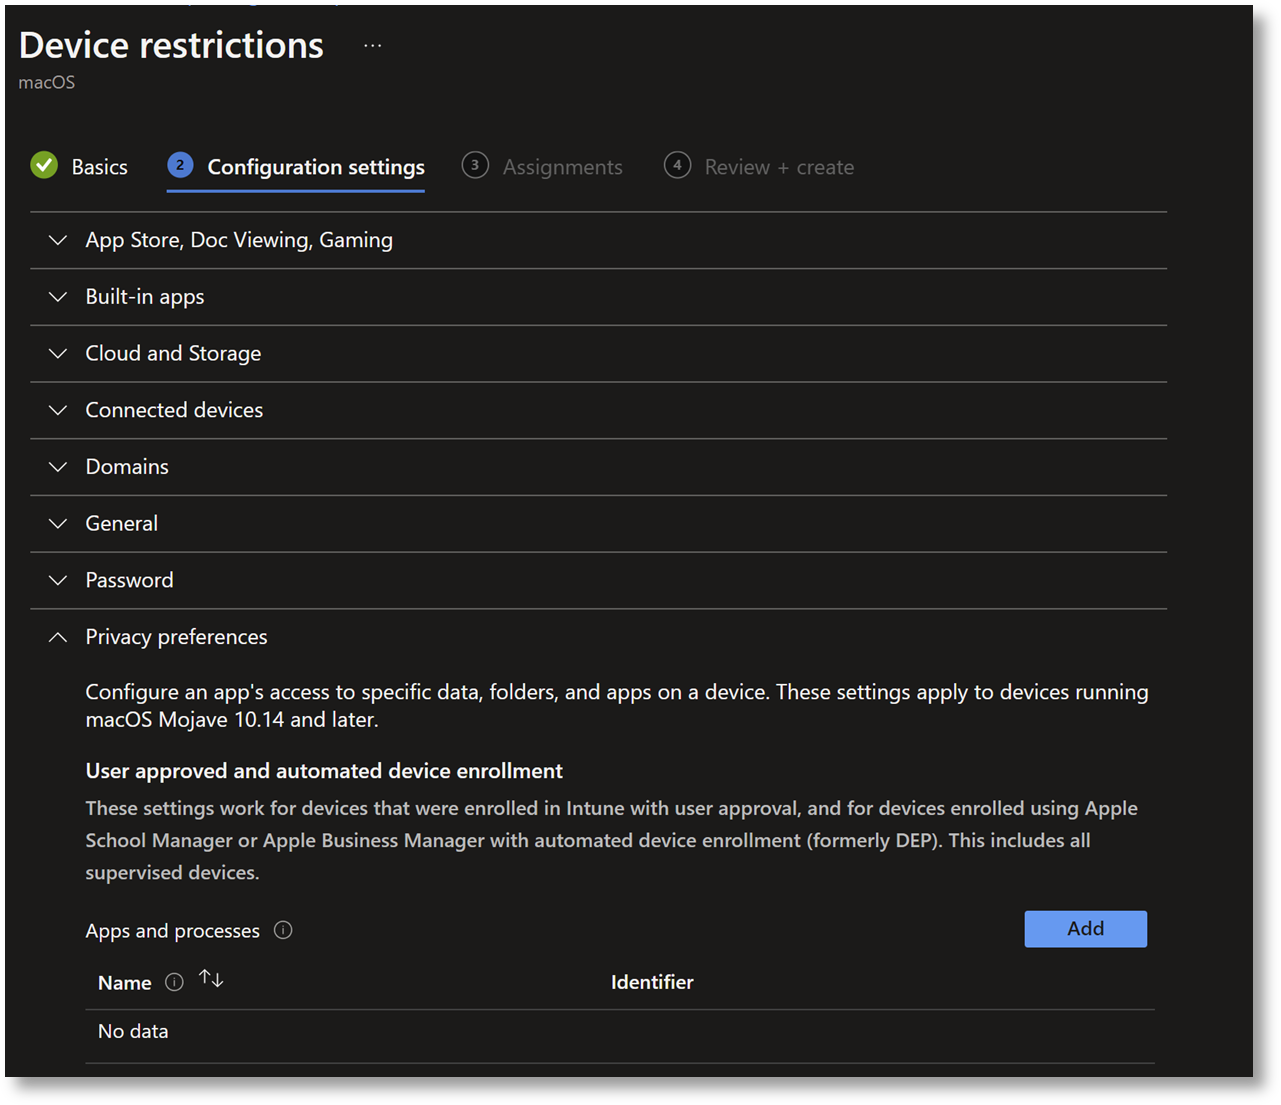
Under Device restrictions, go to Configuration settings.
-
Select Privacy preferences and click Add:
-
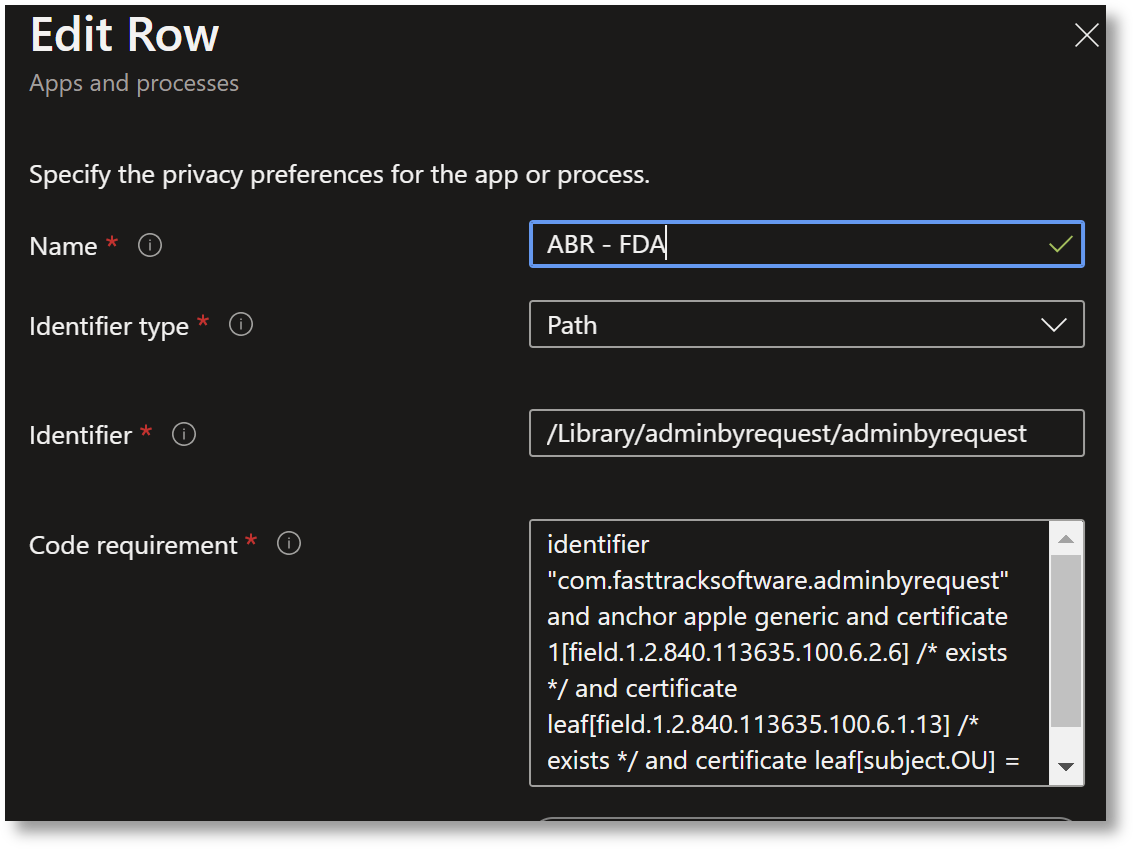
In the Edit Row form, enter the following:
-
Name: ABR – FDA
-
Identifier type: Path
-
Identifier: /Library/adminbyrequest/adminbyrequest
-
For Code Requirement, enter the following line of code:
Copyidentifier "com.fasttracksoftware.adminbyrequest" and anchor apple generic and certificate 1[field.1.2.840.113635.100.6.2.6] /* exists */ and certificate leaf[field.1.2.840.113635.100.6.1.13] /* exists */ and certificate leaf[subject.OU] = AU2ALARPUPIMPORTANTThe code snippet is all one line. Use the Copy button in the top right corner of the code box to copy the code to the clipboard.
-
-
Finally, select Allow in field Full disk access:

The completed form: