API Overview
Public API
We offer a free REST API as part of your licensing. You can use the API to get your data into your SIEM (security information and event management) system, such as Splunk or Power BI. Alternatively, you can offload the data into your own backend or integrate seamlessly into your ticketing system. You can read all data you can see in the portal and approve or deny requests through the API.
Pull (API) versus Push (Webhooks)
There are two ways for getting your data from Admin By Request into an external system. The most typical way to get data is for you to call our public API in interval to download data (pull from your side). You can also subscribe to webhooks (push from our side).
About the API
Authentication
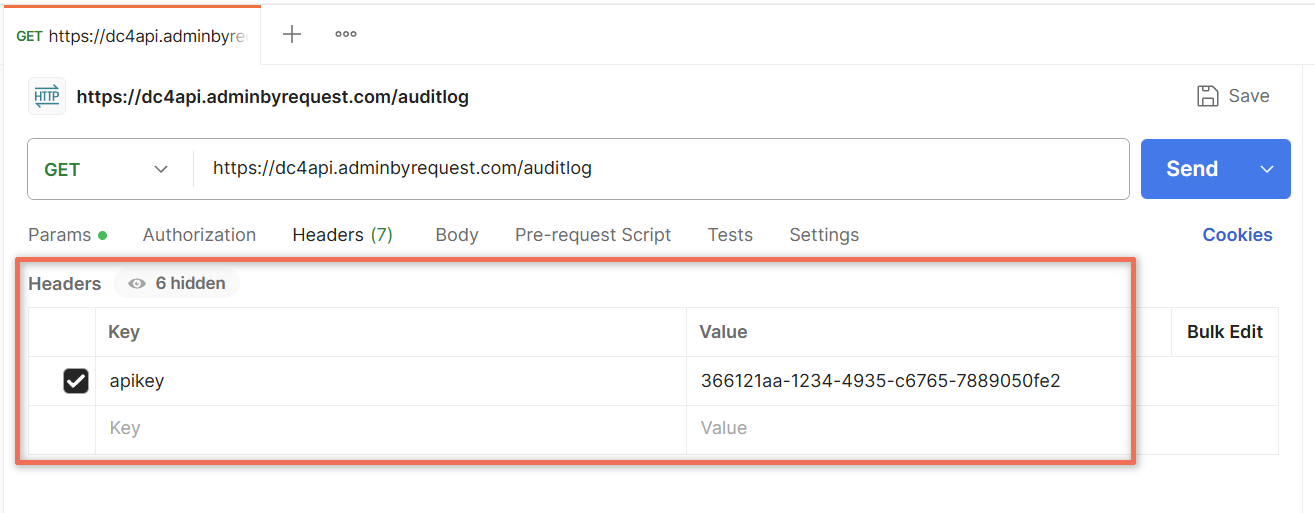
All requests against the API must be authenticated via your API key. Send the key as a header field named "apikey" as shown in this image:
Quota
To prevent the Admin By Request API from being flooded with requests, a daily quota of 100,000 API calls is in place. If your tenant exceeds this quota, it will automatically be blocked from accessing the API until the next business day.
Data Centers
In order to interact with the API, you need to know which data center your tenant is using. The API URL of the data center determines the prefix you need for constructing the URL with which you call the API.
Go to Settings > Tenant Settings > Data > API Keys in the portal and check which API prefix is shown under About API Keys:
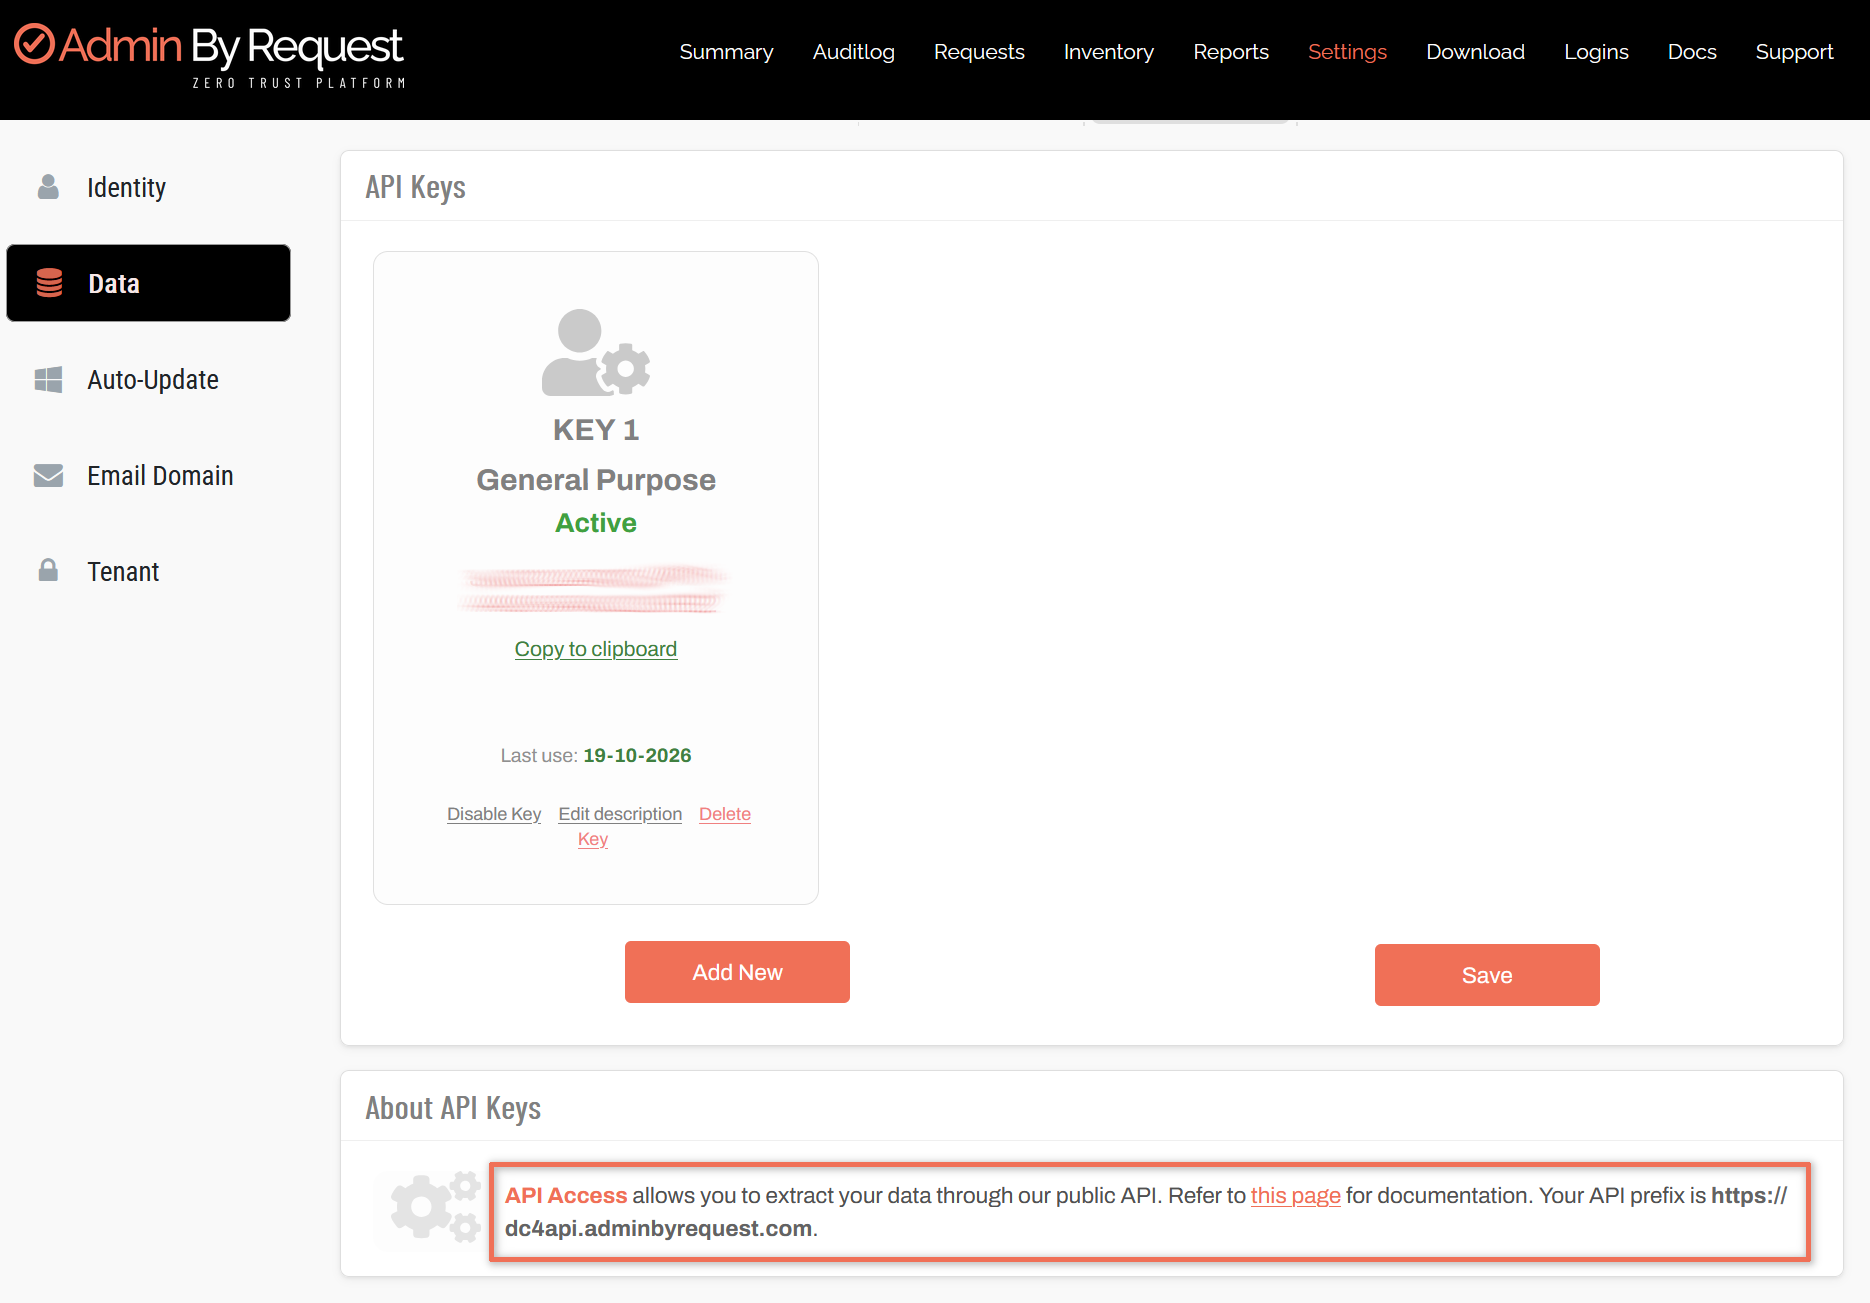
The data center API URL (also known as the API prefix) will be one of the following:
-
https://dc1api.adminbyrequest.com (Europe - Netherlands)
-
https://dc2api.adminbyrequest.com (US East)
-
https://dc3api.adminbyrequest.com (UK)
-
https://dc4api.adminbyrequest.com (Europe - Germany)
-
https://dc5api.adminbyrequest.com (US West)
-
https://dc6api.adminbyrequest.com (Asia)
Make a note of your prefix - you will need it when you access the API.
Integrating with an External System
If you need to pass on the requests queue to an external system and approve or deny requests from there, Admin By Request has native apps for various systems, so you might want to check whether one is available for your system. If not, you can always use the API directly to access your data.
The following APIs are available from Admin By Request:
-
Inventory API (including PIN codes)
Using the API
Prerequisites
To follow the tasks described below, you will need the following:
-
A REST client of your choice. The examples shown below were created with Postman.
-
The location of your data center
Also note that all requests must be authenticated using your API key. Select one of the available methods for passing the key.
API Tasks
The following tasks are covered in this section:
 Create an API key
-
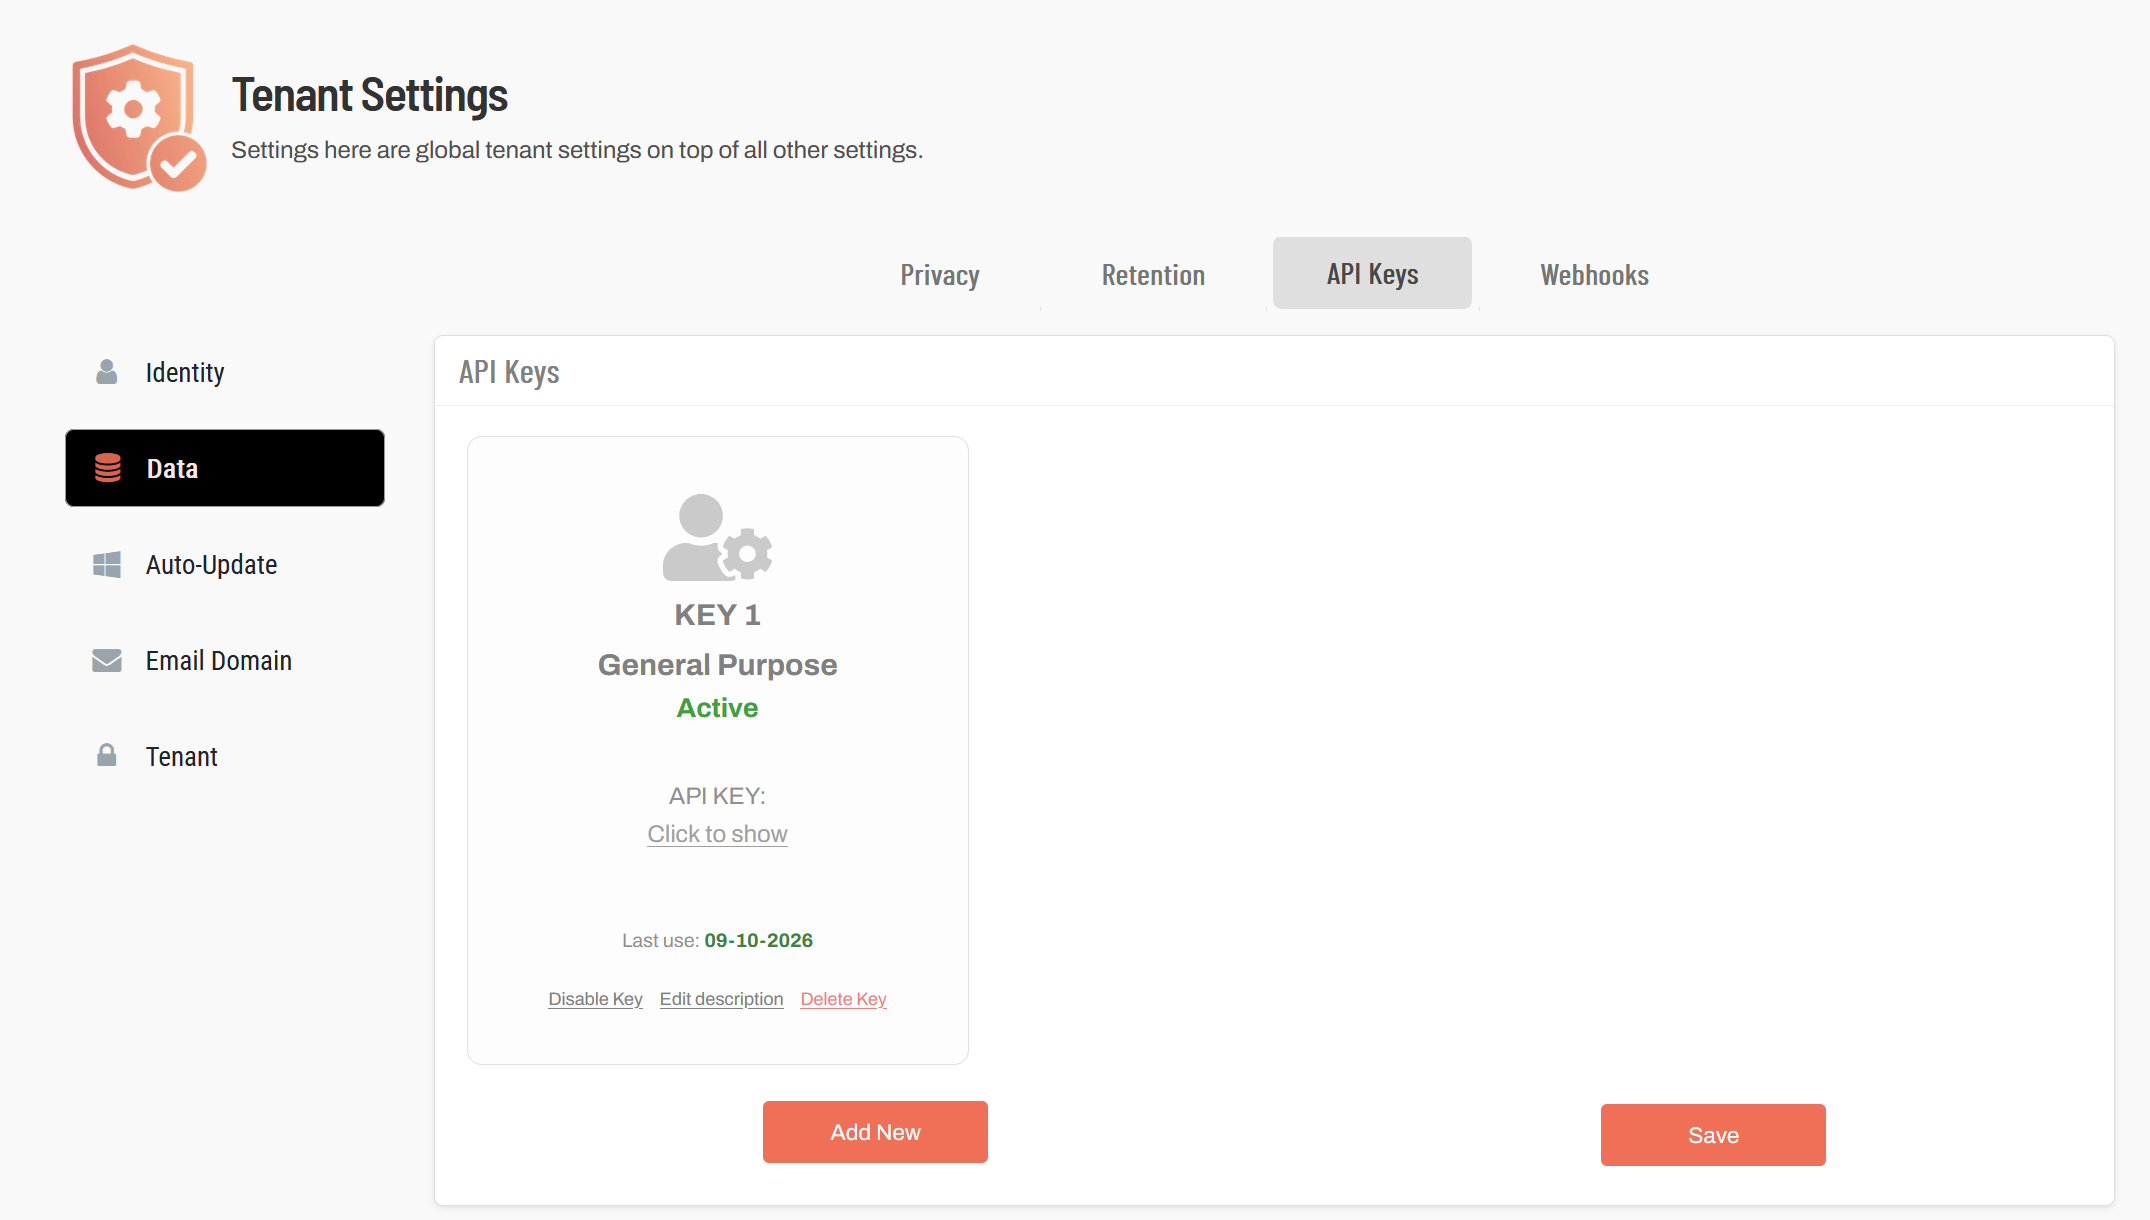
In the main portal navigation, click Settings -> Tenant Settings.
-
In the navigation pane, click Data and switch to the API Keys tab.
-
Click Add New to add a new API key.
-
By default, newly created keys are named "General Purpose", but you may want to change the name to something more descriptive. Click Edit description to rename your key.
-
Click Save to save the key. It immediately becomes active.
The API Key has a number of security features:
-
Default Security Settings - By default, your tenant's data is not publicly accessible. This means that without an API key, external systems or users cannot retrieve data.
-
Queries and Updates - Once generated, the API key must be included in API requests (usually in headers or query parameters). This allows the API to verify your identity and access permissions.
-
Brute Force Protection - The API has security mechanisms in place to prevent excessive or unauthorized requests. Brute force protection helps prevent attackers from trying multiple API keys or requests rapidly. This protects your data from abuse and ensures the API remains available for legitimate users.
-
Safe to Open - Since the API has built-in security measures (such as rate limiting and authentication), it is considered safe to expose it to external use. You should still follow best practices like:
-
Keeping your API key confidential.
-
Using secure storage for credentials.
-
Enforcing least privilege access (restricting API access to only necessary data).
-
Get requests
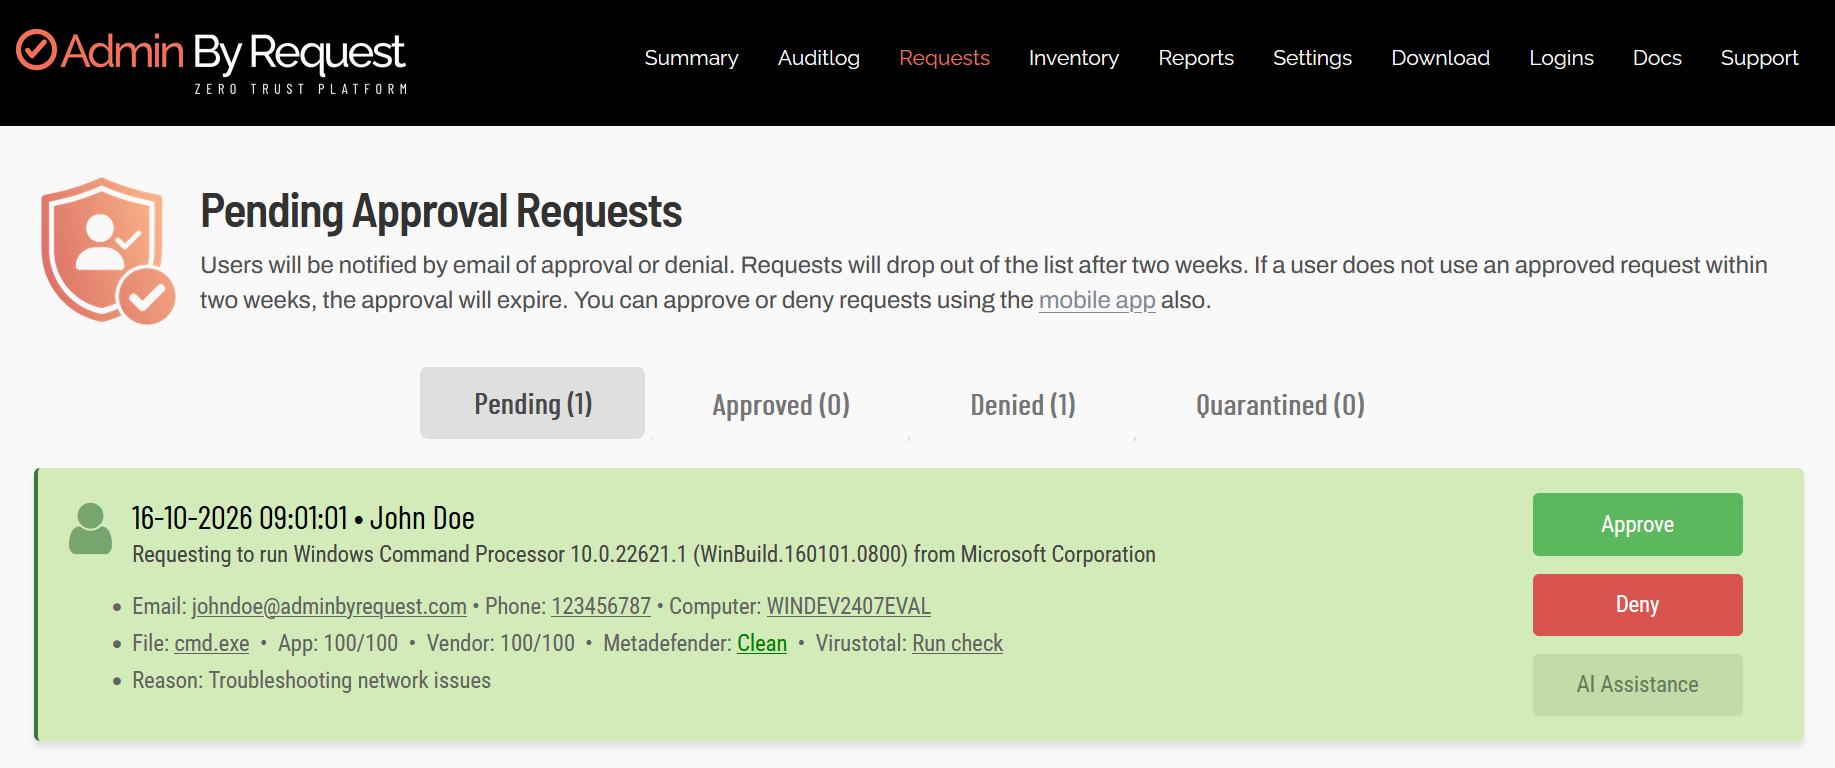
Requests will appear in the “Requests” top menu in the portal as shown here:
To get a list of pending requests for approval, we need to call the Requests API, indicating that we are only interested in “Pending” states:
-
Open your REST client.
-
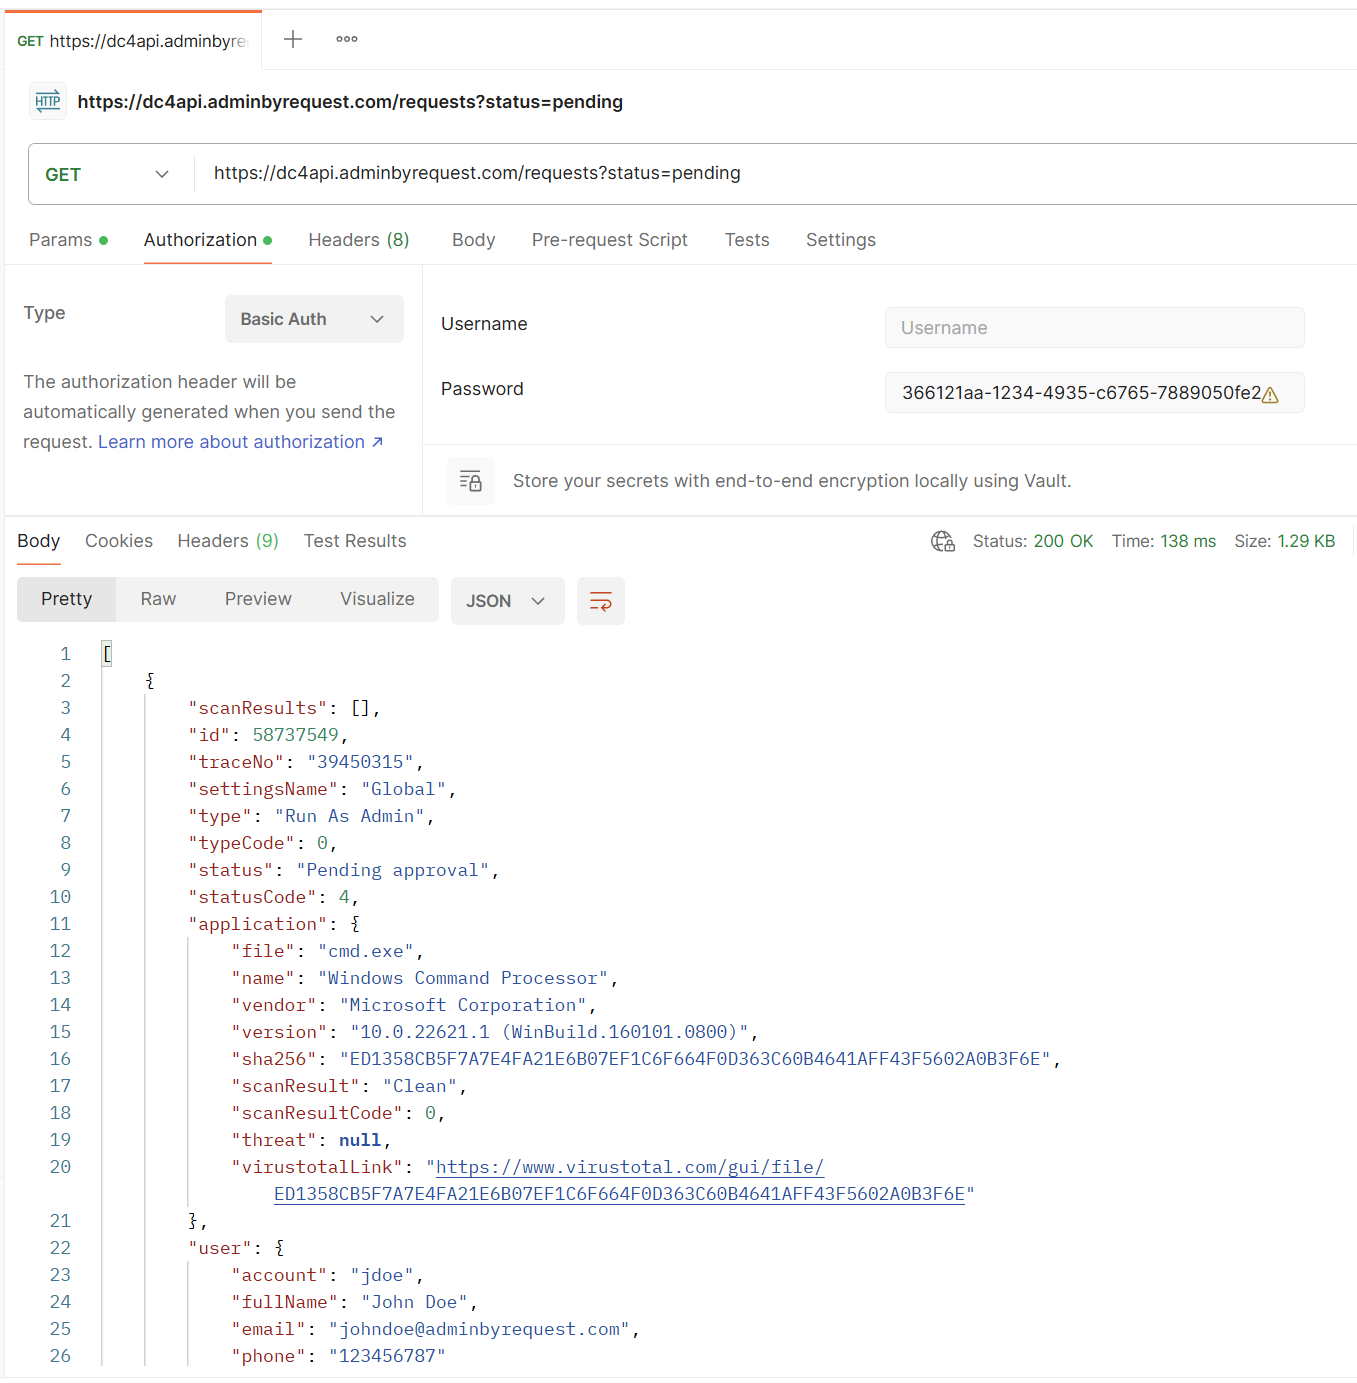
Select the GET method and enter the URL with the appropriate API prefix. Assuming that our tenant uses the European data center in Germany, the URL would be:
https://dc4api.adminbyrequest.com/requests?status=pending -
Click Send. The response is a JSON object with the same information that is shown in the portal:
The next step is to approve a request.
Approve a request
Notice that each request has an id field. This field is used to identify and access a specific request via the Requests API.
-
Open your REST client.
-
Select the PUT method and enter the URL with the ID of the request and the appropriate API prefix, for example:
https://dc4api.adminbyrequest.com/requests/58737549 -
Click Send.
The request is approved and the user is notified accordingly
Retrieve requests incrementally
So how do you only get new requests? The Requests API provides the startid filter which you can use to retrieve requests starting at the specified ID.
-
Open your REST client.
-
Select the GET method and enter the URL with the appropriate API prefix and the
startidparameter set to the first request ID you want to retrieve, for example:https://dc4api.adminbyrequest.com/requests?startid=58737550 -
Click Send.
The response is a JSON object which contains all requests with an ID equal to or higher than 58737550.
Questions?
Feel free to ask any questions you might have. If you do not have a direct contact at Admin By Request, contact us with any questions you might have, or submit a support ticket.