Linux Settings
Authorization
 Authorization tab
Portal menu: EPM > Settings > Linux Settings > Authorization > AUTHORIZATION
Run As Admin
Run As Admin (also known as Application Elevation) elevates privileges for only the file or application selected.
It is invoked when a user runs a sudo command or double-clicks an executable file.
|
Setting |
Type |
Description |
|---|---|---|
|
Allow Run As Admin |
Toggle Default: On |
On - Allows users to elevate privileges for a selected file. Enables Require approval and Require reason. Disables Block Run As Admin. Off - Denies users the ability to elevate privileges for a selected file. Enables Block Run As Admin, which is how users with admin credentials can still elevate privileges. |
|
Block Run As Admin (enabled only if Allow Run As Admin is Off) |
Toggle Default: Off |
On - Denies users the ability to execute Run As Admin even if administrator credentials are available (i.e. no Off - Allows users with administrator credentials to execute Run As Admin (i.e. |
|
Require approval |
Toggle Default: Off |
On - Sends a request to the IT team, which must be approved before elevation is granted. Makes Require reason mandatory (i.e. must be On). Off - Allows the user to elevate file privileges (and thus perform the action) as soon as the action is selected. For example, selecting "Run as administrator" to execute a program occurs immediately, without requiring approval. Makes Require reason optional (i.e. can be either On or Off). |
|
Require reason |
Toggle Default: Off |
On - Extends the Off - No reason is required by the user, but details of the actions performed are stored in the Auditlog. |
|
Save |
Button |
Saves customization and changes to any fields. Note that reloading any defaults does not take effect until Save is clicked. |
Admin Session
Admin Session (also known as User Elevation) elevates the current user's privileges across the endpoint for the duration of the session.
Invoked when the user clicks the
|
Setting |
Type |
Description |
|---|---|---|
|
Allow Admin Sessions |
Toggle Default: On |
On - Allows users to effectively become a local administrator for the number of minutes specified in Access time (minutes). Enables Require approval, Require reason and Access time (minutes). Off - Denies users the ability to become a local administrator. Hides all other options under Admin Session. |
|
Require approval |
Toggle Default: Off |
On - Sends a request to the IT team, which must be approved before the request is granted. Makes Require reason mandatory (i.e. must be On). Off - Allows the user to become a local administrator as soon as the request is made. Makes Require reason optional (i.e. can be either On or Off). |
|
Require reason |
Toggle Default: Off |
On - Extends the Off - No further information is required by the user, but user and computer details are stored in the Auditlog. |
|
Access time (minutes) |
Integer Default: 15 (minutes) |
The maximum duration in minutes an Admin Session may last. This time must be sufficient for the user to install software or perform any other tasks that require elevation. |
|
Save |
Button |
Saves customization and changes to any fields. Note that reloading any defaults does not take effect until Save is clicked. |
Notification tab
Portal menu: EPM > Settings > Linux Settings > Authorization > NOTIFICATION
Email notification to administrators is available when Require approval is checked under Authorization.
Notifications can be sent for the following scenarios:
-
Each new request for approval (Run As Admin) or admin session access (Admin Session)
-
When malware is detected (Workstation Settings > [OS] Settings > Malware)
-
When unattended remote access is requested (Unattended Access)
-
When either an end user or portal admin initiates a Remote Support session.
As with other request types, new requests for approval always appear under Requests > Pending in the Portal top menu. This is the case for both Endpoint Privilege Management and Secure Remote Access.
The Notification setting enables and configures additional email notification for new requests. If multiple email addresses are specified, they must be on separate lines.
Phone notification is separate and happens automatically via push notifications to phones with the mobile app installed.
|
Setting |
Type |
Description |
|---|---|---|
|
Send email notifications |
Toggle Default: Off |
On - Additional email notifications are sent to the email addresses listed in Email addresses. Off - Email notifications are not sent. |
|
Email addresses |
Text |
Standard email address format. Use a new line for each address. |
|
Save |
Button |
Saves customization and changes to any fields. Note that reloading any defaults does not take effect until Save is clicked. |
Azure AD tab
The Azure AD Connector has been renamed to ENTRA ID / AZURE AD tab and moved to Settings > Tenant Settings > Groups > ENTRA ID / AZURE AD in the Portal.
Endpoint
Look & Feel tab
Portal menu: EPM > Settings > Linux Settings > Endpoint > LOOK & FEEL
Email and phone settings control the behavior of the fields in the request form.
Skin determines if user interfaces are light or dark. Active skin choice can be used as an easy way to determine if sub-settings are in effect.
|
Setting |
Type |
Description |
|---|---|---|
|
Skin |
Selection Default: Follow Operating System |
Auto-detect - The skin (light or dark) depends on what is currently being used by the operating system. Light - Uses a light skin for Admin By Request dialog boxes. Dark - Uses a dark skin for Admin By Request dialog boxes. Follow Operating System - The skin (light or dark) depends on what is currently being used by the operating system. |
|
Email field |
Selection Default: Mandatory |
Mandatory - Field appears in dialog boxes and must be filled-in. Optional - Field appears in dialog boxes, but does not have to be filled-in. Hide - Field does not appear in dialog boxes. |
|
Phone no field |
Selection Default: Mandatory |
Mandatory - Field appears in dialog boxes and must be filled-in. Optional - Field appears in dialog boxes, but does not have to be filled-in. Hide - Field does not appear in dialog boxes. |
|
Save |
Button |
Saves customization and changes to any fields. Note that reloading any defaults does not take effect until Save is clicked. |
Instructions tab
Portal menu: EPM > Settings > Linux Settings > Endpoint > INSTRUCTIONS
Run As Admin instructions
Instructions for Run As Admin are shown after the user invokes "Run As Administrator" and after the optional reason screen.
Instructions can be used as a Code of Conduct to inform the user of the consequences of abuse, what is logged or it could be used to show contact information for your help desk in case of problems. URLs are automatically detected and will appear as clickable links.
|
Setting |
Type |
Description |
|---|---|---|
|
Show instructions before start |
Toggle Default: Off |
On - Instructions are shown to the user per the period selected below via the drop-down. User clicks OK to close the instructions window. Off - Instructions are not shown. |
|
<Three fields with no labels> |
Text Text (multiline) Selection
|
A title for the instructions window. The instructions displayed to the user. A frequency indicating when instructions are to be displayed:
|
|
Save |
Button |
Saves customization and changes to any fields. Note that reloading any defaults does not take effect until Save is clicked. |
Admin Session instructions
Instructions for Admin Session are shown after the user invokes "Request Administrator Access" and after the optional reason screen.
Instructions can be used as a Code of Conduct to inform the user of the consequences of abuse, what is logged or could be used to show contact information for your help desk in case of problems. URLs are automatically detected and will appear as clickable links.
|
Setting |
Type |
Description |
|---|---|---|
|
Show instructions before start |
Toggle Default: Off |
On - Instructions are shown to the user per the period selected below via the drop-down selection field. User clicks OK to close the instructions window. Off - Instructions are not shown. |
|
<Three fields with no labels> |
Text Text (multiline) Selection
|
A title for the instructions window. The instructions displayed to the user. A frequency indicating when instructions are to be displayed:
|
|
Show "Run As" graphics under text |
Toggle Default: Off |
On - Includes an image with the illustrating how to select a program to "Run as administrator". Off - No image is shown with instructions. |
|
Save |
Button |
Saves customization and changes to any fields. Note that reloading any defaults does not take effect until Save is clicked. |
Lockdown
Admin Rights tab
Portal menu: EPM > Settings > Linux Settings > Lockdown > ADMIN RIGHTS
Revoke admin rights at logon means that all user accounts will be downgraded from an Admin role to a User role, unless the account appears in the Excluded accounts list.
Excluded accounts are not removed at logon.
|
Setting |
Type |
Description |
|---|---|---|
|
Revoke admin rights |
Toggle Default: Off |
On - Admin privileges are removed for all users except those appearing in the Excluded accounts list.. Off - Admin privileges are not removed for users configured locally as administrators. |
|
Excluded accounts |
Text |
The account name(s) to retain local admin privileges. Multiple accounts must be specified on separate lines. Domain accounts must be prefixed with domain and backslash. |
|
Save |
Button |
Saves customization and changes to any fields. Note that reloading any defaults does not take effect until Save is clicked. |
Sudo tab
Portal menu: EPM > Settings > Linux Settings > Lockdown > SUDO
Allowing sudo is strongly discouraged, because it gives the user full control over the endpoint and therefore allows the user to tamper with or completely remove any endpoint software.
Excluded accounts are not removed at logon.
|
Setting |
Type |
Description |
|---|---|---|
|
Allow sudo terminal commands |
Toggle Default: Off |
On - The logged-in user is in the sudoers file and can run sudo commands. Off - The user cannot run sudo commands, even though they are in the sudoers file. |
|
Allow sudo for non-sudoers |
Toggle Default: Off |
On - The logged-in user is not in the sudoers file, but can run sudo commands. Off - The user cannot run sudo commands. |
|
Allow sudo interactive sessions |
Toggle Default: Off |
On -The logged-in user can start a sudo interactive session. Off - The user cannot start a sudo interactive session. |
|
Save |
Button |
Saves customization and changes to any fields. Note that reloading any defaults does not take effect until Save is clicked. |
Root tab
Portal menu: EPM > Settings > Linux Settings > Lockdown > ROOT
Allow root login controls whether or not it is possible to log in as root on Linux devices.
Allow root password change controls whether or not it is possible to change the password of the root account.
|
Setting |
Type |
Description |
|---|---|---|
|
Allow root login |
Toggle Default: Off |
On - This endpoint allows users to login as root, or the logged-in user can su (switch user) to root. Off - The endpoint does not allow root logins. |
|
Allow root password change |
Toggle Default: Off |
On - This endpoint allows users to login as root, and also allows the logged-in user to change the root password. Off - The endpoint allows root logins, but the root password cannot be changed. |
|
Save |
Button |
Saves customization and changes to any fields. Note that reloading any defaults does not take effect until Save is clicked. |
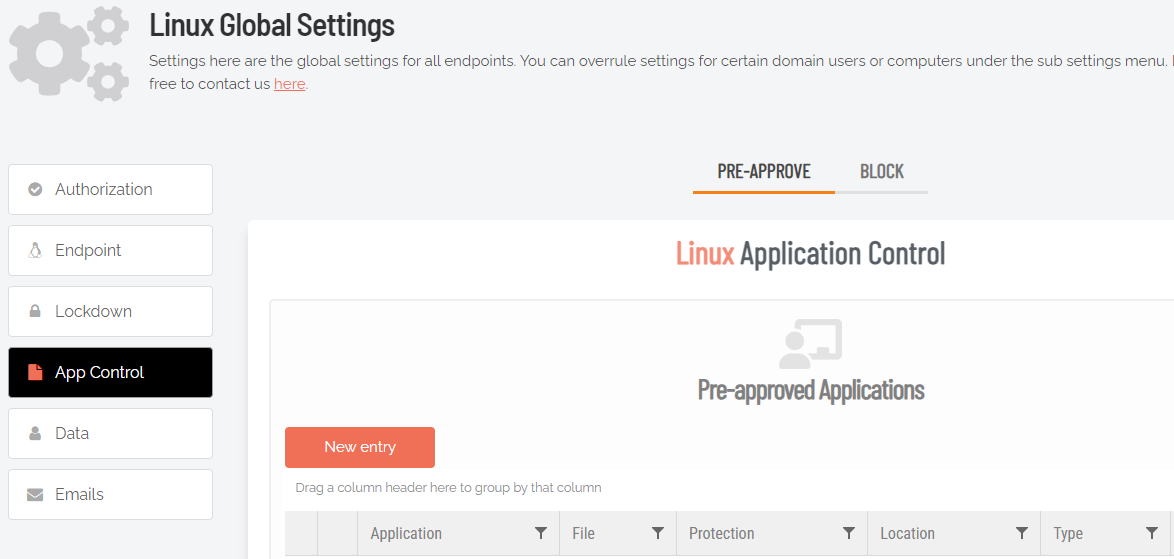
App Control
Pre-Approve tab
Portal menu: EPM > Settings > Linux Settings > App Control > PRE-APPROVE
Pre-approved applications are
When an application is on the pre-aproval list, the difference is:
-
The application is auto-approved, so the approval flow is bypassed
-
A reason is not required, as the application is known to be good
-
You have the option to not log to the Auditlog (e.g. for trivial data)
-
If Run As Admin is disabled, a pre-approved application will still run
New entry
Click button New entry to create a new pre-approved application.
|
Setting |
Type |
Description |
|---|---|---|
|
Log to auditlog (hidden if User confirmation is Off) |
Toggle Default: Off |
On - .Relevant details about the application are logged. Off - No logging is performed for this application. |
|
User confirmation |
Toggle Default: On |
On - .The user must confirm elevation on the endpoint before the application can be run. This is the typical Off - The user does not need to confirm elevation on the endpoint before execution. Hides the Log to auditlog field. |
|
Type |
Selection Default: Run As Admin application pre-approval |
Run As Admin application pre-approval - Pre-approve this application for Run As Admin. Run As Admin location pre-approval (all files in folder tree) - Pre-approve all applications in the specified folder, including any sub-folders. Selecting this option enables the Directory field and hides all other fields. |
|
Protection |
Selection Default: File must be located in read-only directory |
Prevent users from bypassing pre-approval by file renaming. File must be located in read-only directory - The recommended method. File must be in a read-only location. You only need to know the name and location and you are not bound to a specific file version. File must match checksum - A checksum of a specific file version. If the file is updated, the checksum no longer matches and a new one must be collected. No protection (not recommended) - Not recommended for anything except testing. The file can be located anywhere and is a file renaming vulnerability, in case a user is aware of (or can guess) the file name. |
|
Directory (enabled when other selections are in effect):
|
Text |
A read-only location where the application to be added is stored. If the directory entered is not on the local machine, a UNC path can be used. The endpoint software will automatically translate drive letters to UNC path. |
|
Application name |
Text |
The name of the application. Mandatory, although used for convenience only to help identify applications in the list. |
|
File name |
Text |
Enter file name. Adding the app via the Auditlog will auto-populate this field. |
|
Save |
Button |
Saves customization and changes to any fields. Note that reloading any defaults does not take effect until Save is clicked. |
|
Cancel |
Button |
Cancels all work done in this setting and returns to the |
Enabled toggle
A global setting that indicates whether pre-approved applications are allowed at all (On) or not (Off).
Block tab
Portal menu: EPM > Settings > Linux Settings > App Control > BLOCK
Blocked applications are effectively the opposite of pre-approved applications - the feature allows you to point to a file name that will be blocked from executing rather than pre-approved for execution.
As with other activity, attempts to run blocked applications are recorded in the auditlog.
Please contact us using the Contact menu, if you have questions about blocking.
New entry
Click button New entry to create a new pre-approved application.
|
Setting |
Type |
Description |
|---|---|---|
|
Type |
Selection Default: Block file from running as administrator |
Block file from running as administrator - Block this application for Run As Admin. Block location from running as admin (all files in folder tree) - Block all applications in the specified folder, including any sub-folders. Selecting this option enables the Directory field and hides all fields except the optional fields. |
|
Condition |
Selection Default: No condition (block always) |
Condition applies only when a file is blocked. No condition (block always) - The default (and recommended) method. Block if located in directory - File must be located in this folder or directory to be blocked. Block if matching checksum) - A checksum of a specific file version. If the file is updated, the checksum no longer matches and a new one must be collected. |
|
Directory (enabled when other selections are in effect):
|
Text |
File must be located in this directory or a sub-folder. |
|
Application name |
Text |
The name of the application. Mandatory, although used for convenience only to help identify applications in the list. |
|
File name |
Text |
The file name of the app to be blocked. |
|
SHA256 checksum (enabled when other selections are in effect):
|
Text |
A checksum of a specific file version. If the file is updated, the checksum no longer matches and a new one must be collected. |
|
Blocking message (optional) |
Text (multiline) |
A message that appears as a rejection to the user, when the application is attempted to be executed. |
|
Internal comments (optional) |
Text (multiline) |
Optional comments that IT admins might wish to add about the blocked application. |
|
Save |
Button |
Saves customization and changes to any fields. Note that reloading any defaults does not take effect until Save is clicked. |
|
Cancel |
Button |
Cancels all work done in this setting and returns to the |
Enabled toggle
A global setting that indicates whether blocked applications are allowed at all (On) or not (Off).
Data
Privacy tab
Privacy has been moved to Settings > Tenant Settings > Privacy > PRIVACY in the Portal. Refer to Tenant Settings for more information.
Emails
Request Emails tab
Portal menu: EPM > Settings > Mac Settings > Emails > REQUEST EMAILS
Emails go out when Require approval is turned On under . You can create your own email templates here with information specific to your company, such as a Help Desk phone number and custom instructions.
|
Setting |
Type |
Description |
|---|---|---|
|
Email template |
Selection Default: Approved email |
Approved email - Loads a template that advises the user (i.e. requester) that the request for access has been approved. Denied email - Loads a template that advises the request for access has been denied without giving a reason. Denied with reason - Loads a template that advises the request for access has been denied and provides the reason. Administrator notify - Loads a template that advises the administrator (i.e. person who approves or denies) that a request for access is waiting for attention. |
|
Email sender |
Text Default: Admin By Request Team |
The email address to be used as the sender for the email. Can be used with custom domains. Use the Email address button to set up custom domains. Refer to Email Domain for more information on configuring an email address to be used as the sender for all user notifications. |
|
Email subject |
Text Default: Admin By Request |
Text that will appear in the subject line of emails. |
|
Get default |
Button |
Loads the default Email template for the option selected. NOTE:
|
|
Email address |
Button |
Switches to Email Domain in Tenant Settings in the portal, allowing you to use a custom domain as the sender. This allows sending email from domains other than @adminbyrequest.com. NOTE: This is optional, but you cannot add an email sender field of e.g. "tom@mydomain.com" unless you have first set up the custom email domain "mydomain.com" via the Email Domain setting in the portal (Settings > Tenant Settings > Email Domain). |
|
Template body |
Formatted text |
The body of the email to be sent. Includes three views:
Dynamic content tagsTags can be used in the body, which are place holders in curly braces. These are replaced with actual request values when emails are sent. The following tags are available:
|
|
Save |
Button |
Saves customization and changes to any fields. Note that reloading any defaults does not take effect until Save is clicked. |
Ticketing System tab
You can set up an email notification to your ticketing system and embed the tags below for dynamic content.
|
Setting |
Type |
Description |
|---|---|---|
|
Ticket system email |
Text |
The email address to which emails intended for your ticket system will be sent. For example: itsupport@mycompany.com |
|
Email sender |
Text Default: Admin By Request Team |
The email address to be used as the sender for the email. Can be used with custom domains. Use the Email address button to set up custom domains. |
|
Email subject |
Text Default: Admin By Request |
Text that will appear in the subject line of emails. |
|
Get default |
Button |
Loads the default Email template for the option selected. NOTE:
|
|
Email address |
Button |
Switches to Email Domain in Tenant Settings in the portal, allowing you to use a custom domain as the sender. This allows sending email from domains other than @adminbyrequest.com. NOTE: This is optional, but you cannot add an email sender field of e.g. "tom@mydomain.com" unless you have first set up the custom email domain "mydomain.com" via the Email Domain setting in the portal (Settings > Tenant Settings > Email Domain). |
|
Template body |
Formatted text |
The body of the email to be sent to the ticketing system. Includes three views:
Dynamic content tagsTags can be used in the body, which are place holders in curly braces. These are replaced with actual request values when emails are sent. The following tags are available:
Ticket IDYou can find a ticket by its ticket ID using the Search button in the Auditlog. Voided textIf a line has one or more tags and all tags in the line are empty, the entire line is automatically removed. |
Run As Admin notification events
|
Setting |
Type |
Description |
|---|---|---|
|
User requests Run As Admin approval |
Toggle Default: On |
On - Sends a notification for User requests Run As Admin approval. Off - Does not send a notification. |
|
Admin approves Run As Admin request |
Toggle Default: Off |
On - Sends a notification for Admin approves Run As Admin request. Off - Does not send a notification. |
|
Admin denies Run As Admin request |
Toggle Default: Off |
On - Sends a notification for Admin denies Run As Admin request. Off - Does not send a notification. |
|
User starts Run As Admin |
Toggle Default: Off |
On - Sends a notification for User starts Run As Admin. Off - Does not send a notification. |
|
User finishes Run As Admin |
Toggle Default: Off |
On - Sends a notification for User finishes Run As Admin Off - Does not send a notification. |
Admin Session notification events
|
Setting |
Type |
Description |
|---|---|---|
|
User requests Admin Session approval |
Toggle Default: On |
On - Sends a notification for User requests Admin Session approval. Off - Does not send a notification. |
|
Admin approves Admin Session request |
Toggle Default: Off |
On - Sends a notification for Admin approves Admin Session request. Off - Does not send a notification. |
|
Admin denies Admin Session request |
Toggle Default: Off |
On - Sends a notification for Admin denies Admin Session request. Off - Does not send a notification. |
|
User starts Admin Session |
Toggle Default: Off |
On - Sends a notification for User starts Admin Session. Off - Does not send a notification. |
|
User finishes Admin Session |
Toggle Default: Off |
On - Sends a notification for User finishes Admin Session Off - Does not send a notification. |
|
Save |
Button |
Saves customization and changes to any fields. Note that reloading any defaults does not take effect until Save is clicked. |